Let’s Create Your First Project. Follow the step-by-step procedure to create your first project.
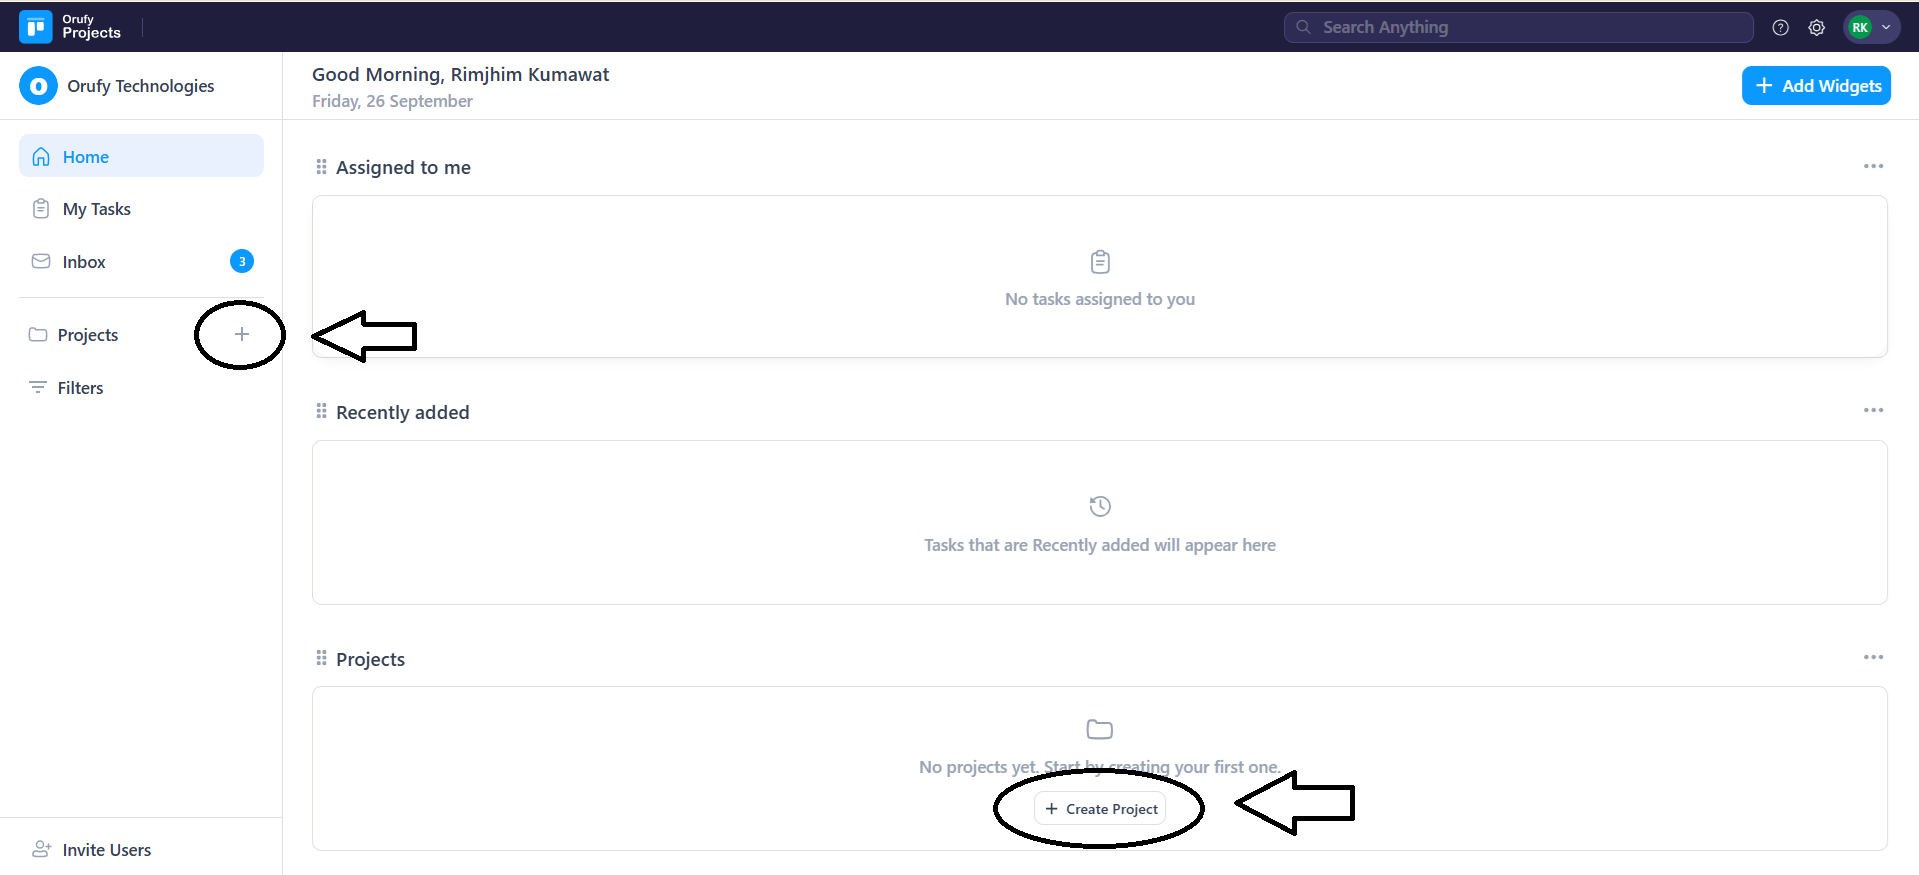
Step 1: Click on Create Project or + (beside project) to create your first project. A pop-up will appear to fill in the project details.
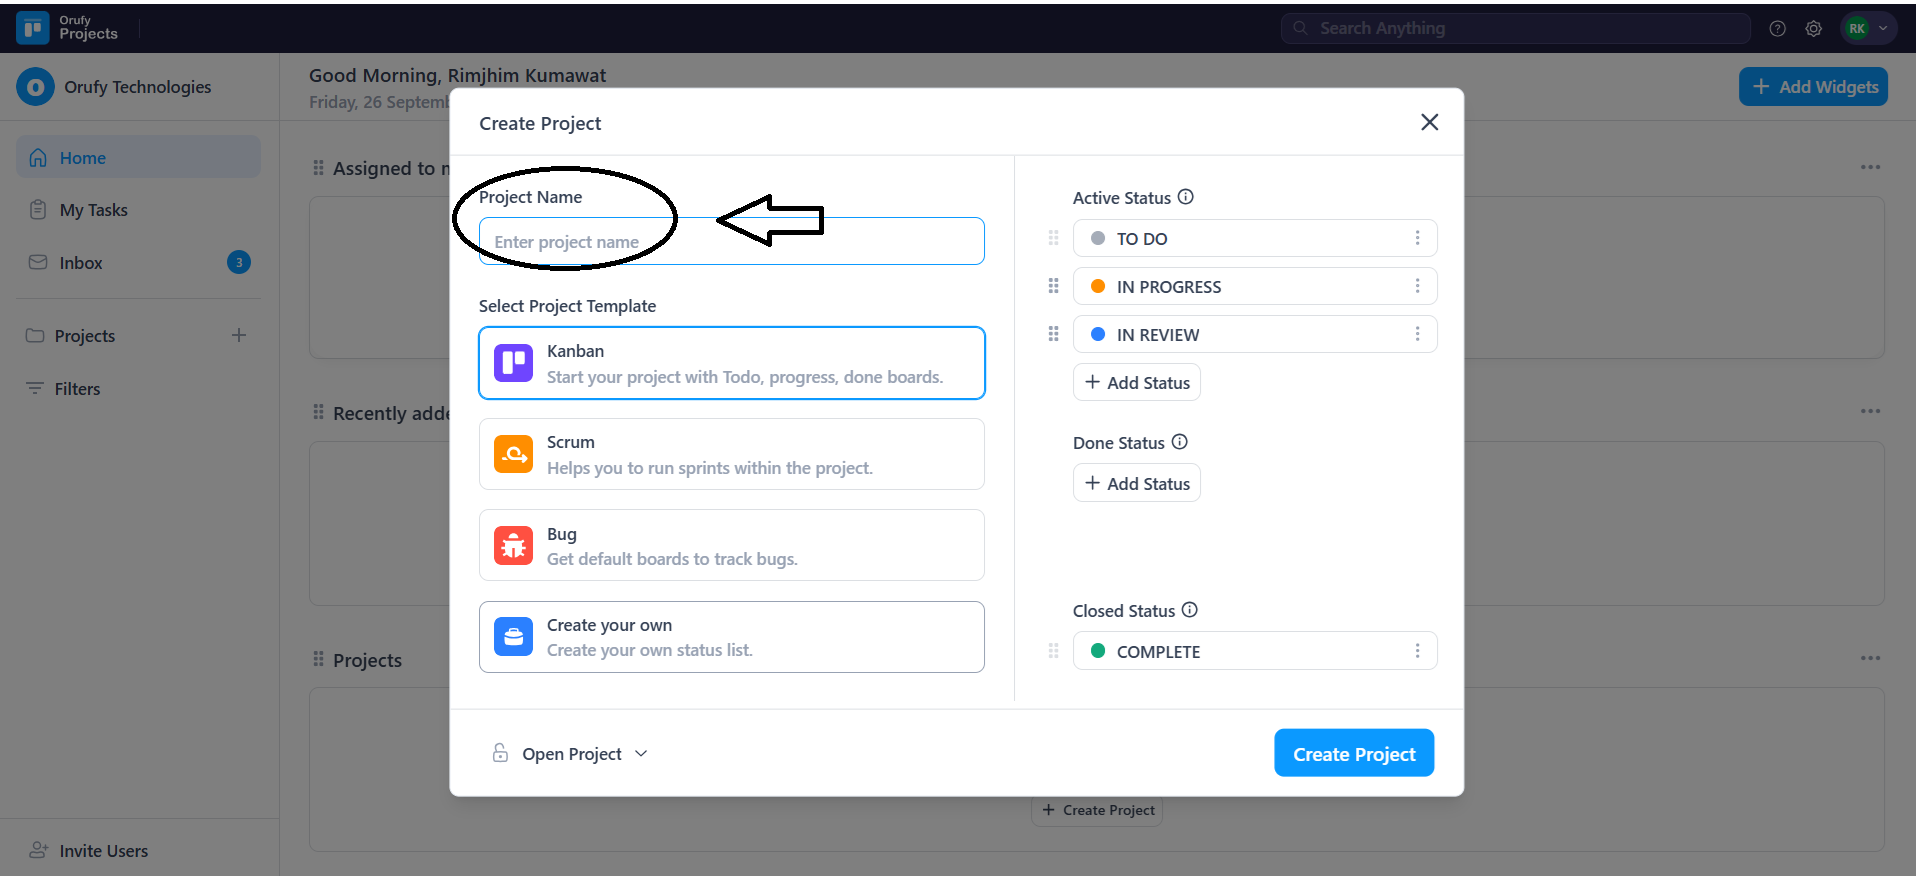
Step 2: Enter the name of the project.
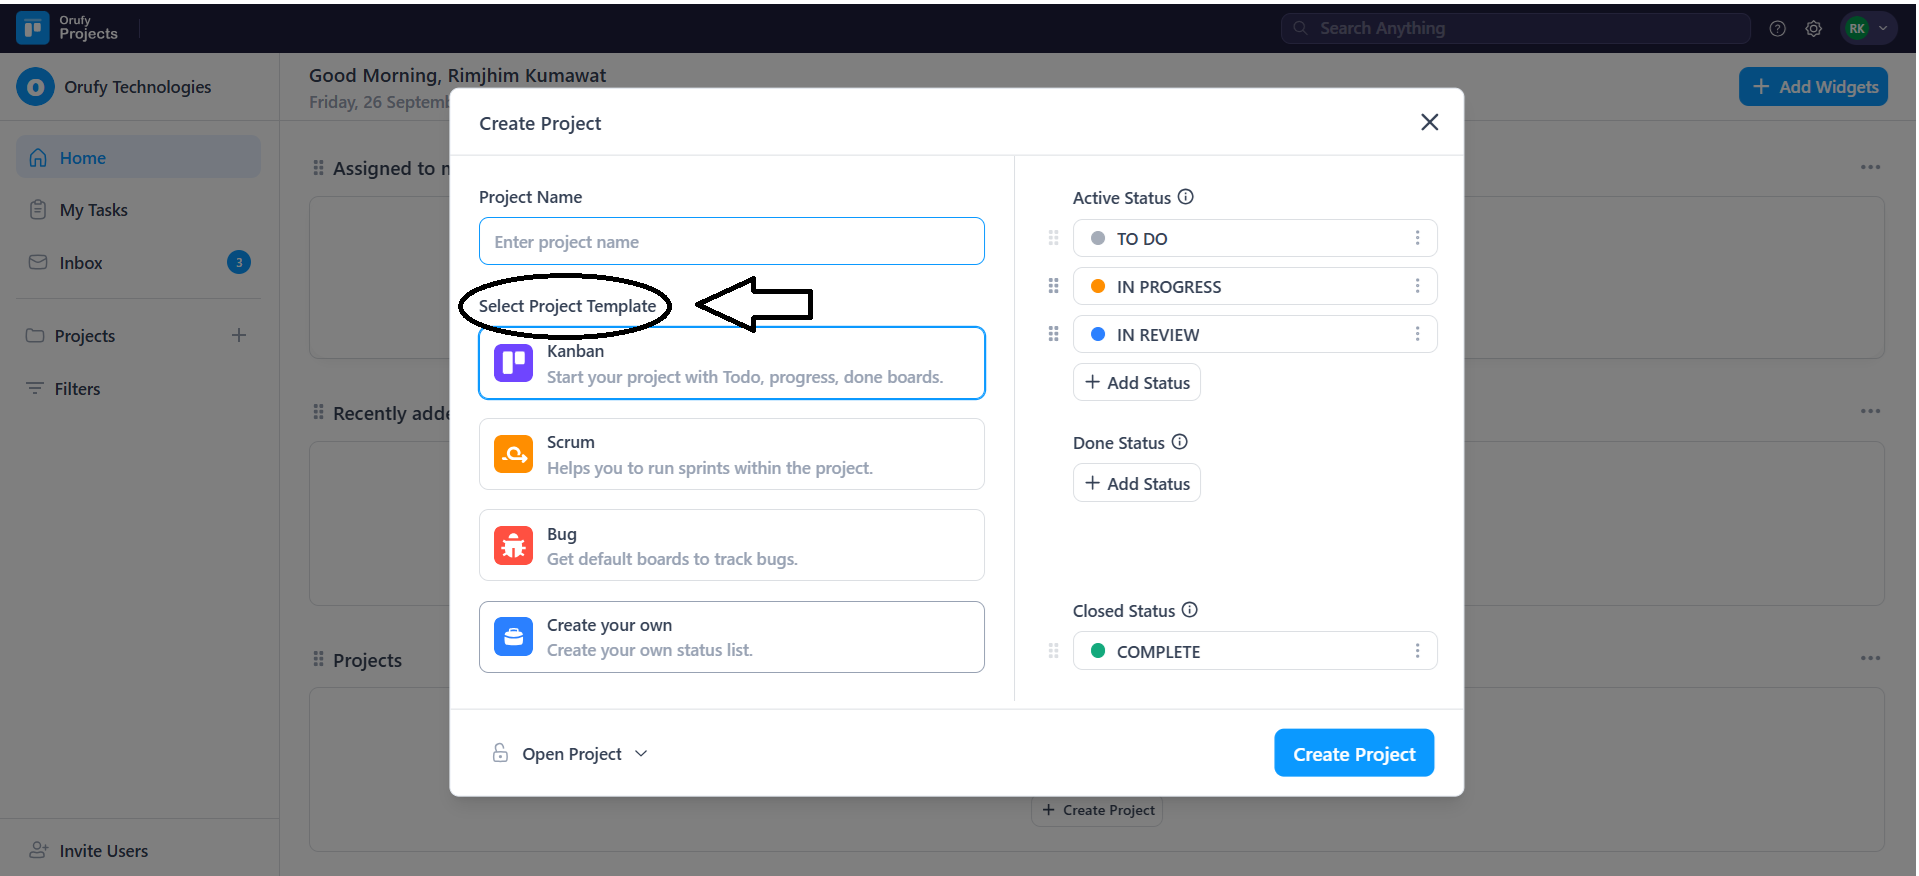
Step 3: Select the Project Template: It refers to what type of project you want to create and its functionality. For more information, Go.................
- Kanban
- Scrum
- Bug
- Create Your Own
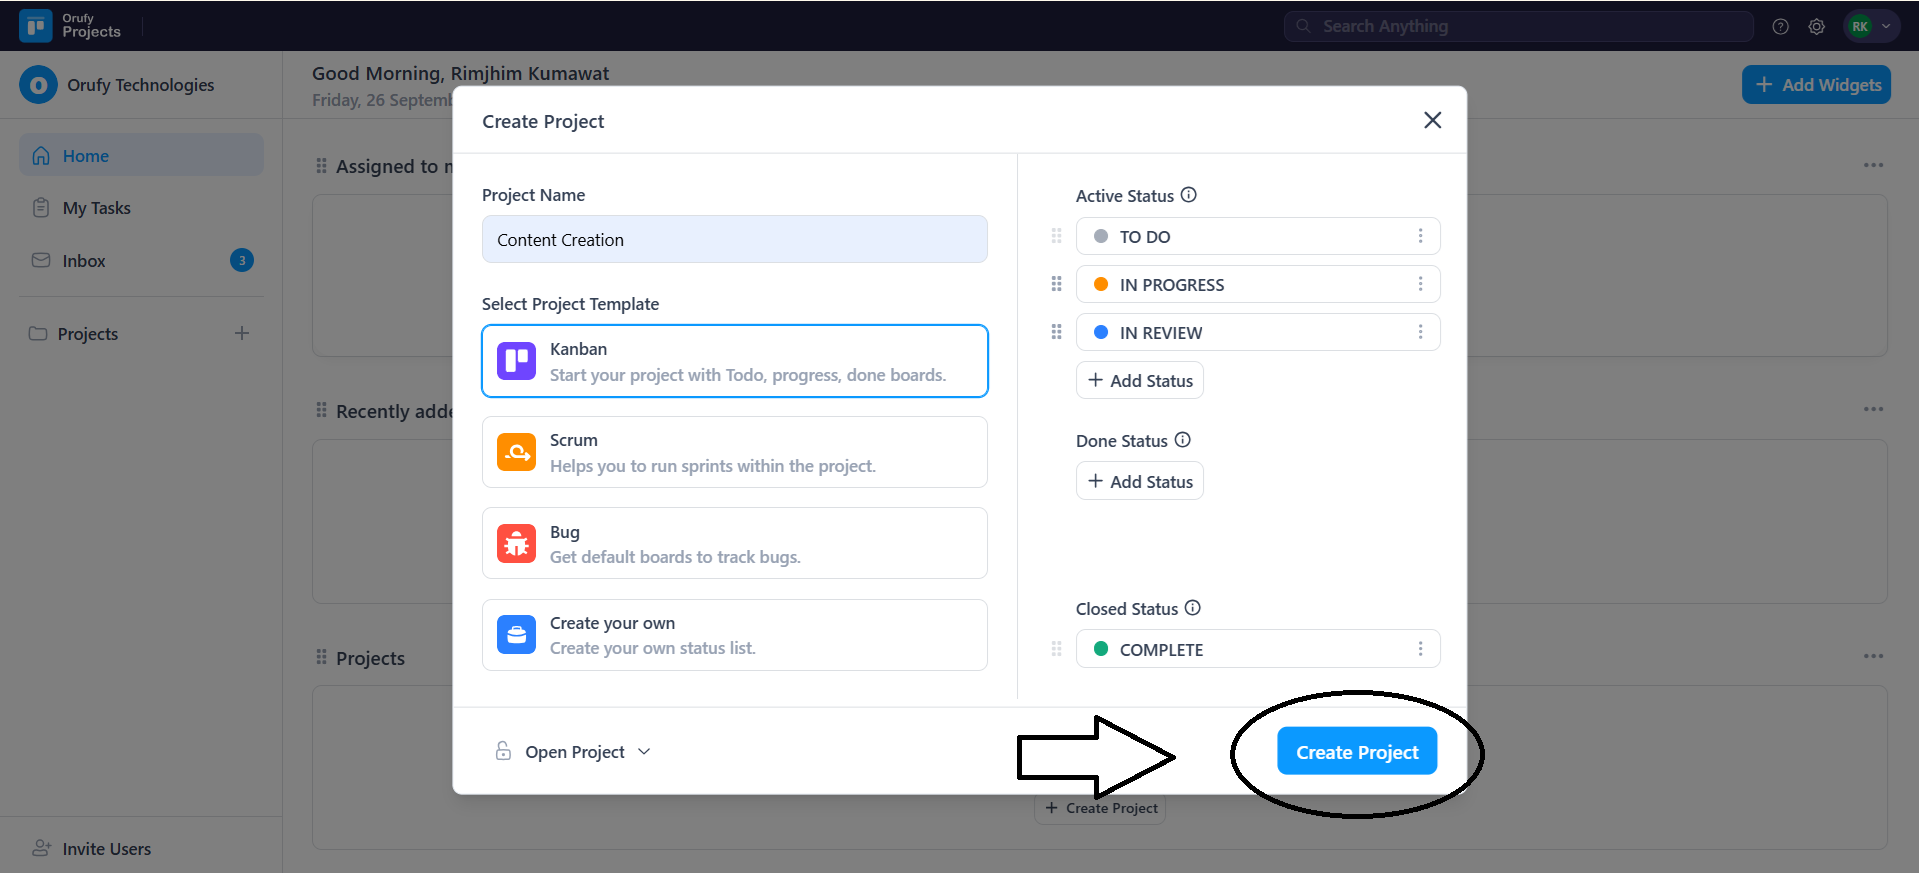
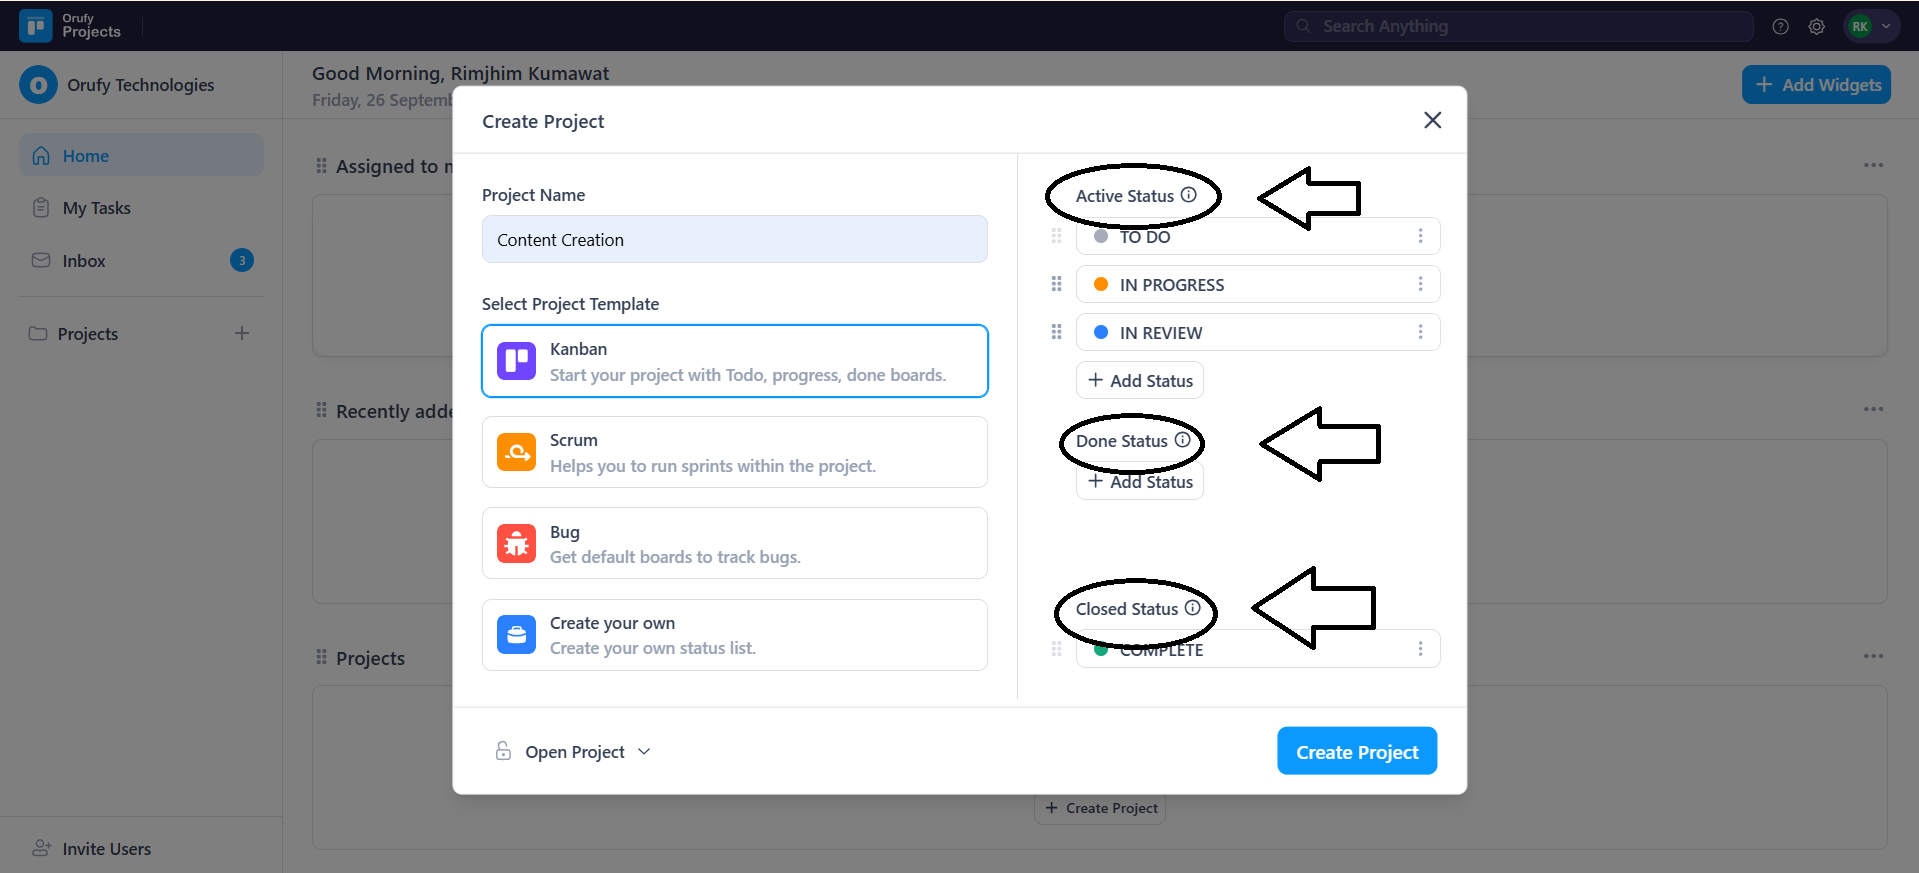
Step 4: Select and Add the different types of status a task can have in the project.
-
Active Status: This is used to display the current status of tasks that are in progress.
-
Done Status: This is the status of any task that is marked as done.
-
Closed Status: The last state of the tasks that is marked as closed, which are hidden by default after they are marked.
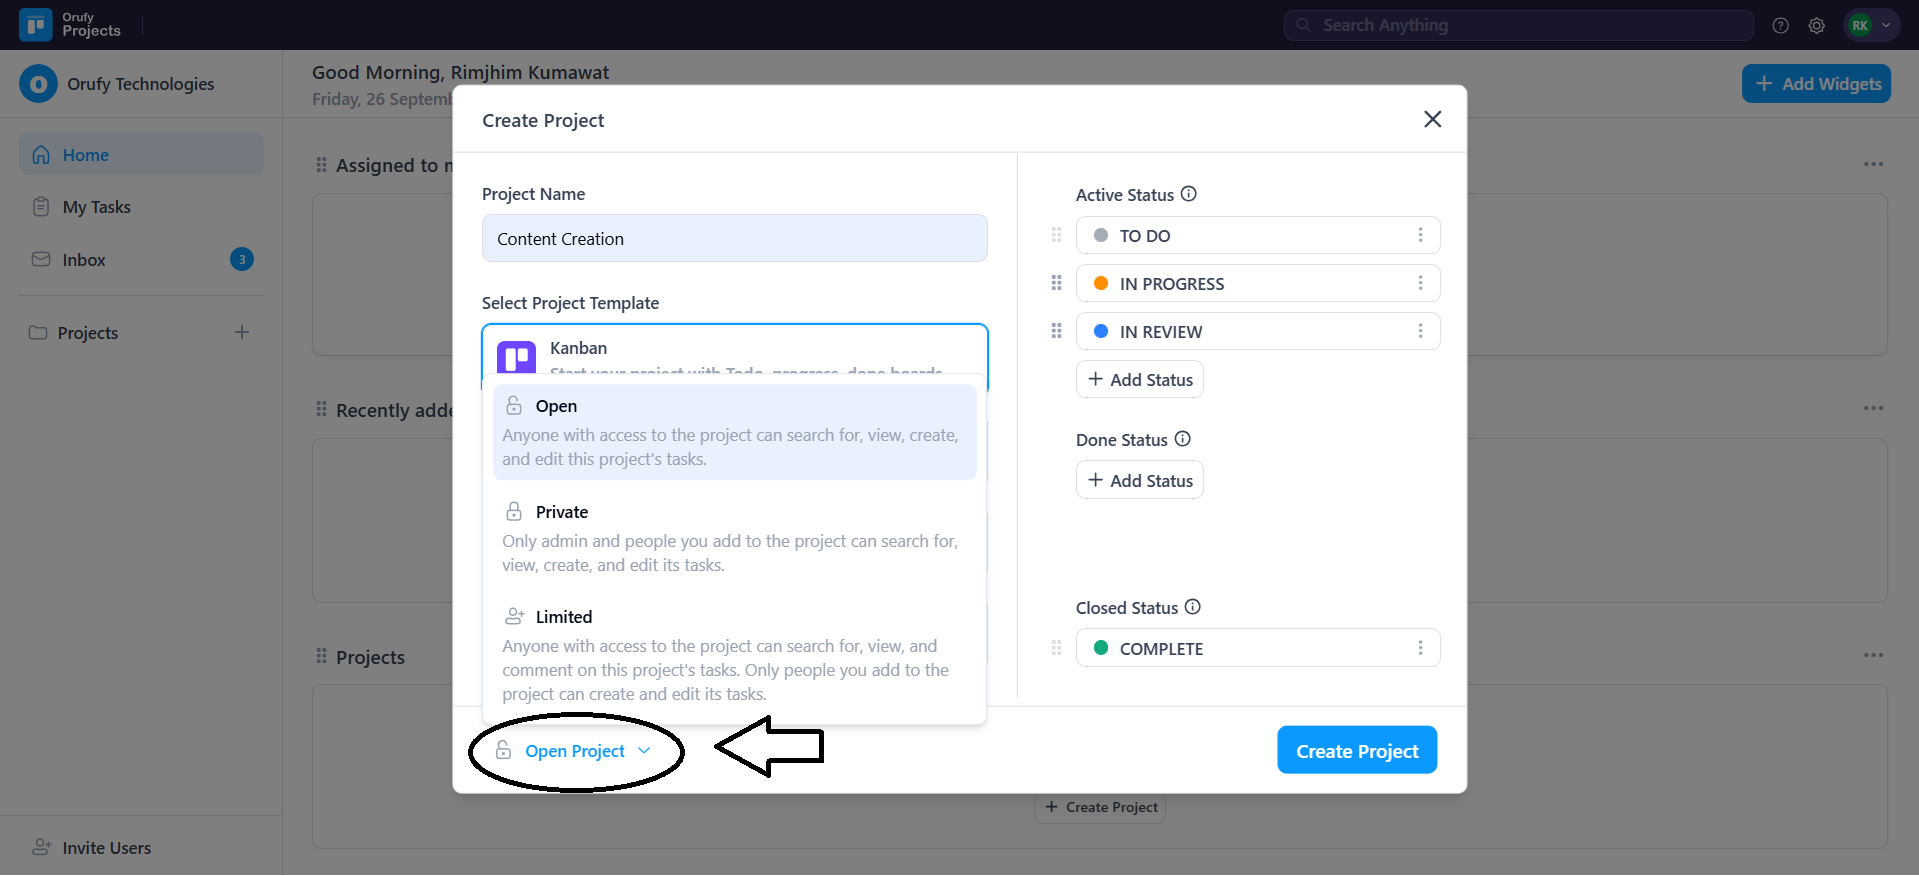
Step 5: Select the project’s access levels from the dropdown.
-
Open Project: The project can be accessed, visible, and edited by everyone.
-
Private Project: Only admins and project users can view, create, and edit tasks in the project.
-
Limited Project: The project users can only create and edit the tasks in the project, but everyone can view and add comments to the tasks.
Step 6: Click on Create Project to make your project visible in the Main Menu.