
Splash Screen with Animation

If you have selected the “Splash with Animation” option for your app. A drop-down will appear to fill in the information needed.
-
Click to add your custom animations in .json file format.
-
Or Click “Explore Animations” for a new animation option.
-
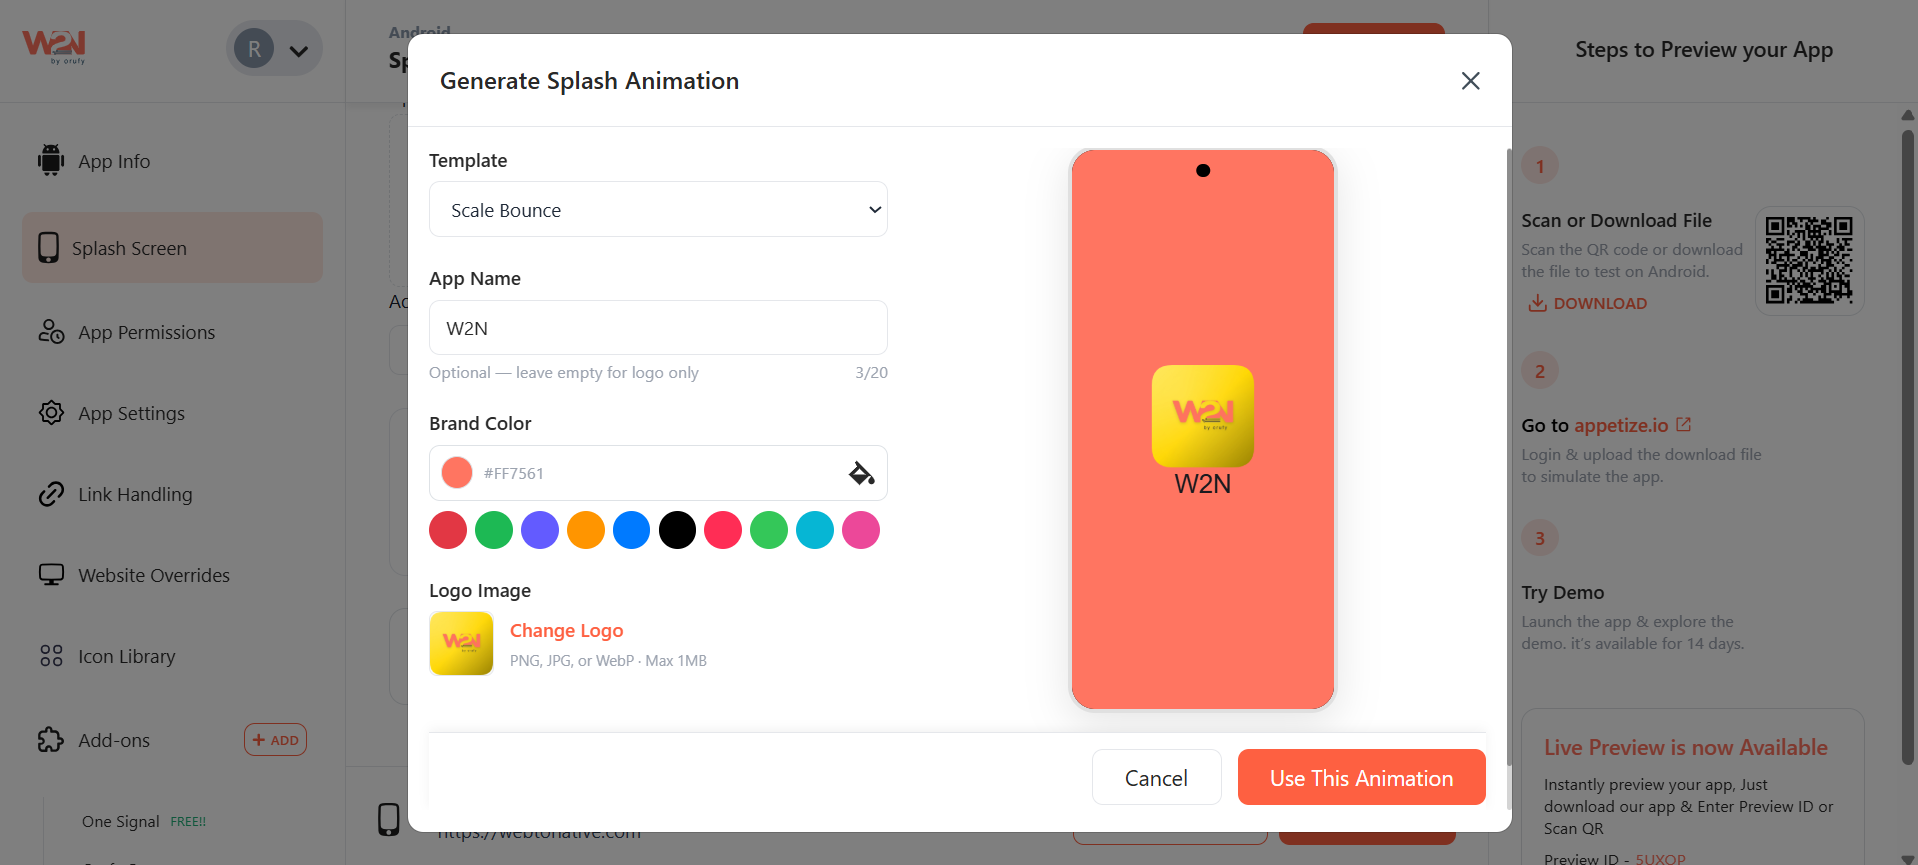
Click on "Generate Animation" to customize your splash screen.
A pop-up will appear to make an animation as per your preferences.
1. Template
Select the animation from the drop-down list of animation effects. The animation selected will define how your logo will animate on the screen.
2. App Name (Optional)
Enter the name of your app to show with the logo image. You can skip this field if you don’t want to add the name to the splash screen. You can enter up to 20 characters in this field.
3. Brand Color
You have to select the color reflecting your brand from the given colors.
4. Logo Image
The logo image is the same as the app icon. You can change the logo image using the “Change Logo” option.
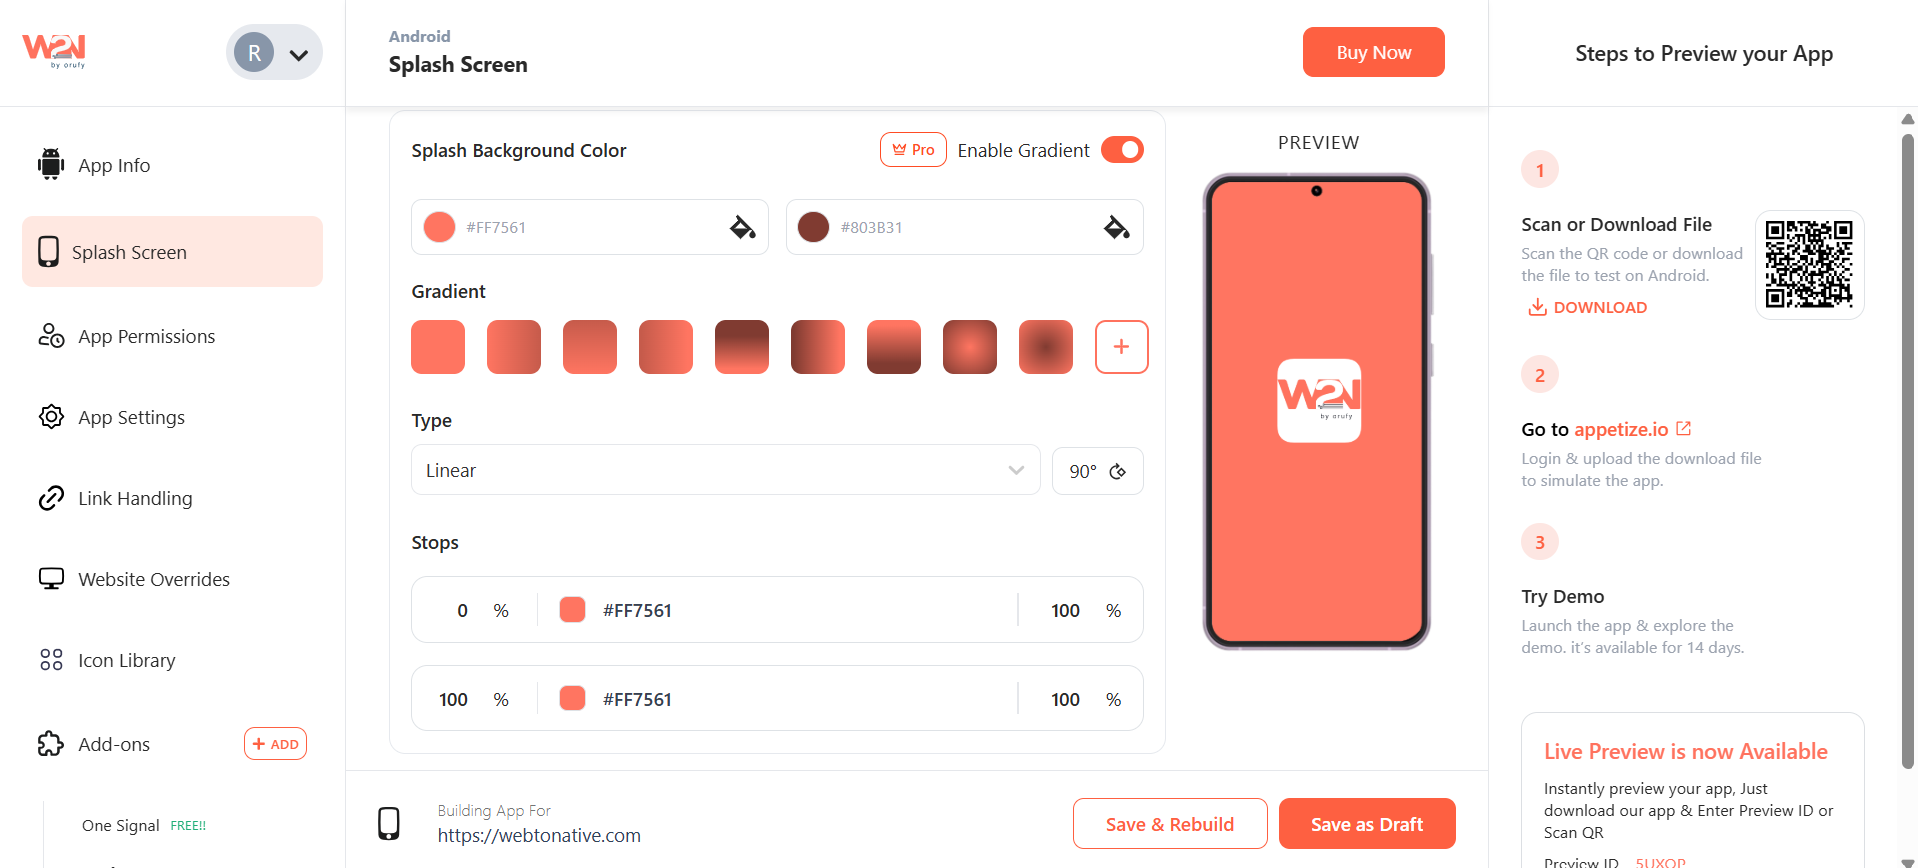
- Select the background color for splash screen.
When you turn on the Enable Gradient toggle, additional customizations will appear.
1. Color
-
You have to select the two colors to create a perfect gradient effect. Gradient
-
Select from the given different gradient effects. You can also create your own gradient effect by clicking on the “+” icon.
-
By clicking on the “+” icon, two options will appear.
- Type
-
You have to select the type of gradient effect. It includes Linear, Radial, and Diagonal.
-
You can also adjust the direction of the gradient effect by clicking on the “Degrees” option. It includes 45, 135, 225, and 315.
- Stops
You can control how the two colors will be distributed in the gradient. You can control them using the % of the colors and how much effect they will have on the screen.
- You have to define how often the splash screen will repeat itself and stay on the screen using the Playback Behavior.
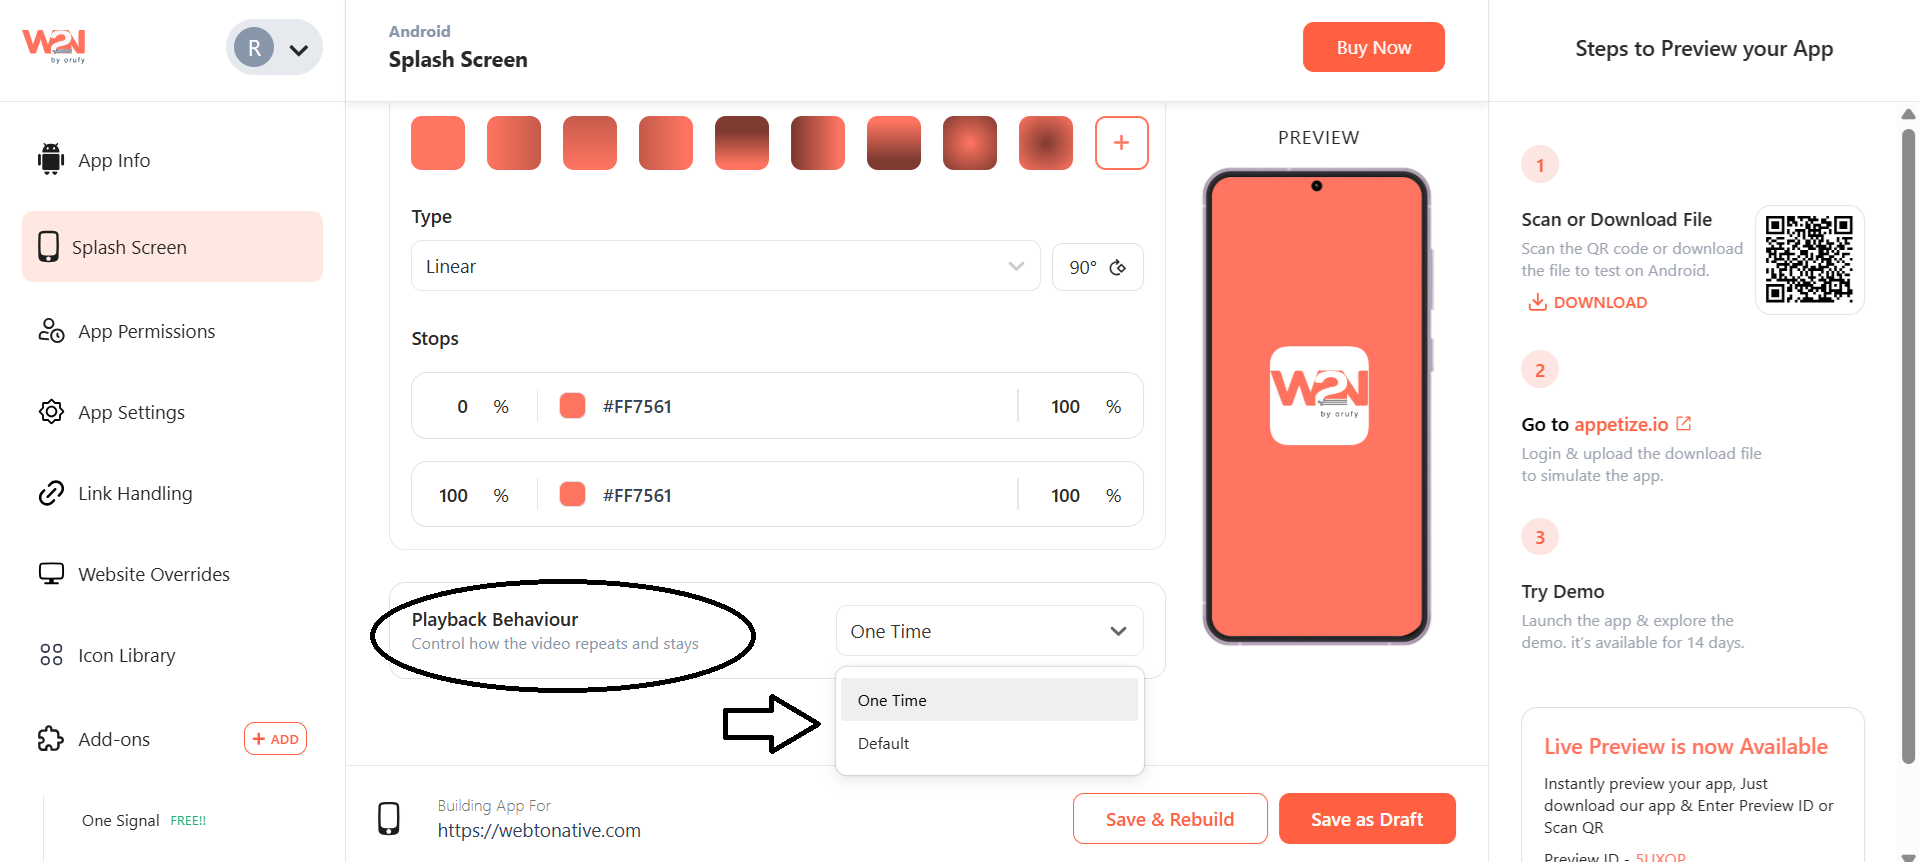
You have given two options:
1. One Time
If you have chosen this option, the splash screen will appear only one time.
2. Custom
If you have chosen this option, an advanced configuration settings block will appear for more customizations.
Click on Advanced Settings.
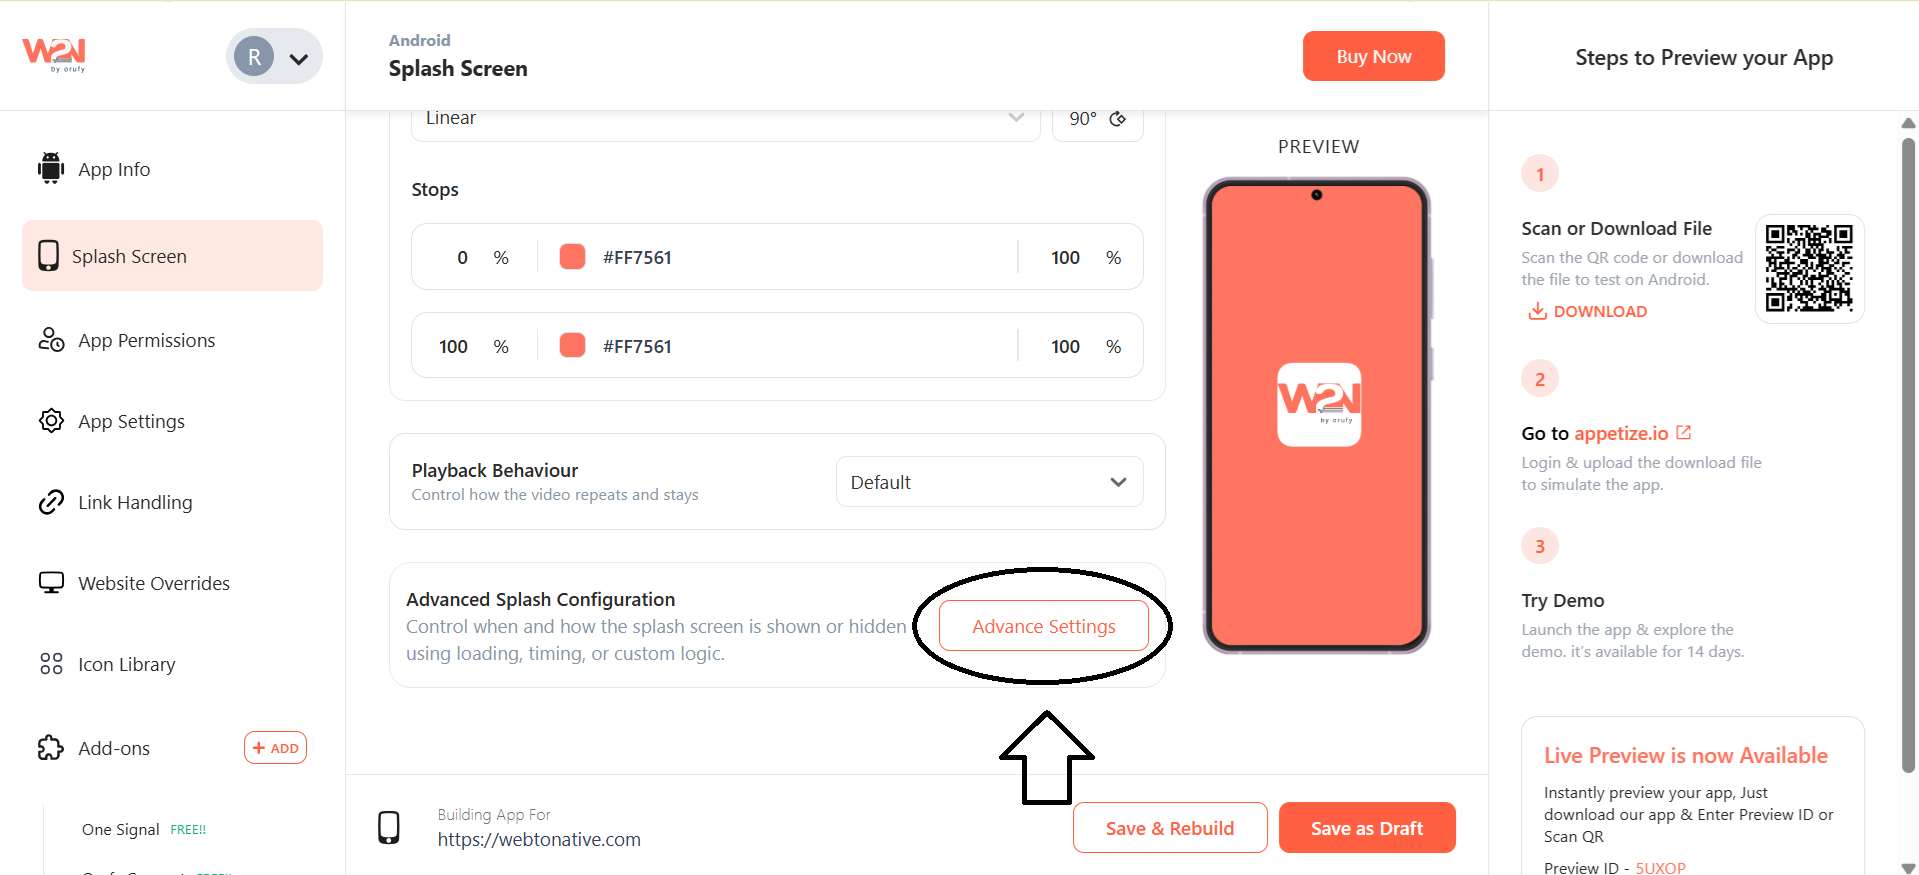
- Hide Splash When
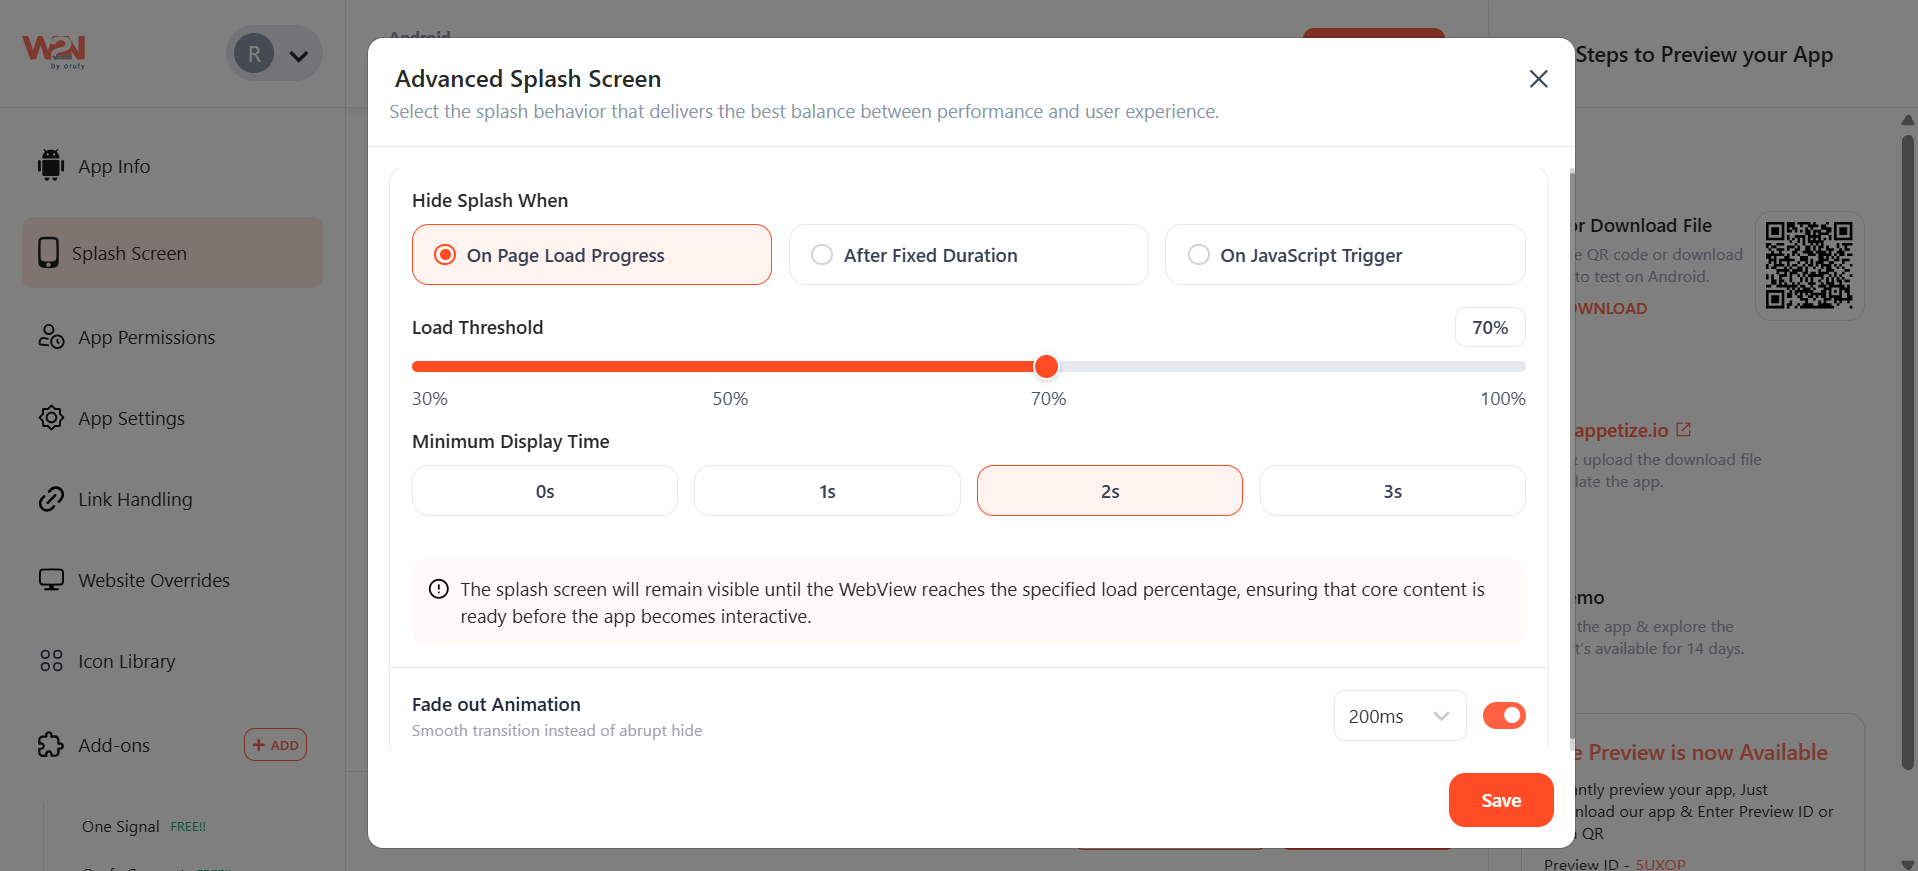
1. On Page Load Progress
The splash screen will disappear based on how much of the page is being loaded.
Setting for On Page Load Press
- Load Threshold
You have to define how much of your website content will load before the splash screen disappears.
- Minimum Display Time
You can control the minimum number of seconds the splash screen will be visible on the screen.
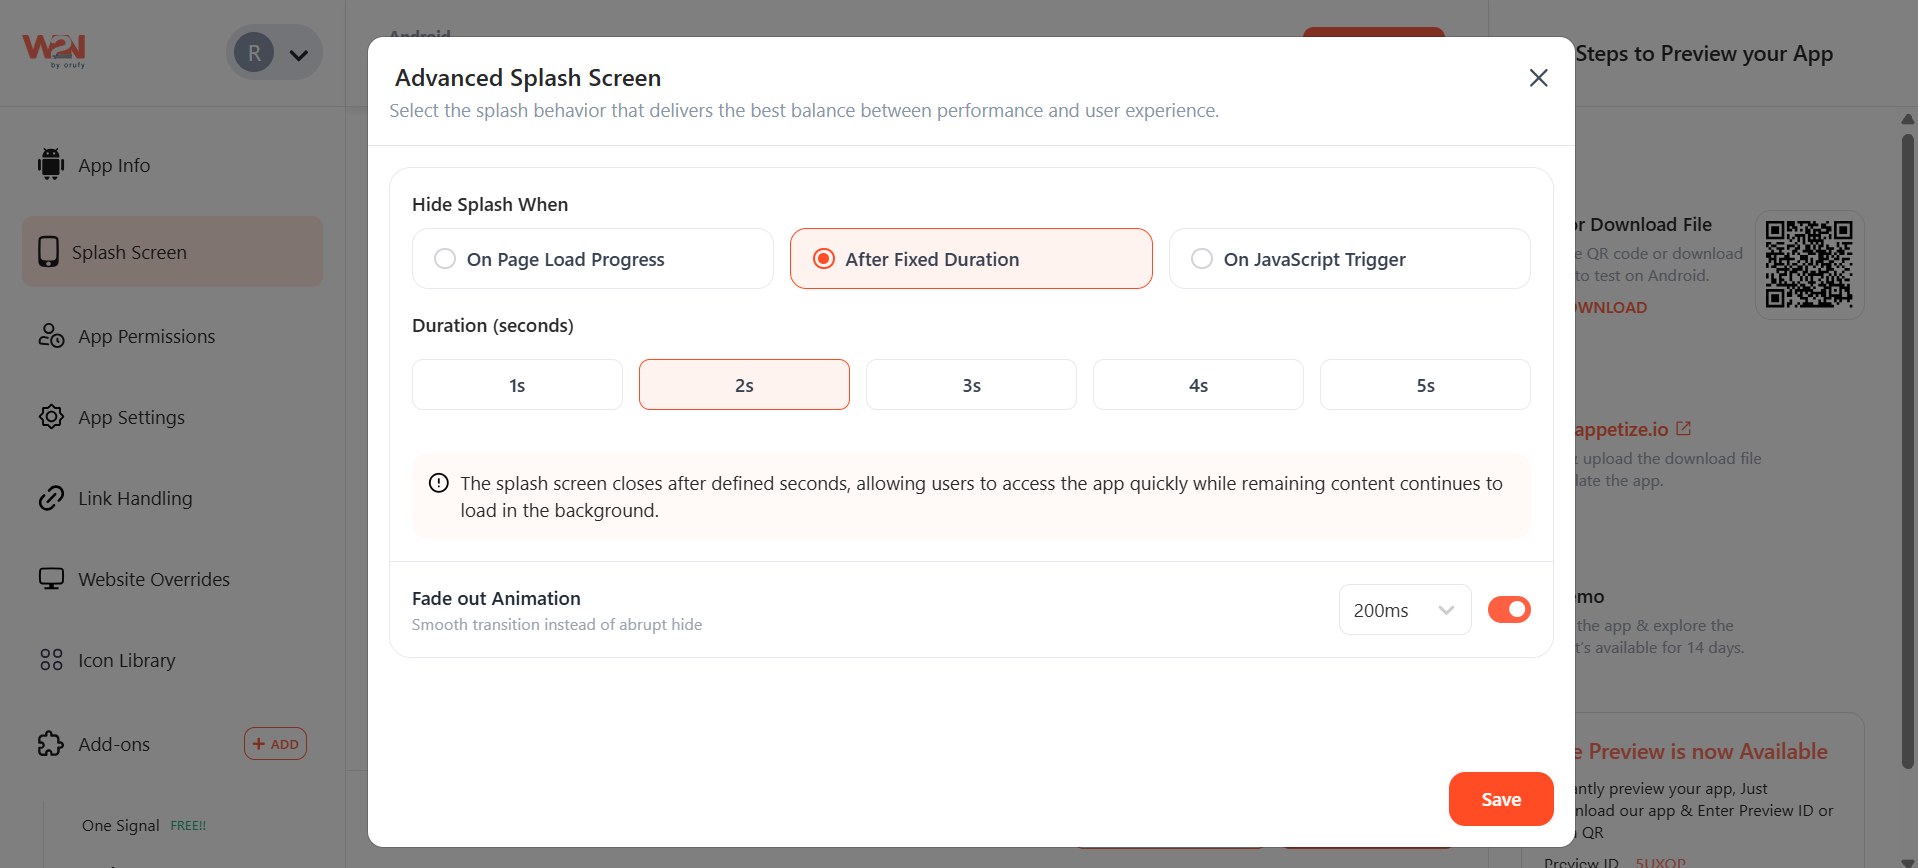
- Fade Out Animation
You can control the splash screen so it does not disappear suddenly. It should disappear smoothly. You can control this with two options: 200 ms and 500 ms.
2. After Fixed Duration
The splash screen will disappear after a fixed duration.
- Duration
You have to select the time for the splash screen to be visible on the screen. It includes 1, 2, 3, 4, and 5 seconds.
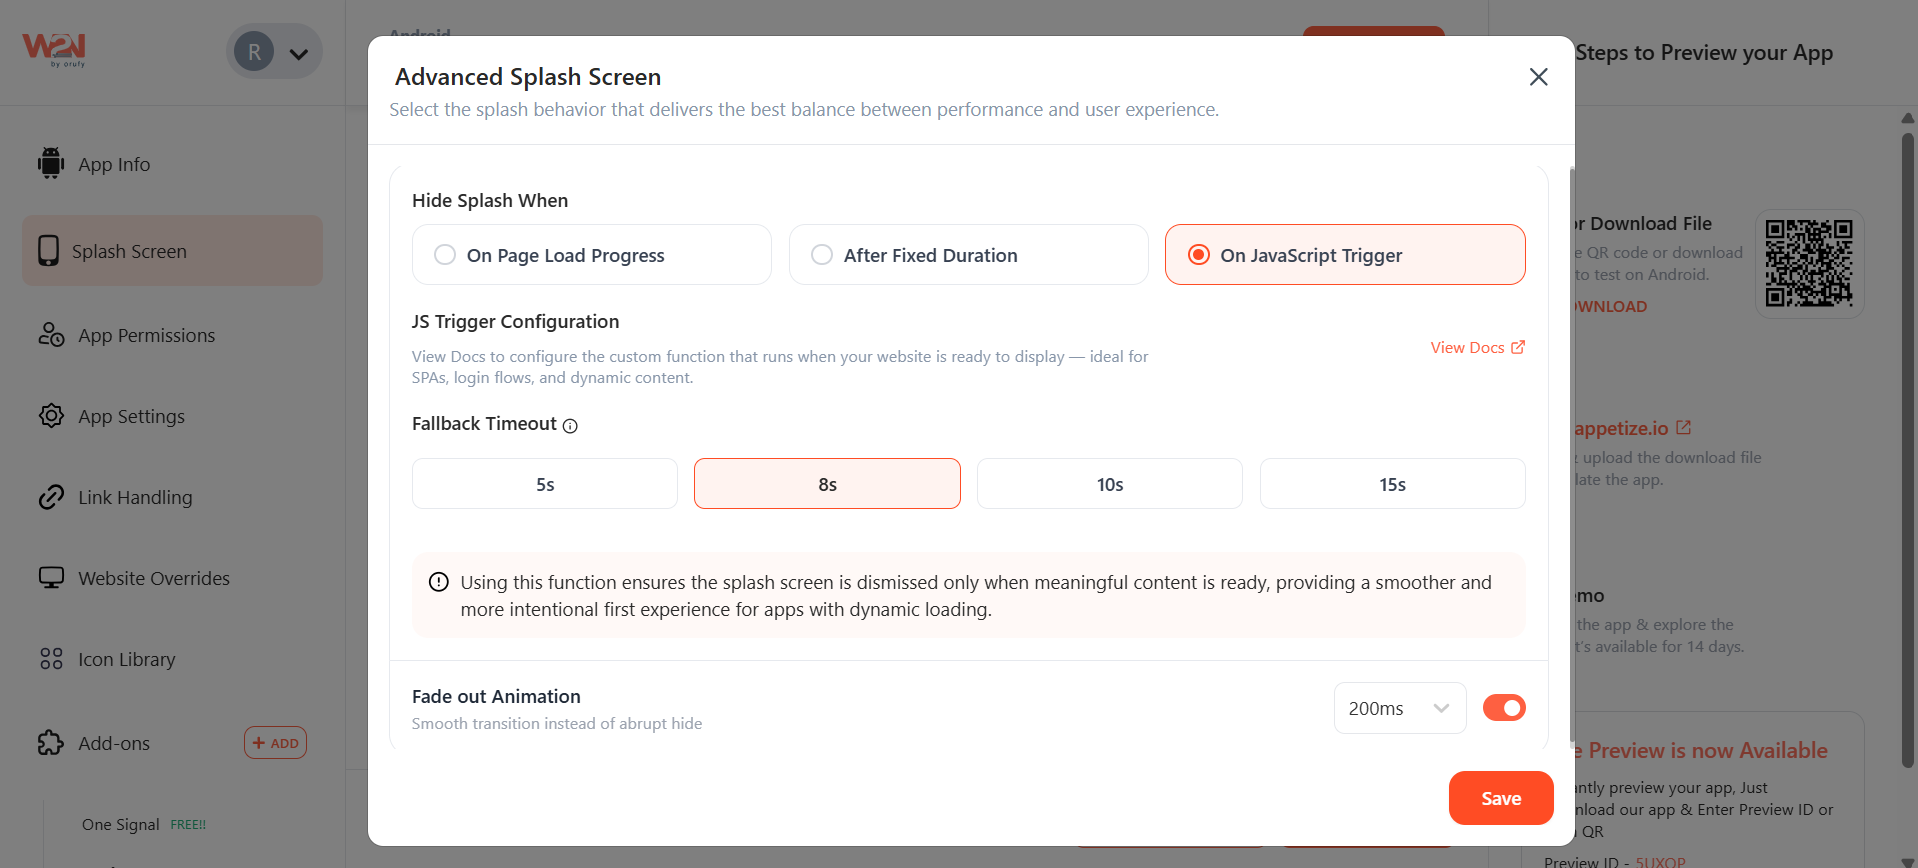
3. On JavaScript Trigger
The splash screen will only disappear when the JavaScript is triggered.
- JS Trigger Configuration
You have to configure the JavaScript custom function on your website. So that it runs when your website is ready to display. Visit the Developer Documentation (opens in a new tab) for the integration.
- Fallback Timeout
You have to select the duration of the splash screen to hide if the JS code is not triggered. It includes 5, 8, 10, and 15 seconds of duration.
- Click on the “Save & Rebuild” button to save the changes and reflect in your app. After clicking on this button, you have to download the app again.

