
Notification with Sound
The Notification with sound functionality ensures that push notifications sent via OneSignal include an audible alert, instantly catching users’ attention. This is beneficial for critical updates, reminders, or sensitive alerts. It enhances the user experience by alerting messages that are noticed immediately.
Enabling Notification with Sound functionality ensures that:
-
Notification Messages are highly visible, so it’s harder to miss.
-
User receives a noticeable and engaging audible notification.
-
Sound adds an extra layer of personalisation to the user.
-
Notifications with sound grab more attention even when the device screen is off.
Step-by-Step Process to Integrate Notifications with Sound
Step 1: From the add-ons section, add Custom Sound for Notification.
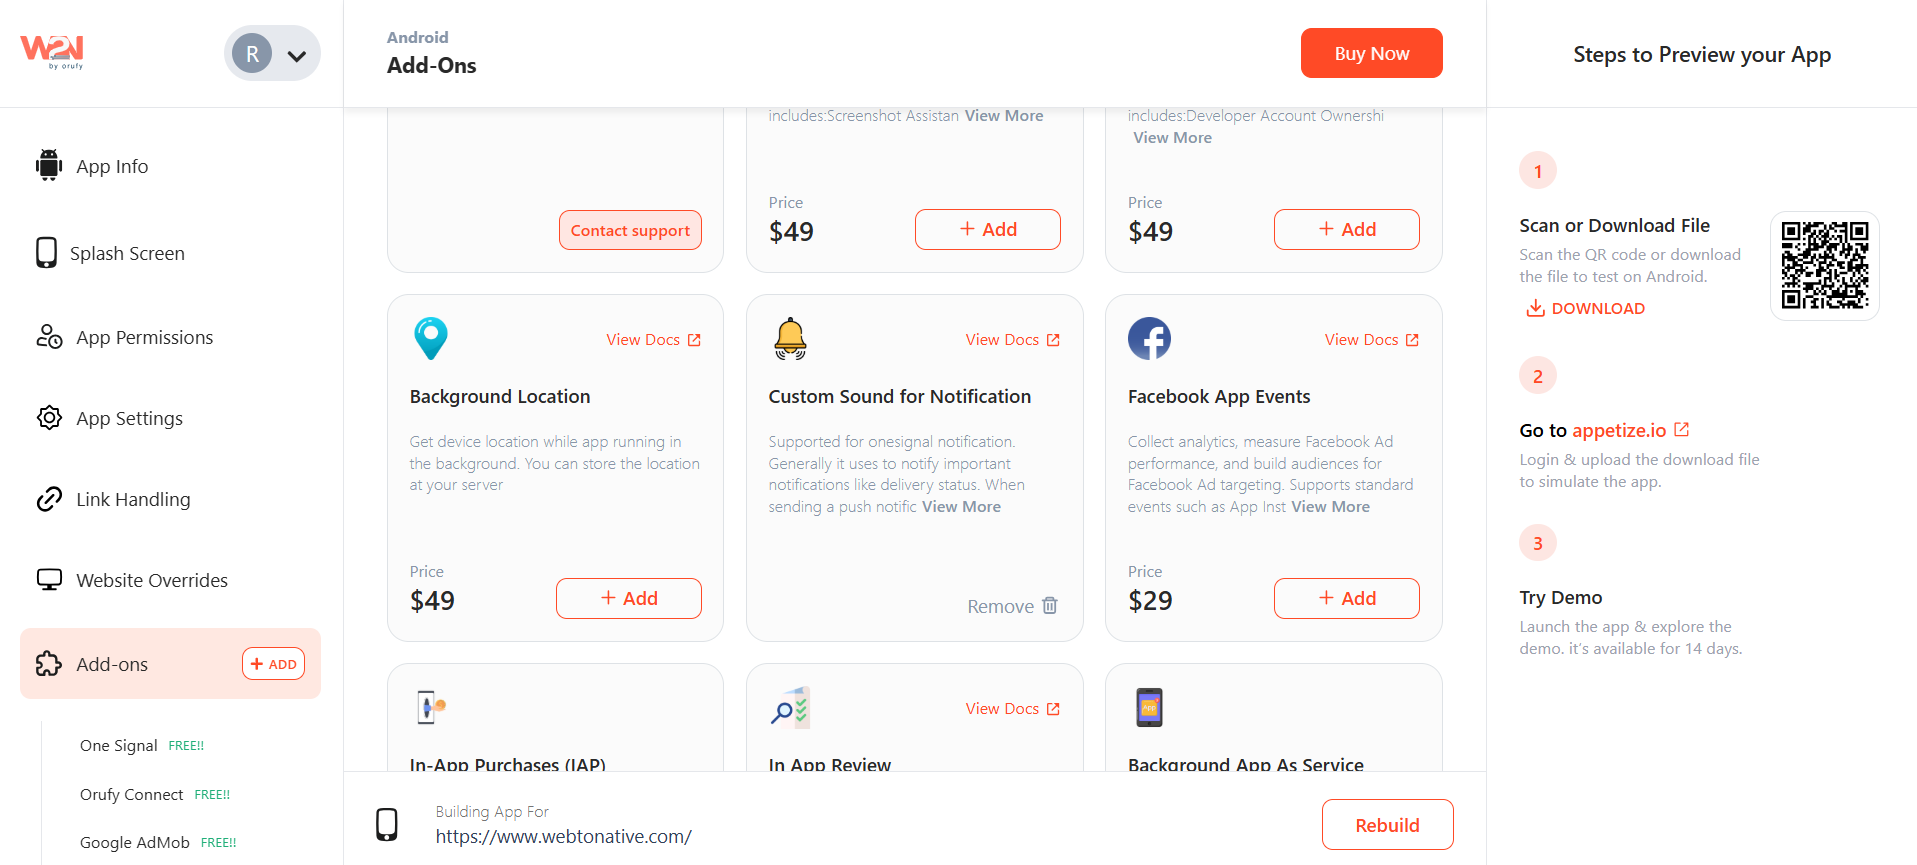
Step 2: As you added the add-on. Now navigate to OneSignal add-on.
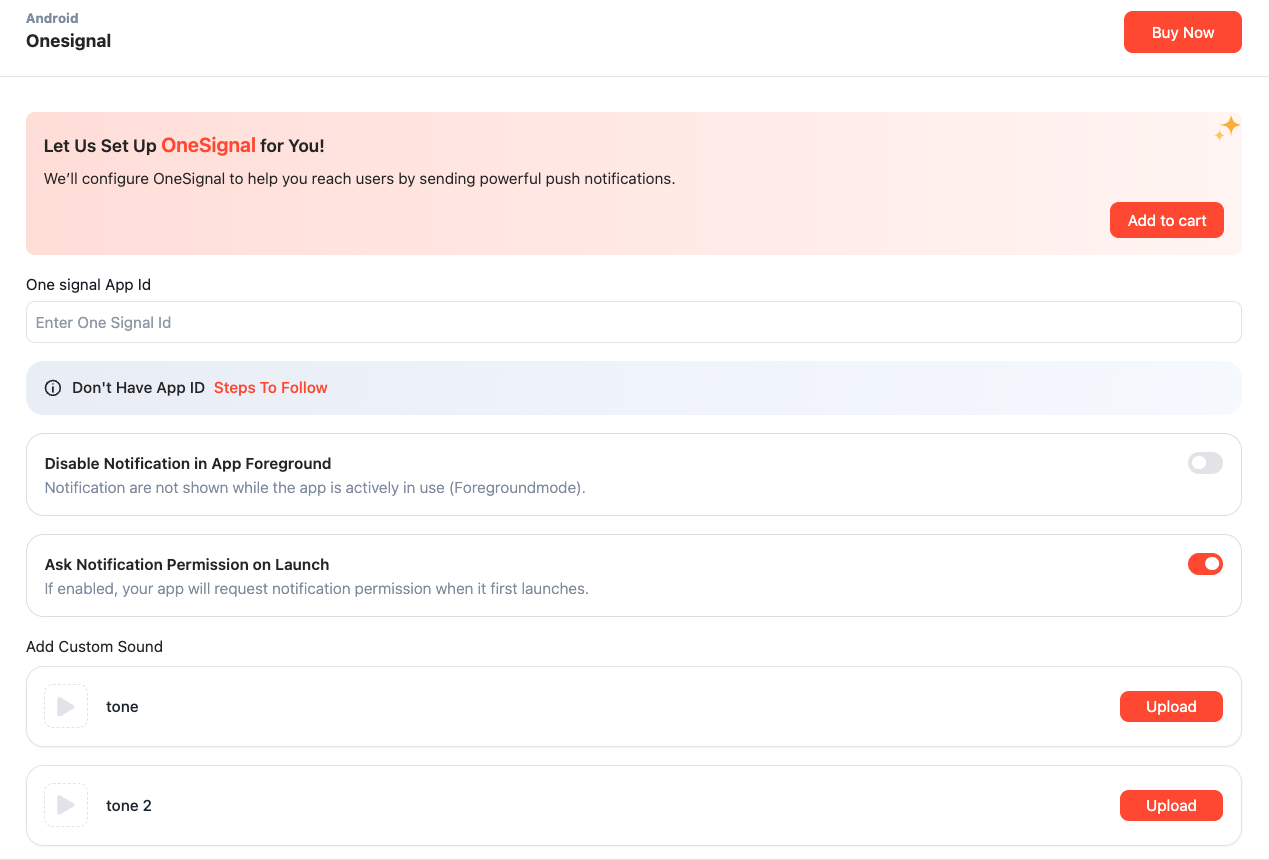
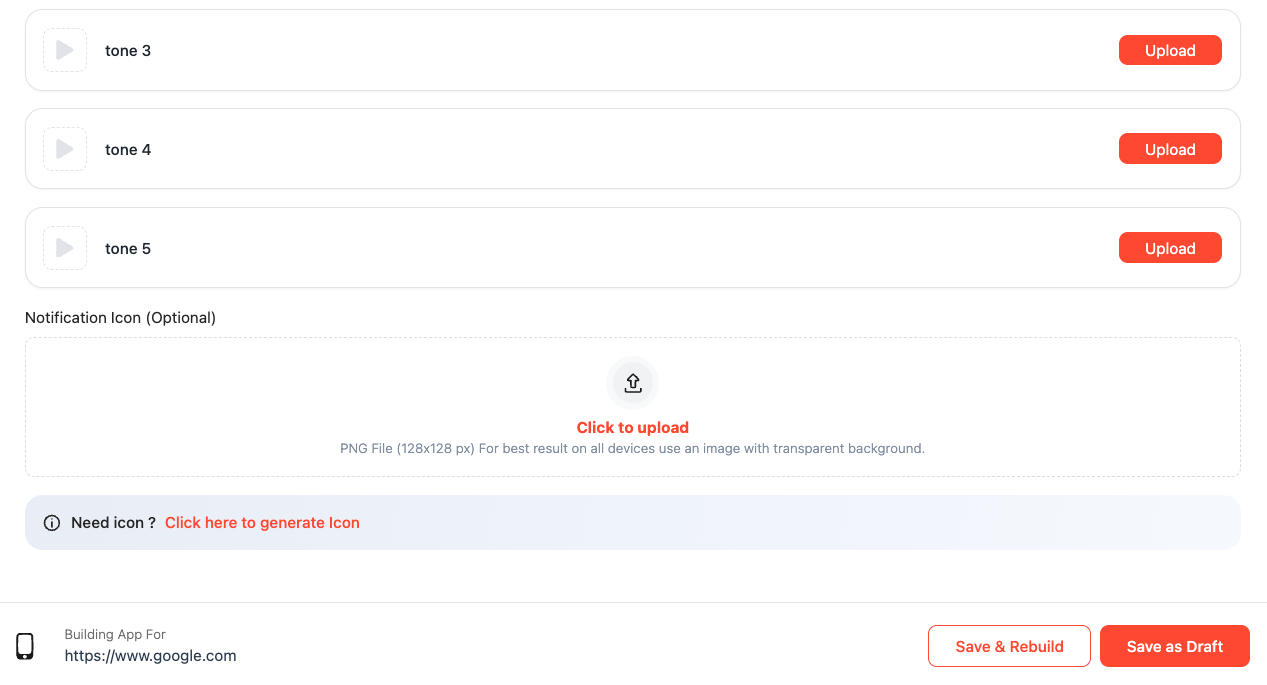
This section allows you to add your notifications sound and icon, so firstly: 1. Select the notification sound you want to add. 2. Upload the app icon, which should be 128x128 px. 3. Click on “Save & Rebuild” to reflect your changes in the app
How to Test Push Notifications
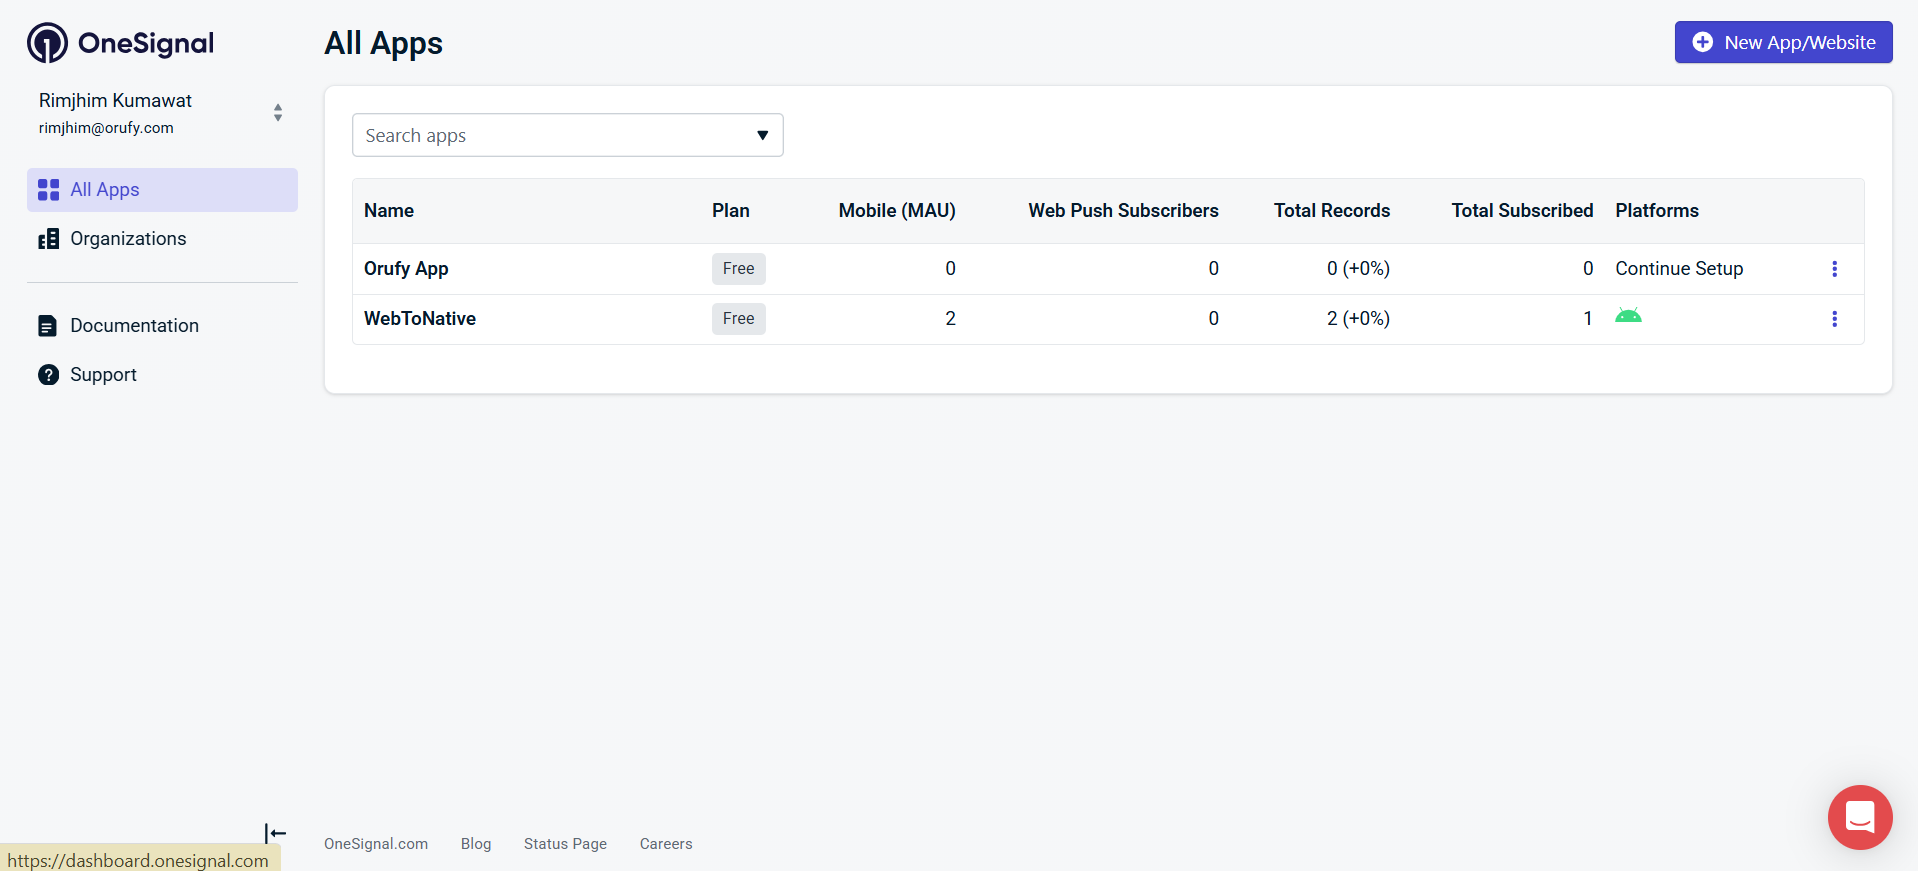
1. Navigate to the OneSignal and Log In. Now, Go the Dashboard (opens in a new tab).
2. Than select the app for which you have to push notifications.
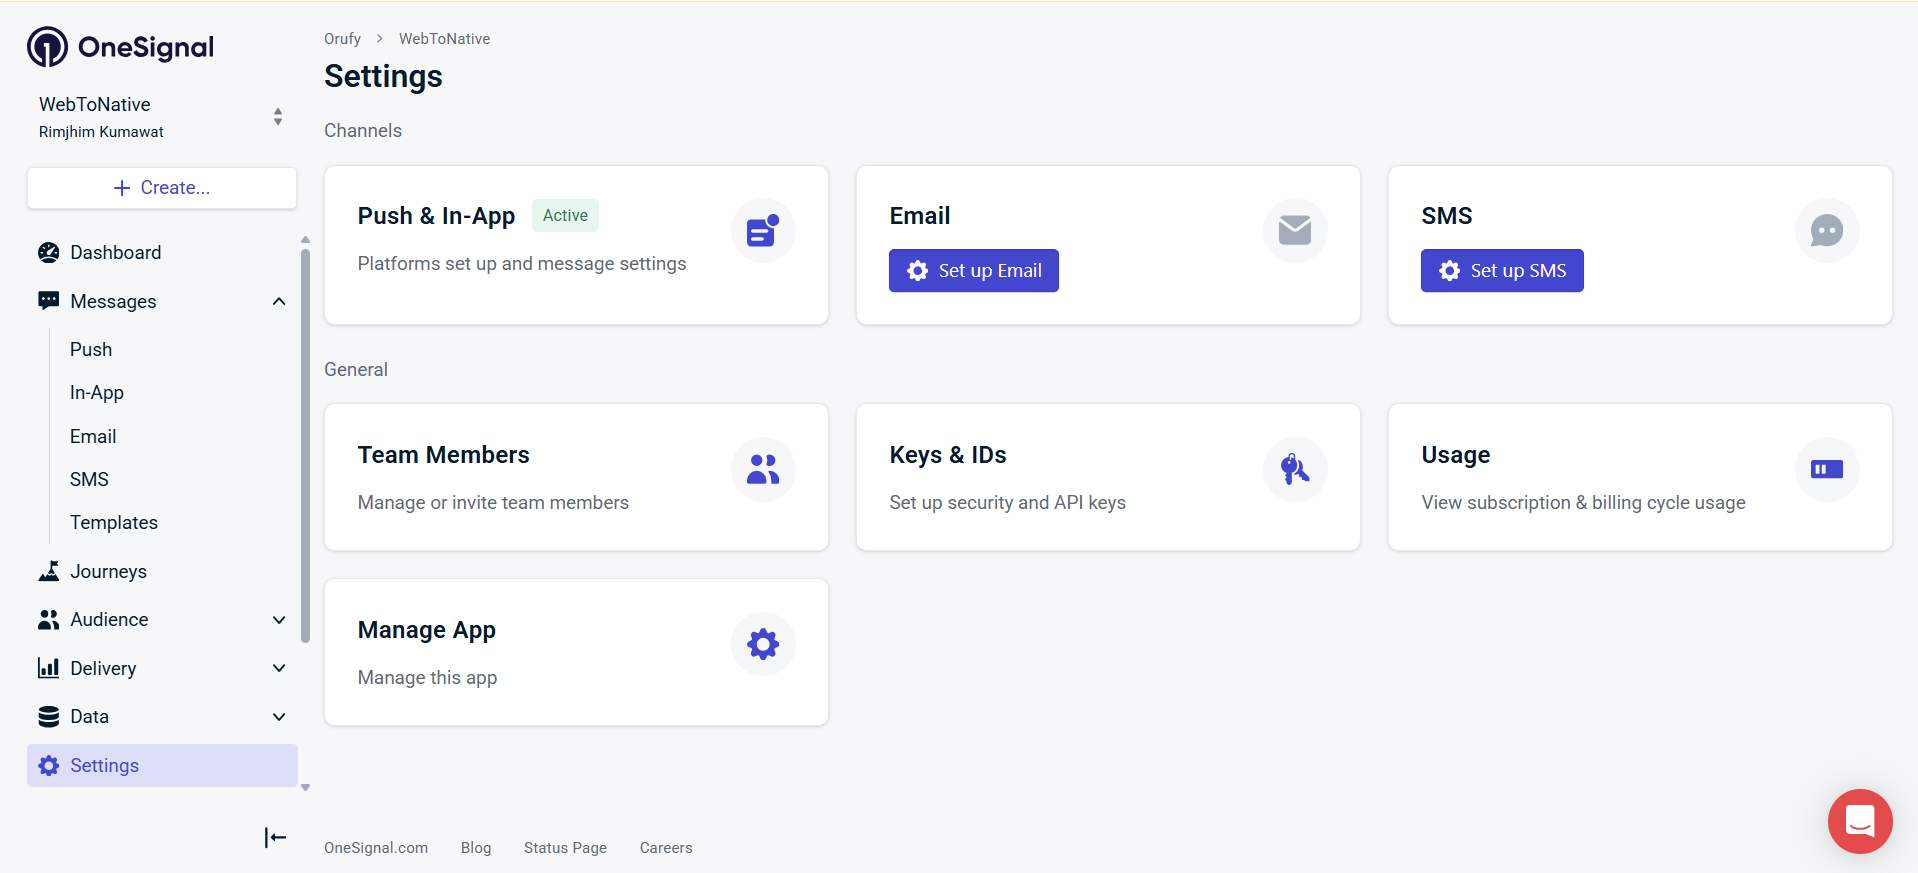
3. Go to the Settings.
![]()
Select the Push & In-App
4. Now, select Android Notification Channel.
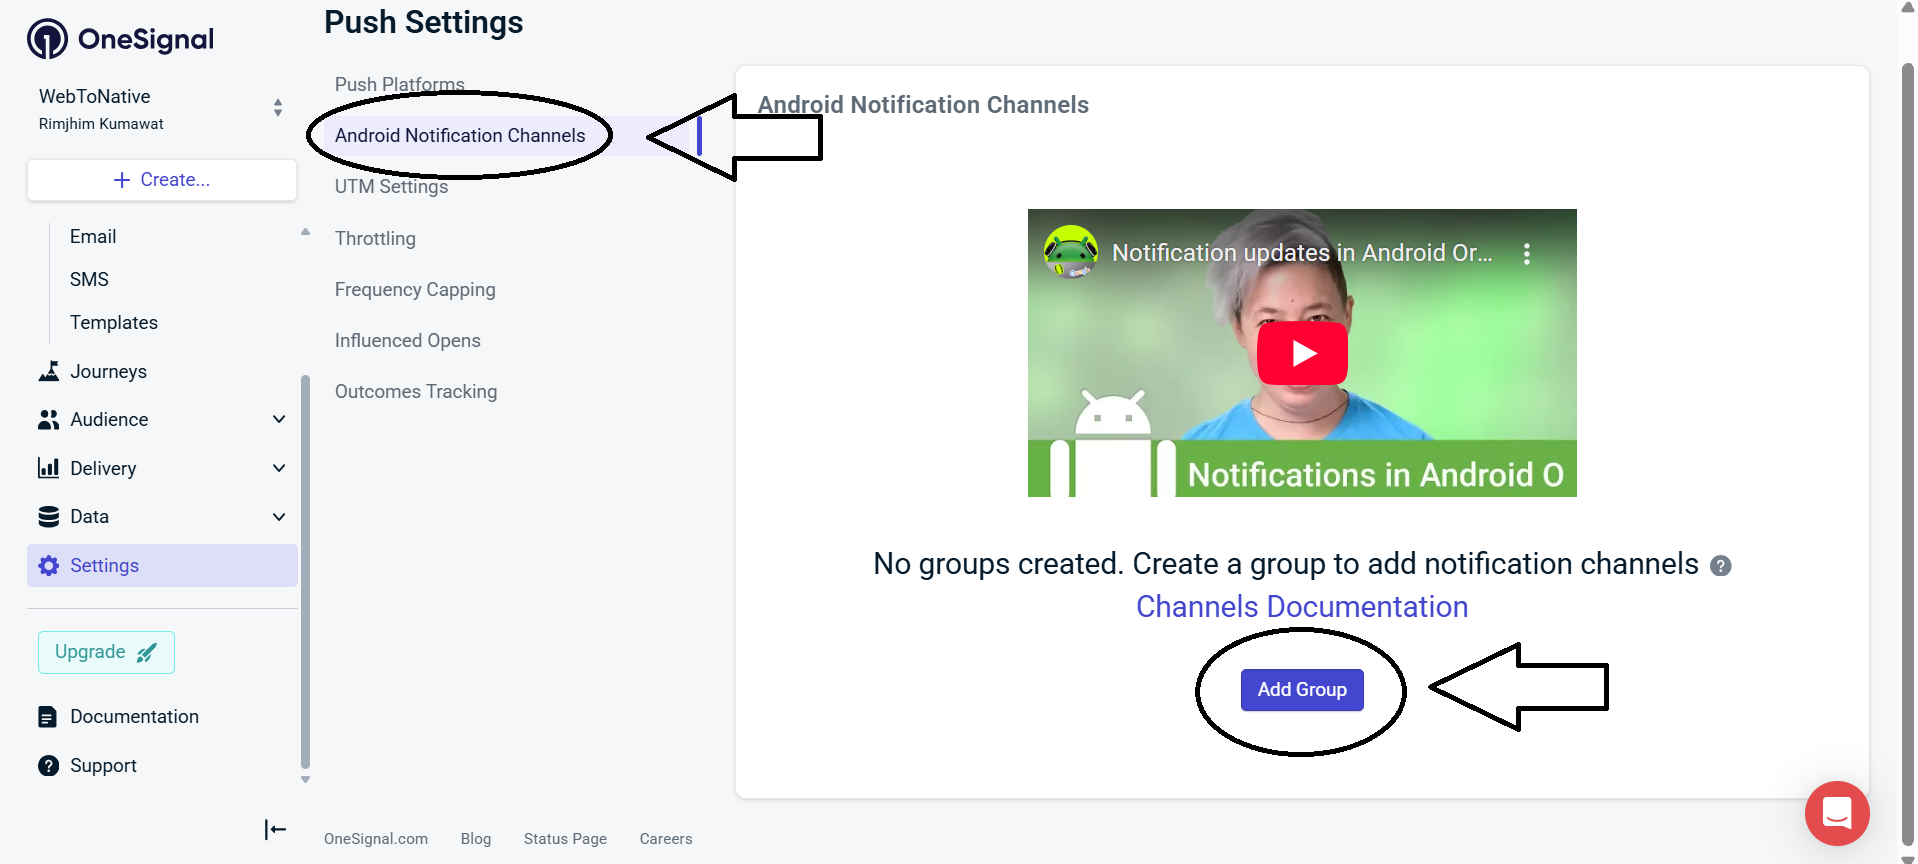
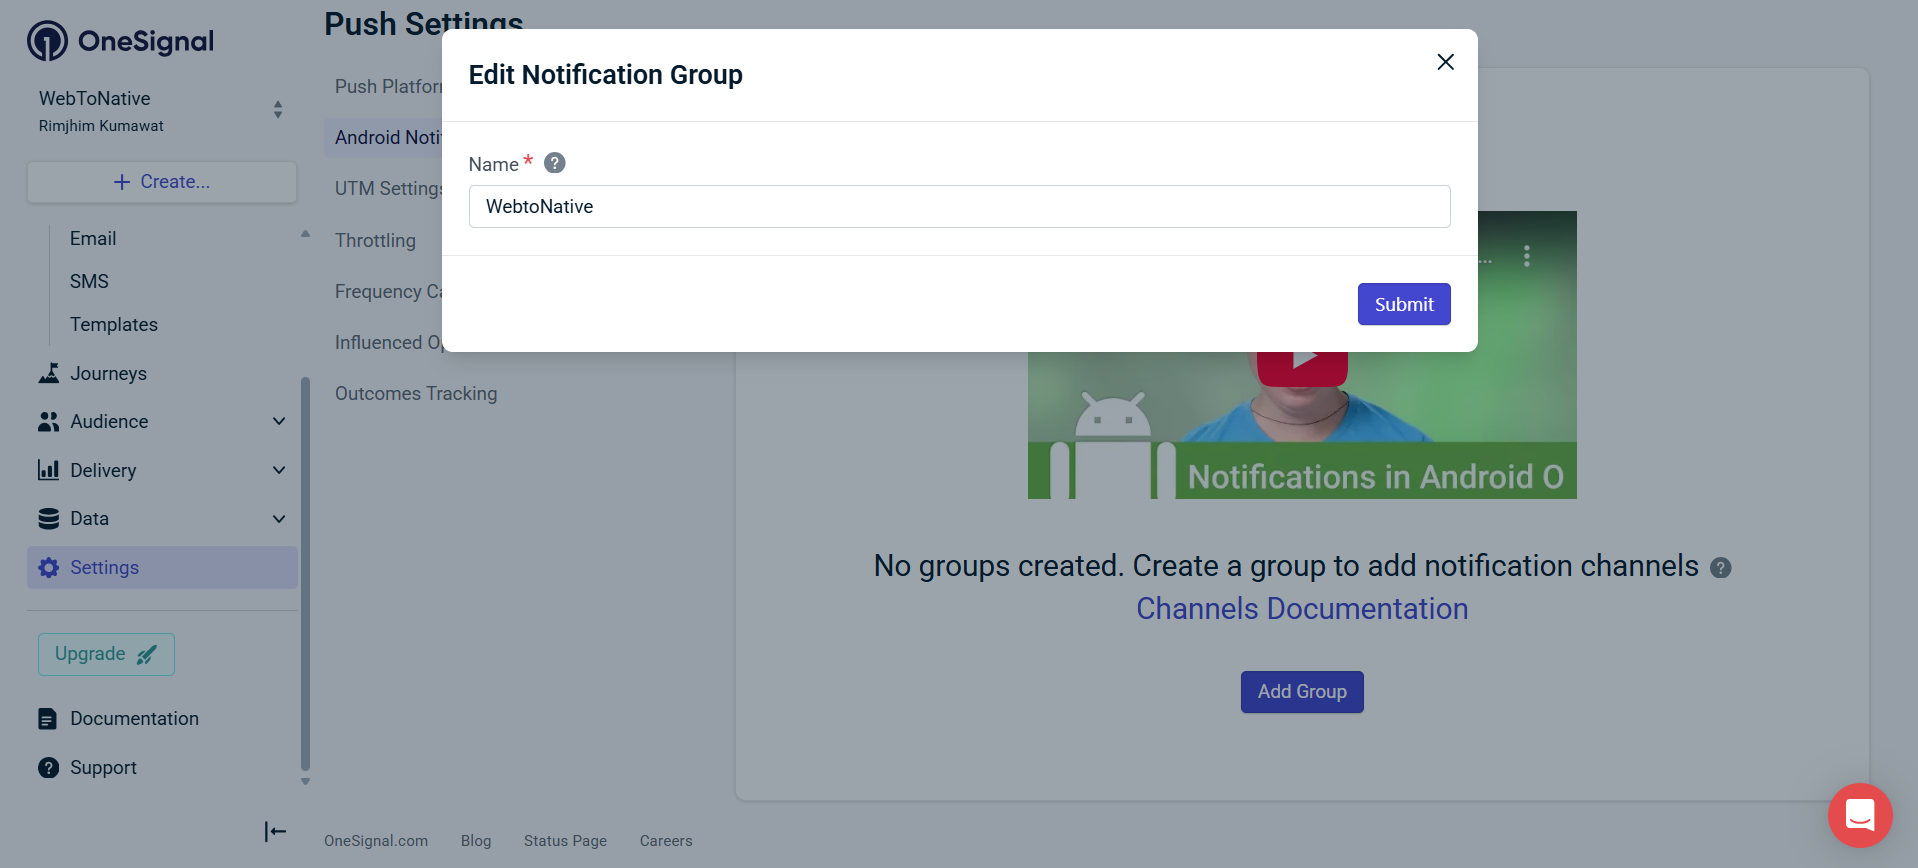
5. Than,click on “+ Add Group”. A pop up will open to enter the name of the notification group. And Submit.
6. Click on “+ Add Channel”.
![]()
A pop up will appear to create notification channel.

-
Enter User-visible channel name
-
User-visible channel description
-
Importance: how important the notification is
-
Sound: which sound to be played as you push the notification. In this section select custom as you will have an custom sound for your notification. Add the name of the resource (the custom sound file name “tone”).
![]()
-
Vibration: vibrate the device when the notification is recevied LED: In case some devices have colored LEDs you can control which color LED to be pushed while sending a notification.
-
Badges: A badge number or notification dot appears on the app icon to indicate there are unopened notifications.
-
Lockscreen: It controls that your notifications content to be shown, hidden, or show partially on the device lock screen.
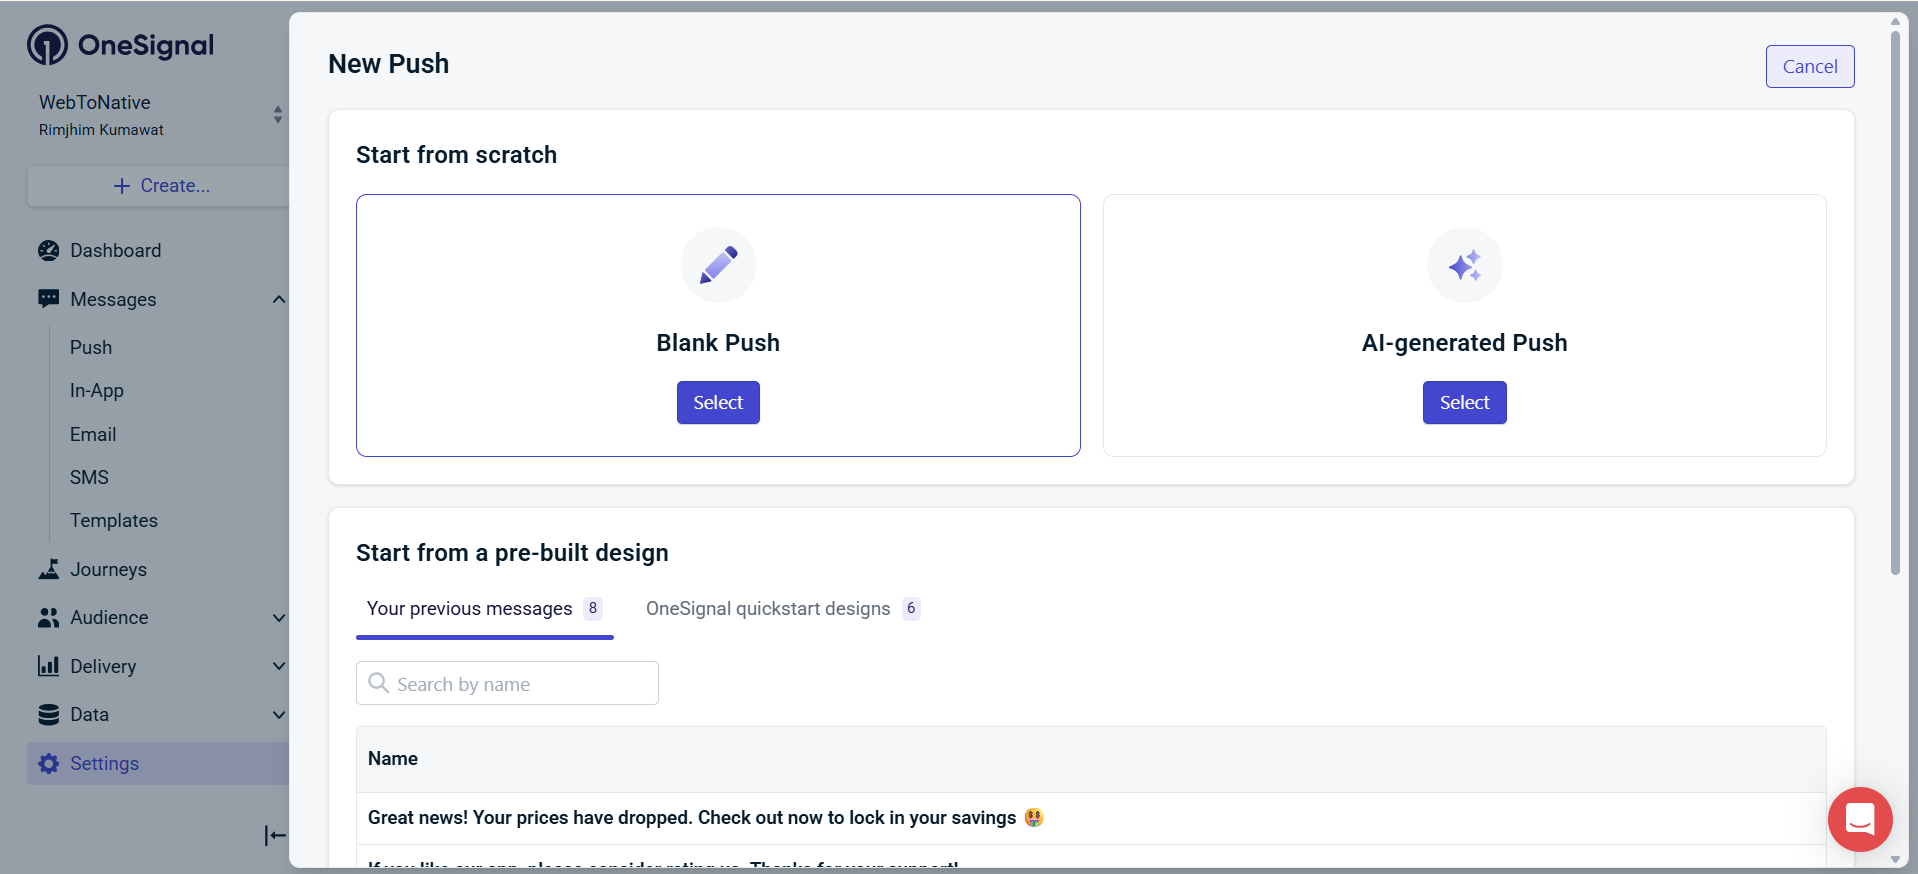
7. Click on Create. Now,click on “+ Create”.
![]()
8. Select Blank Push.
9. In Blank Push, you have a blank message template in which you have to write what notification you want to send.
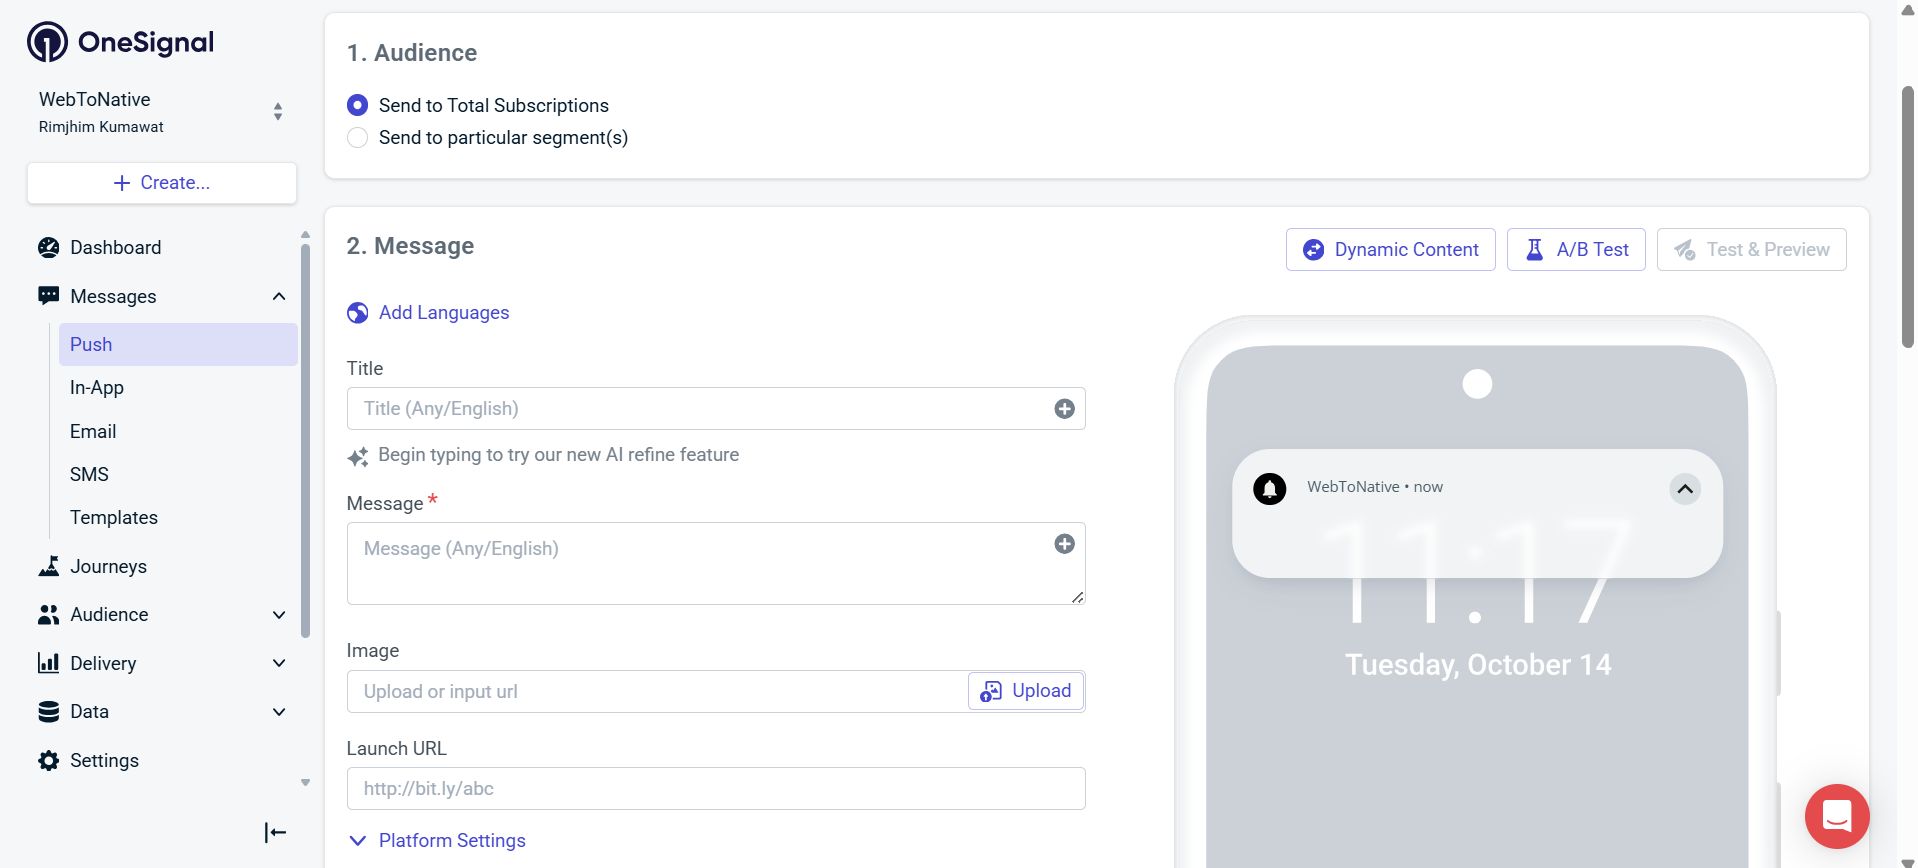
- You have to select the Audience.
- Message: What should a push message will include such as title, message, an image and launch url.
- Delivery schedule: control the time to send push notification.
10. In Platform Settings, go to category and select channel.
![]()
11. Review Your Message. And you can also make changes to your messages if any.
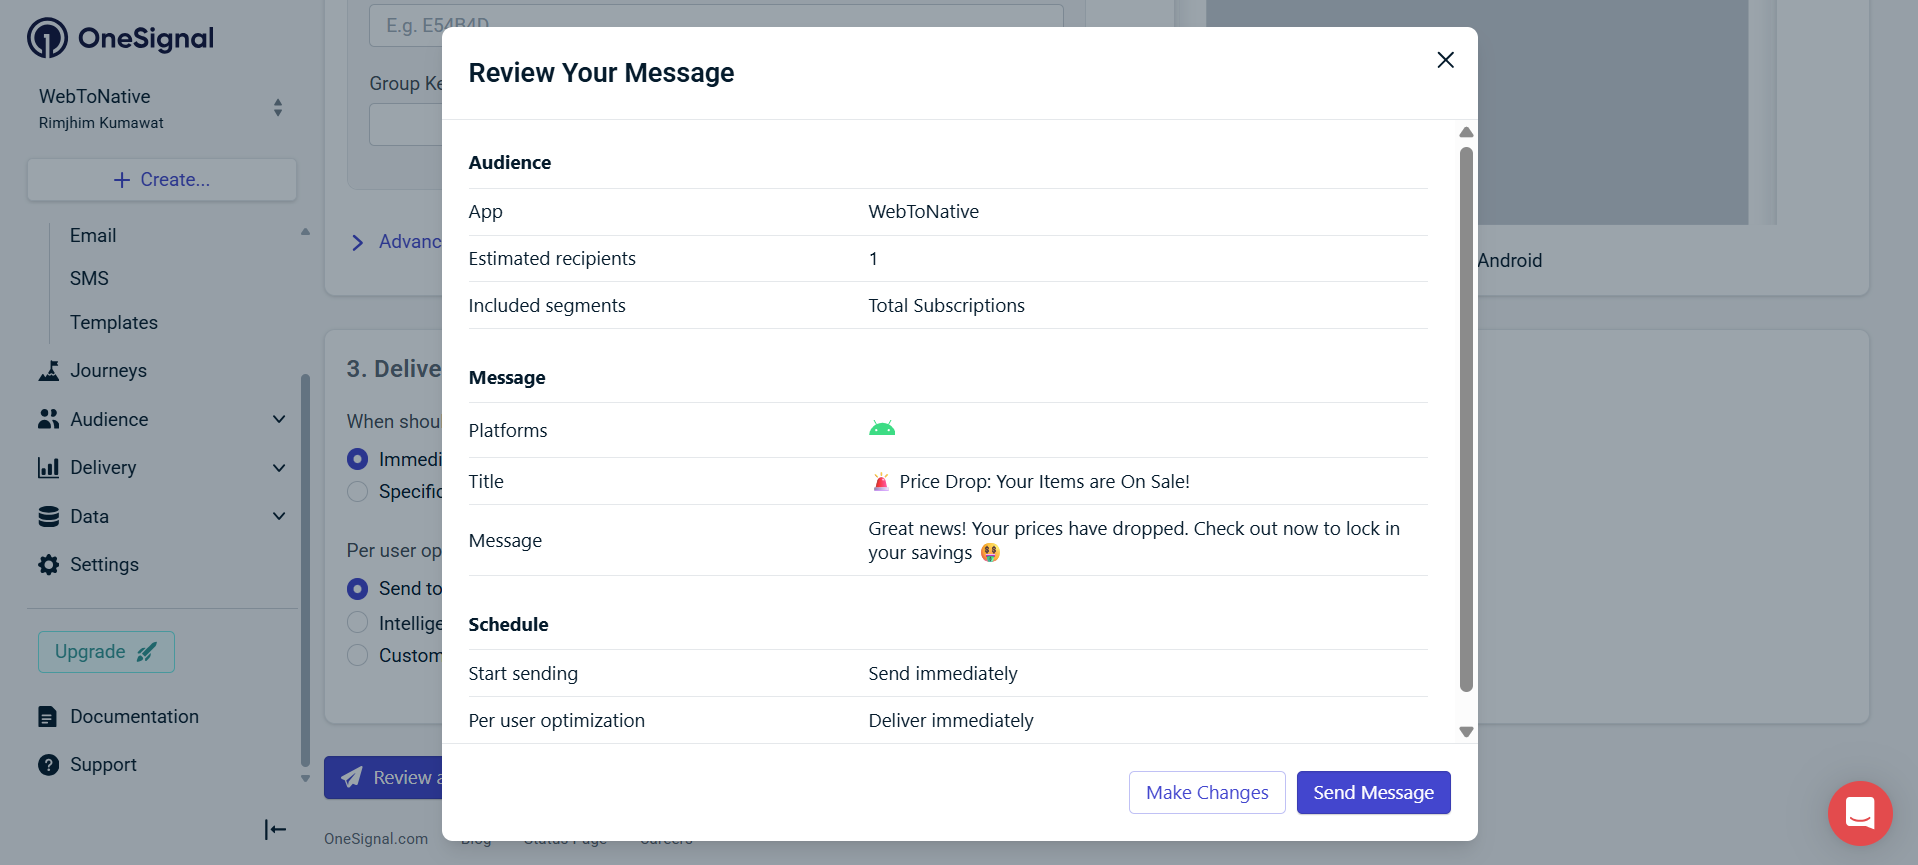
Click on "Send Message" the push notification will be send.

