
Orufy Bookings offers effortless integration with the different payment gateways including, Stripe, Razorpay, PayPal, and UPI. By follwing the integration steps, you can securely connect and enable the effective payment processing gateways.
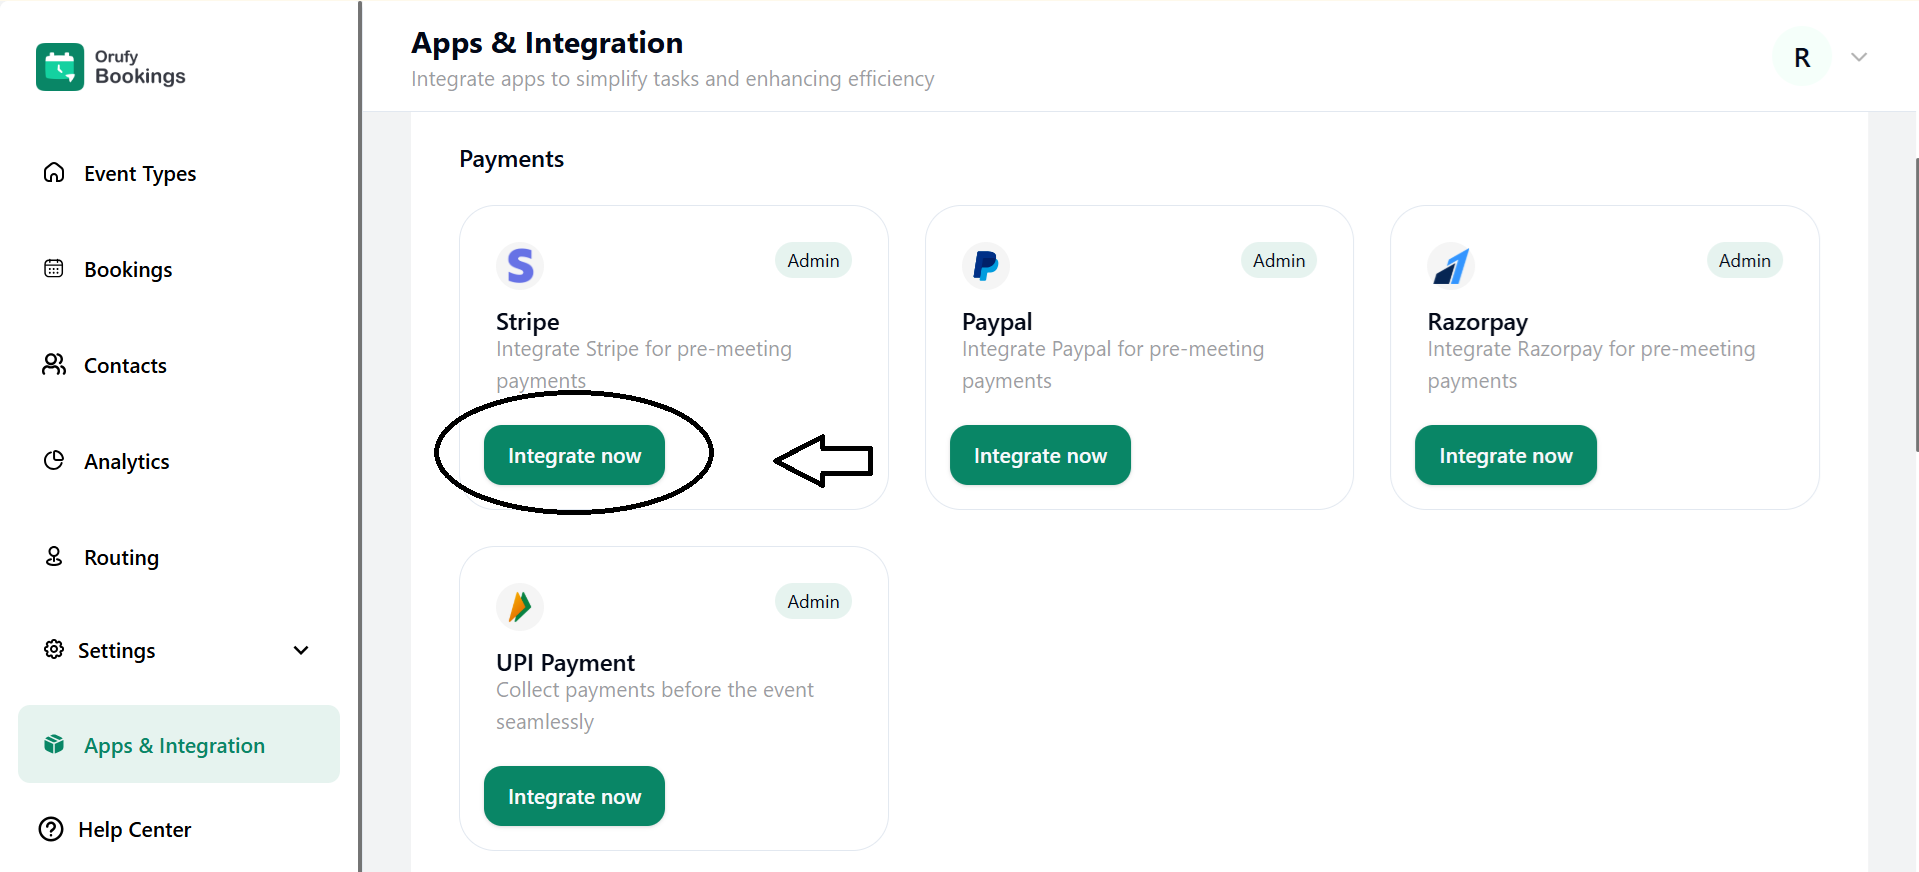
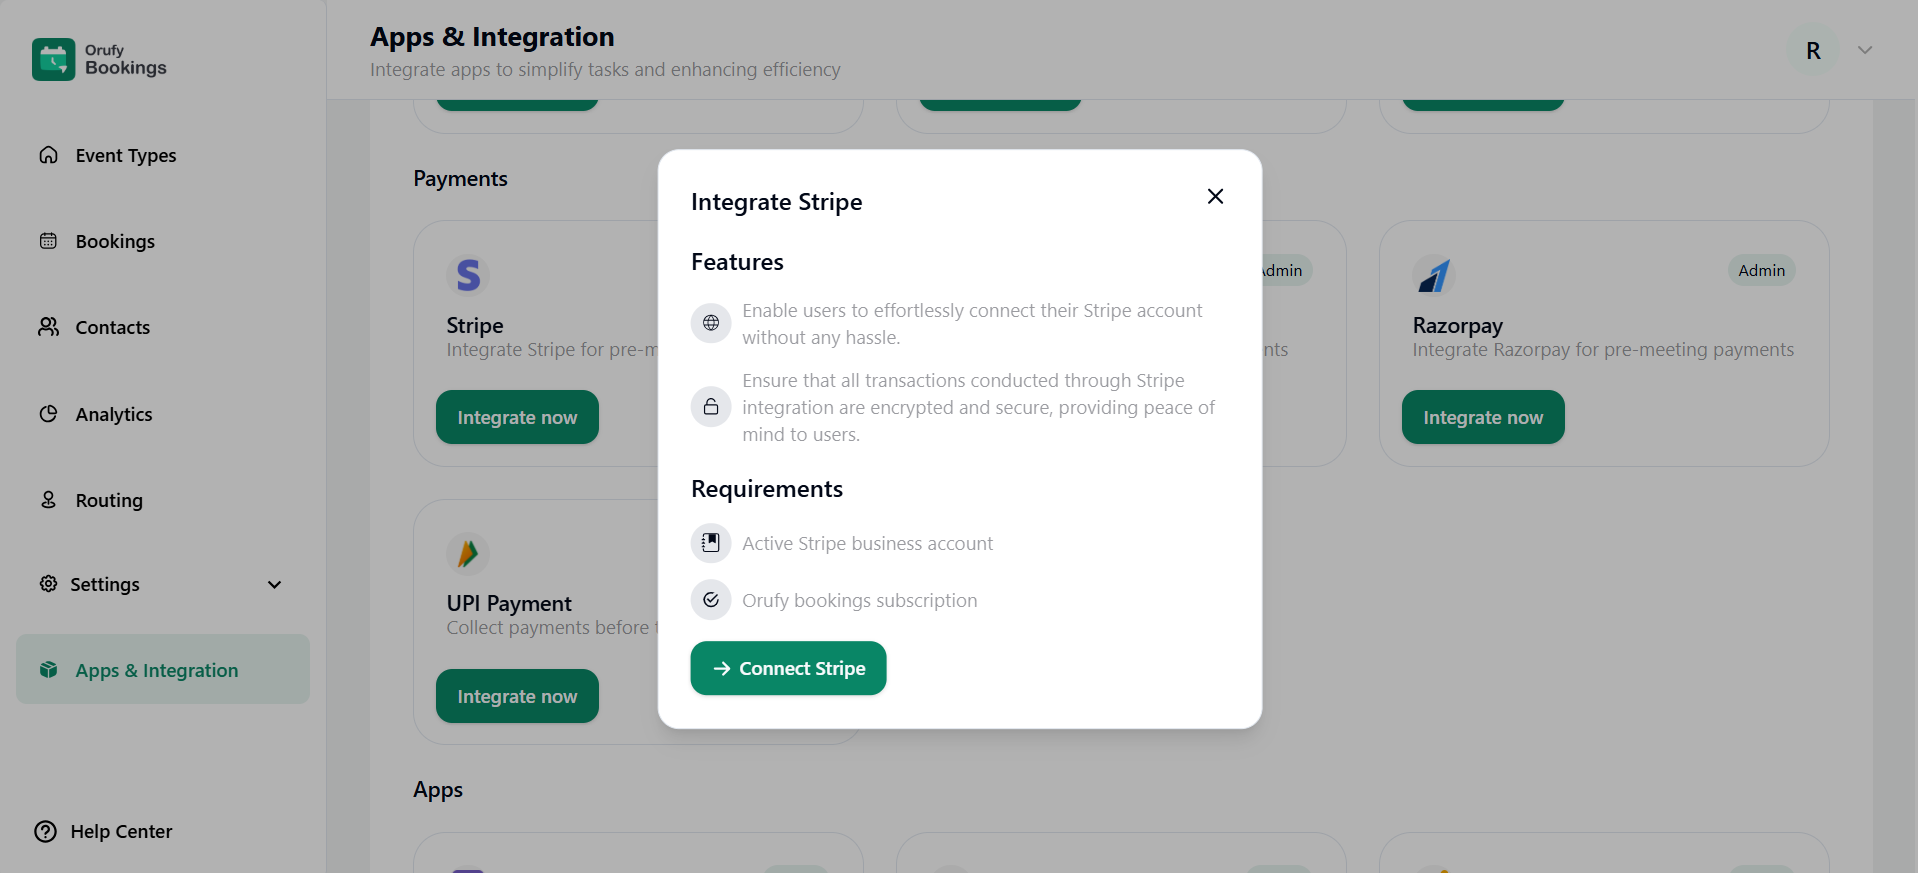
Stripe
1. Click on Integrate Now.
2. Read the features and requirements of Stripe.
3. Now, click on Connect Stripe.
4. Now, enter the API Secret Key from your Stripe account.
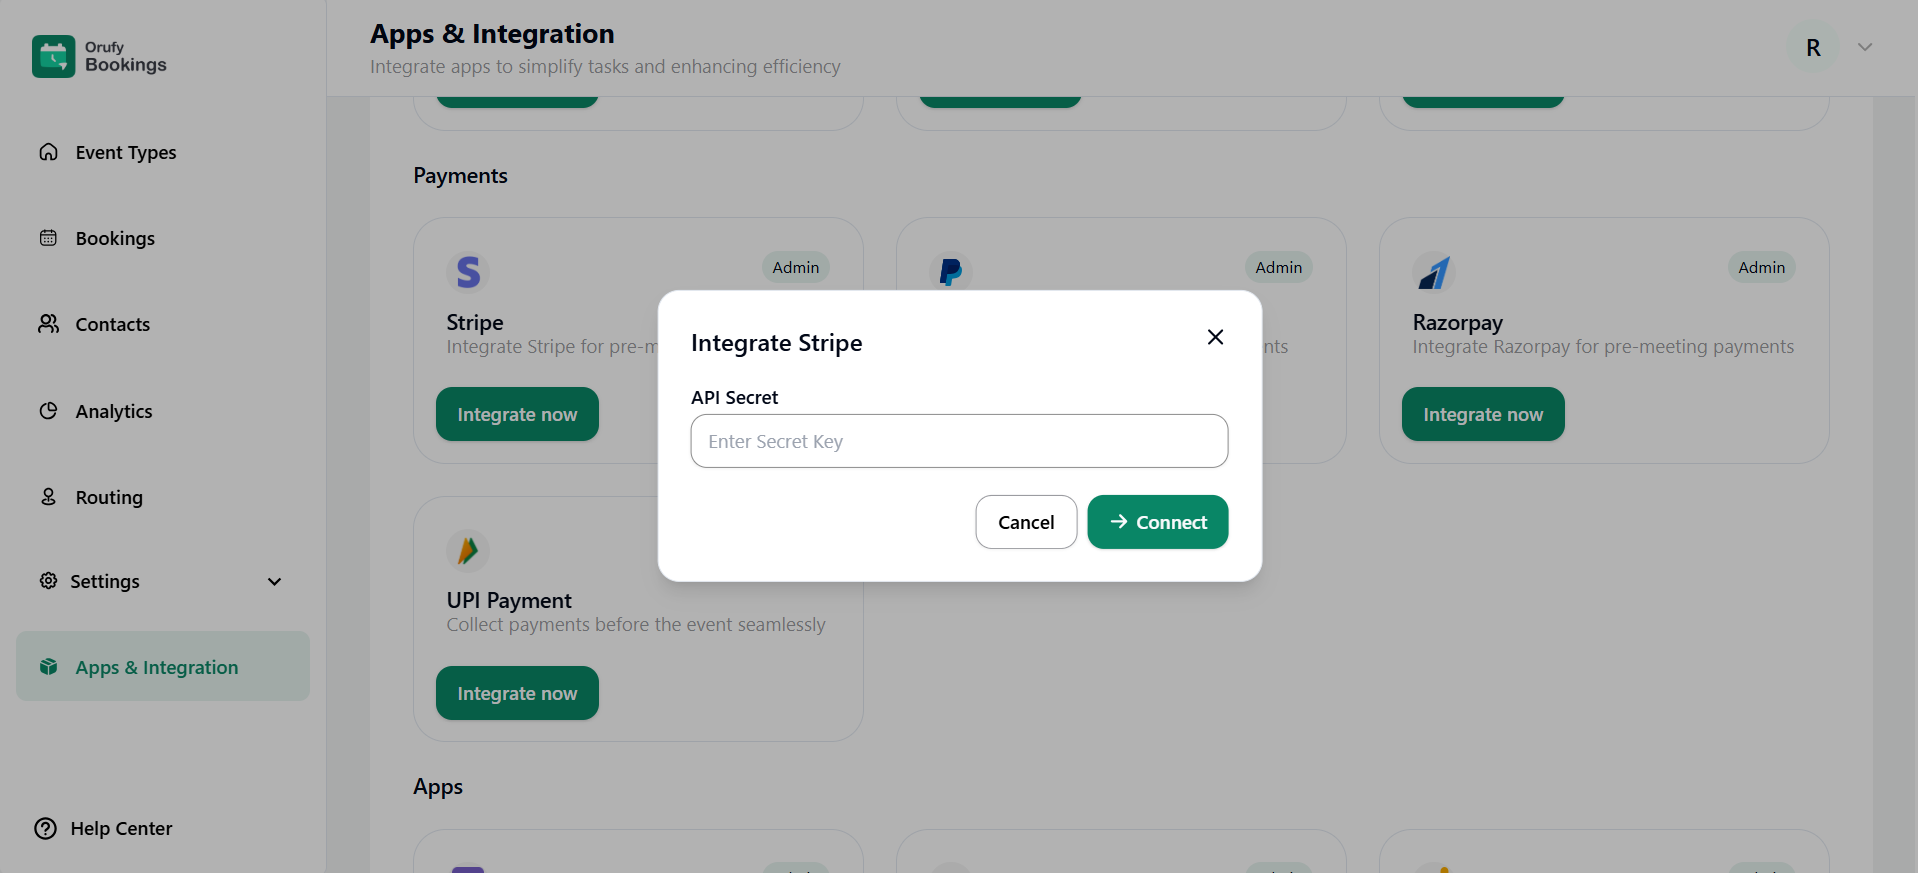
5. Click on Connect to integrate Stripe successfully.
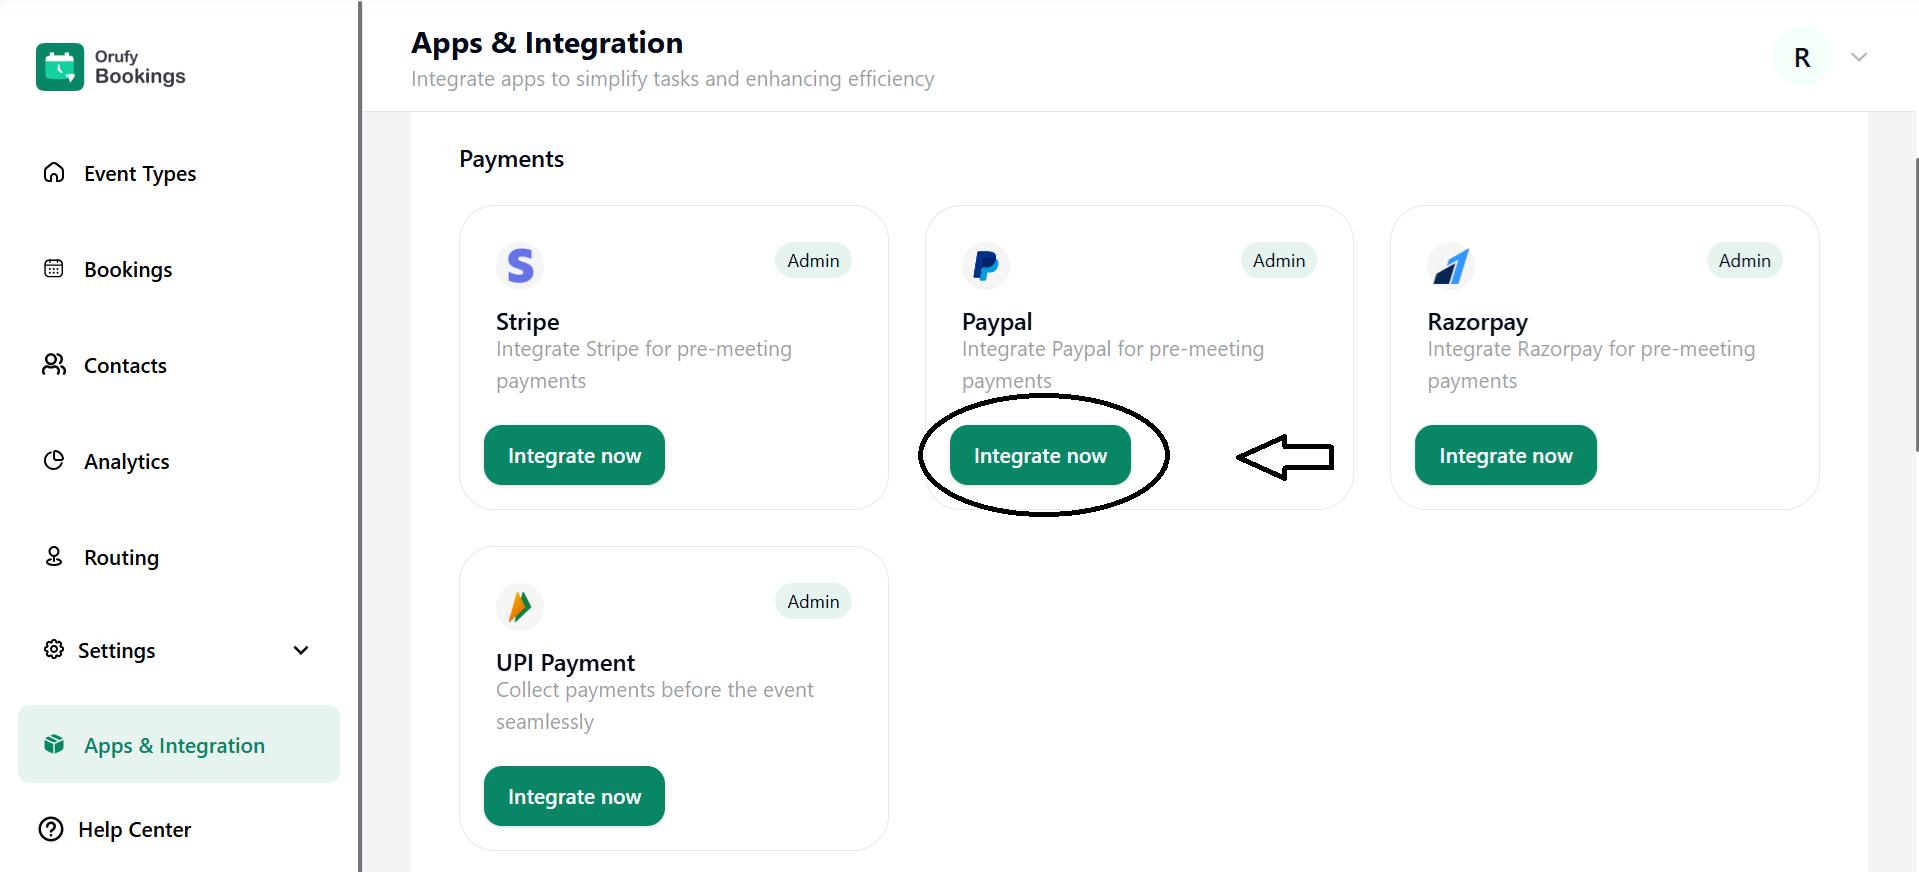
Paypal
1. Click on Integrate Now.
2. Read the features and requirements of PayPal.
3. Now, click on Connect PayPal.

4. A pop-up will open to enter the (Keep in mind you need to have a PayPal account to get these two things).
-
API Key
-
API Secret

5. Click on Connect to integrate PayPal successfully.
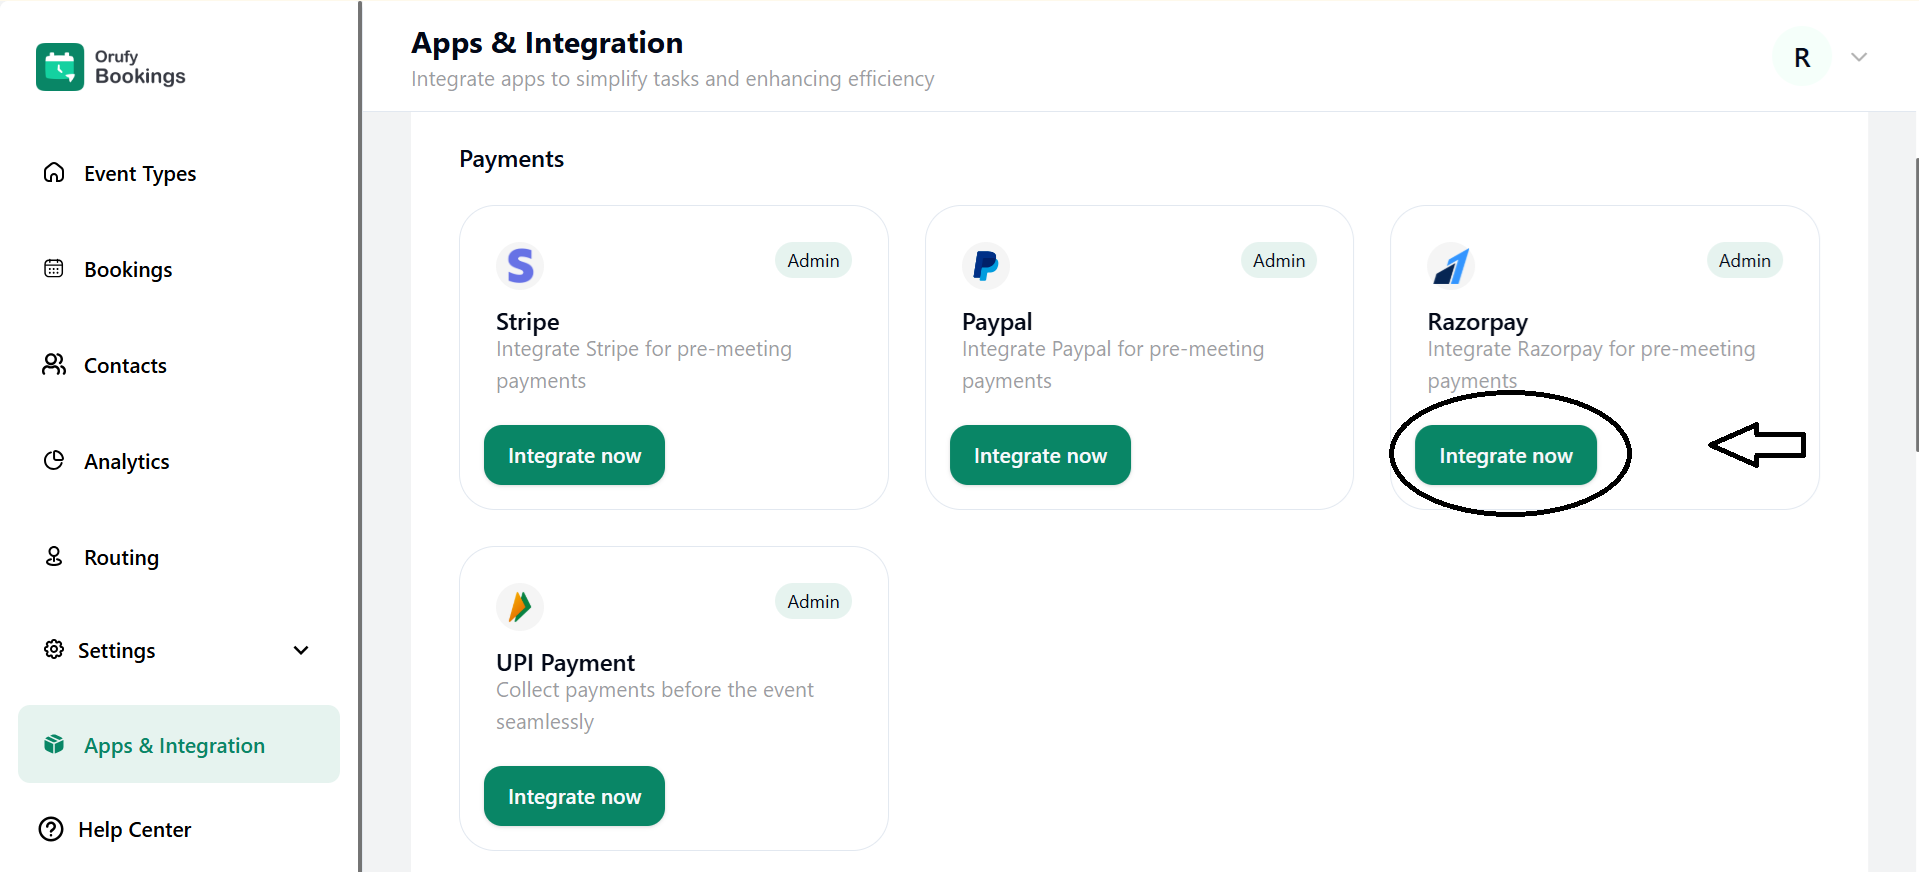
Razorpay
1. Click on Integrate Now.
2. Read the features and requirements of Razorpay.
3. Now, click on Connect Razorpay.
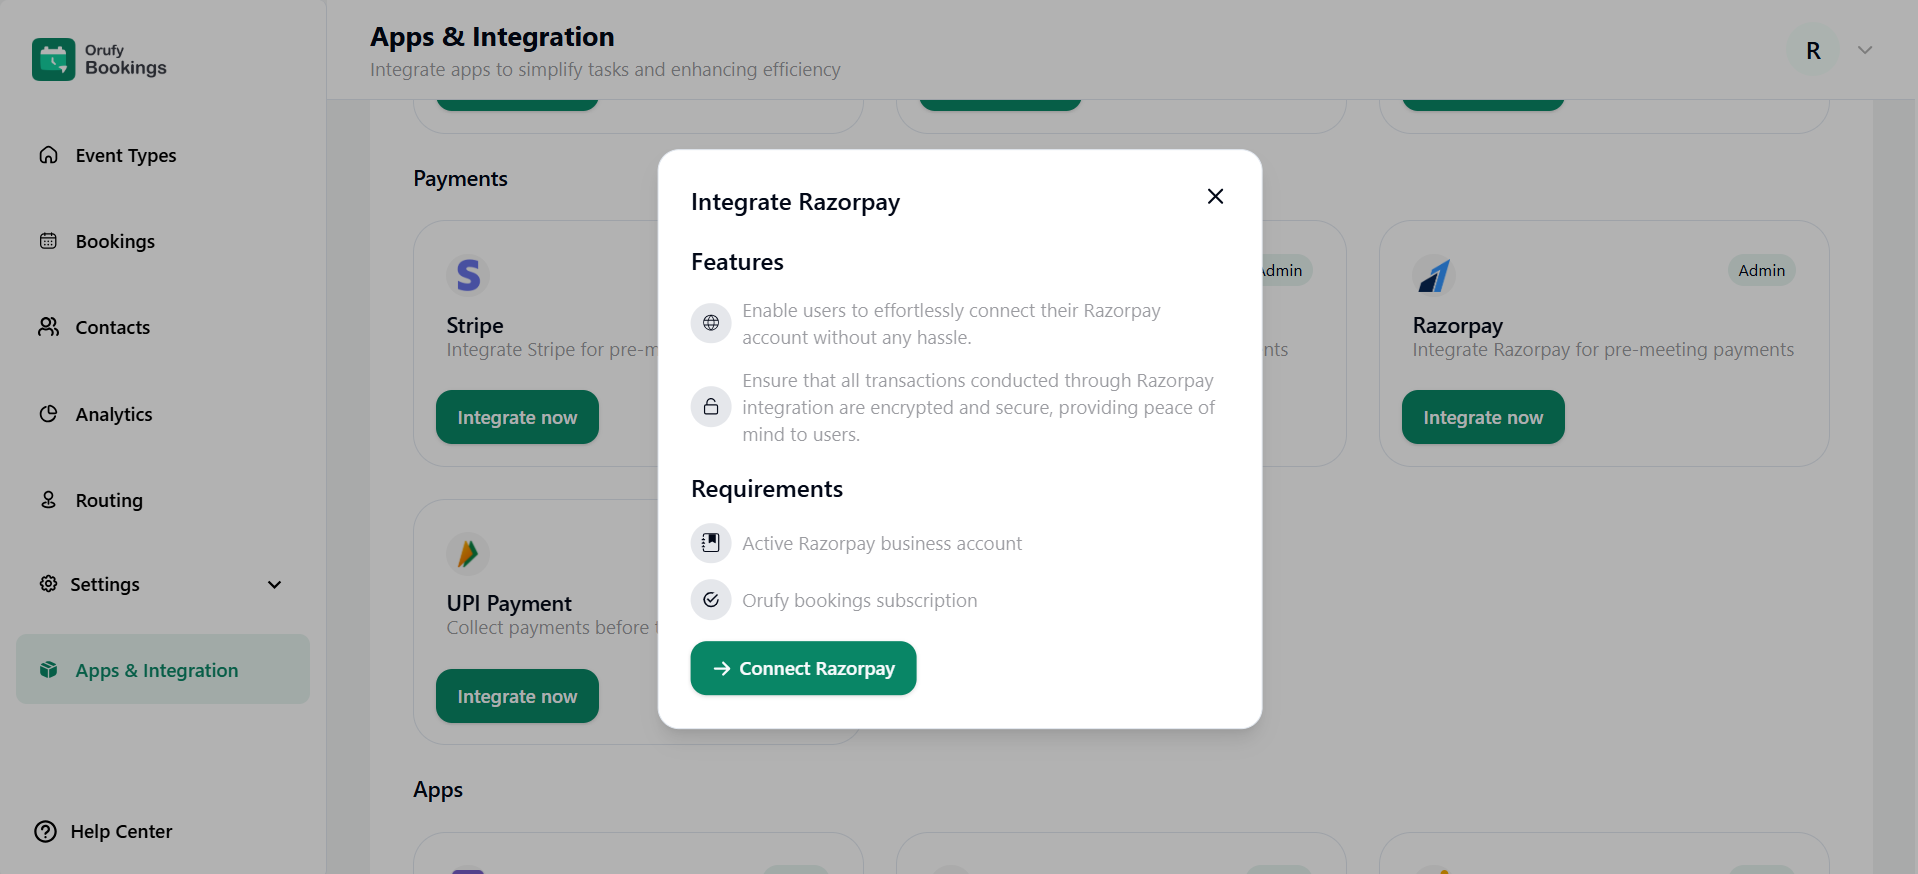
4. You will be redirected to the login page of Razorpay.
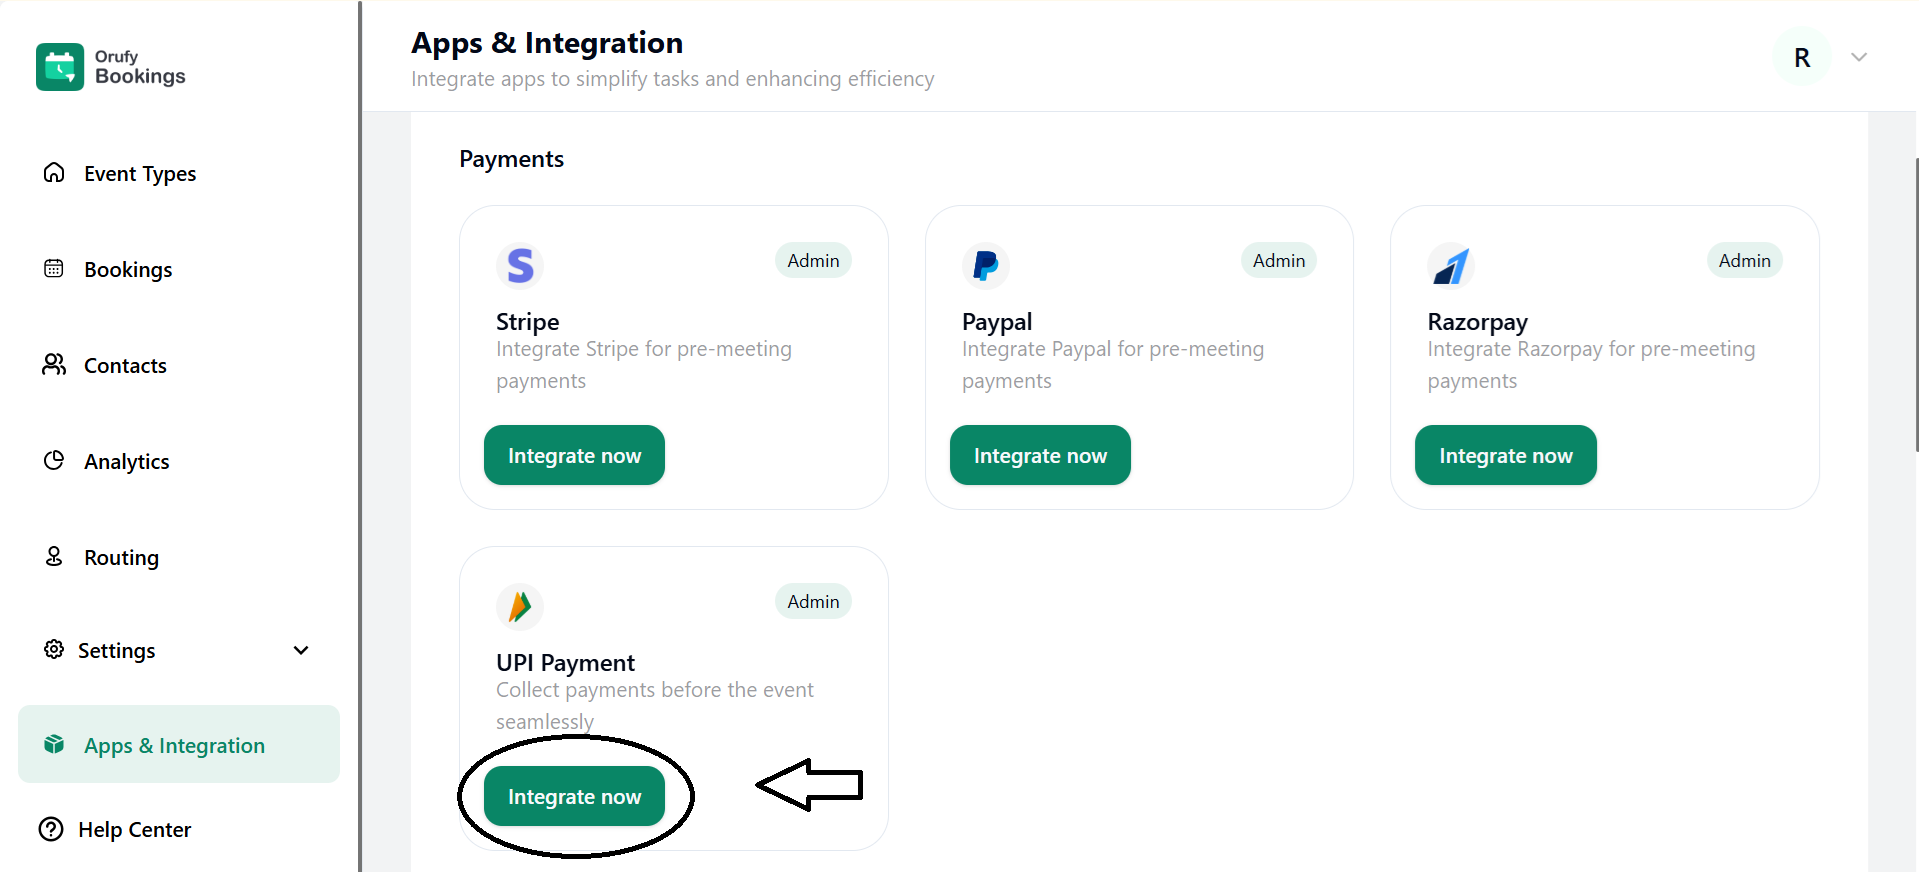
UPI payment
1. Click on Integrate Now.
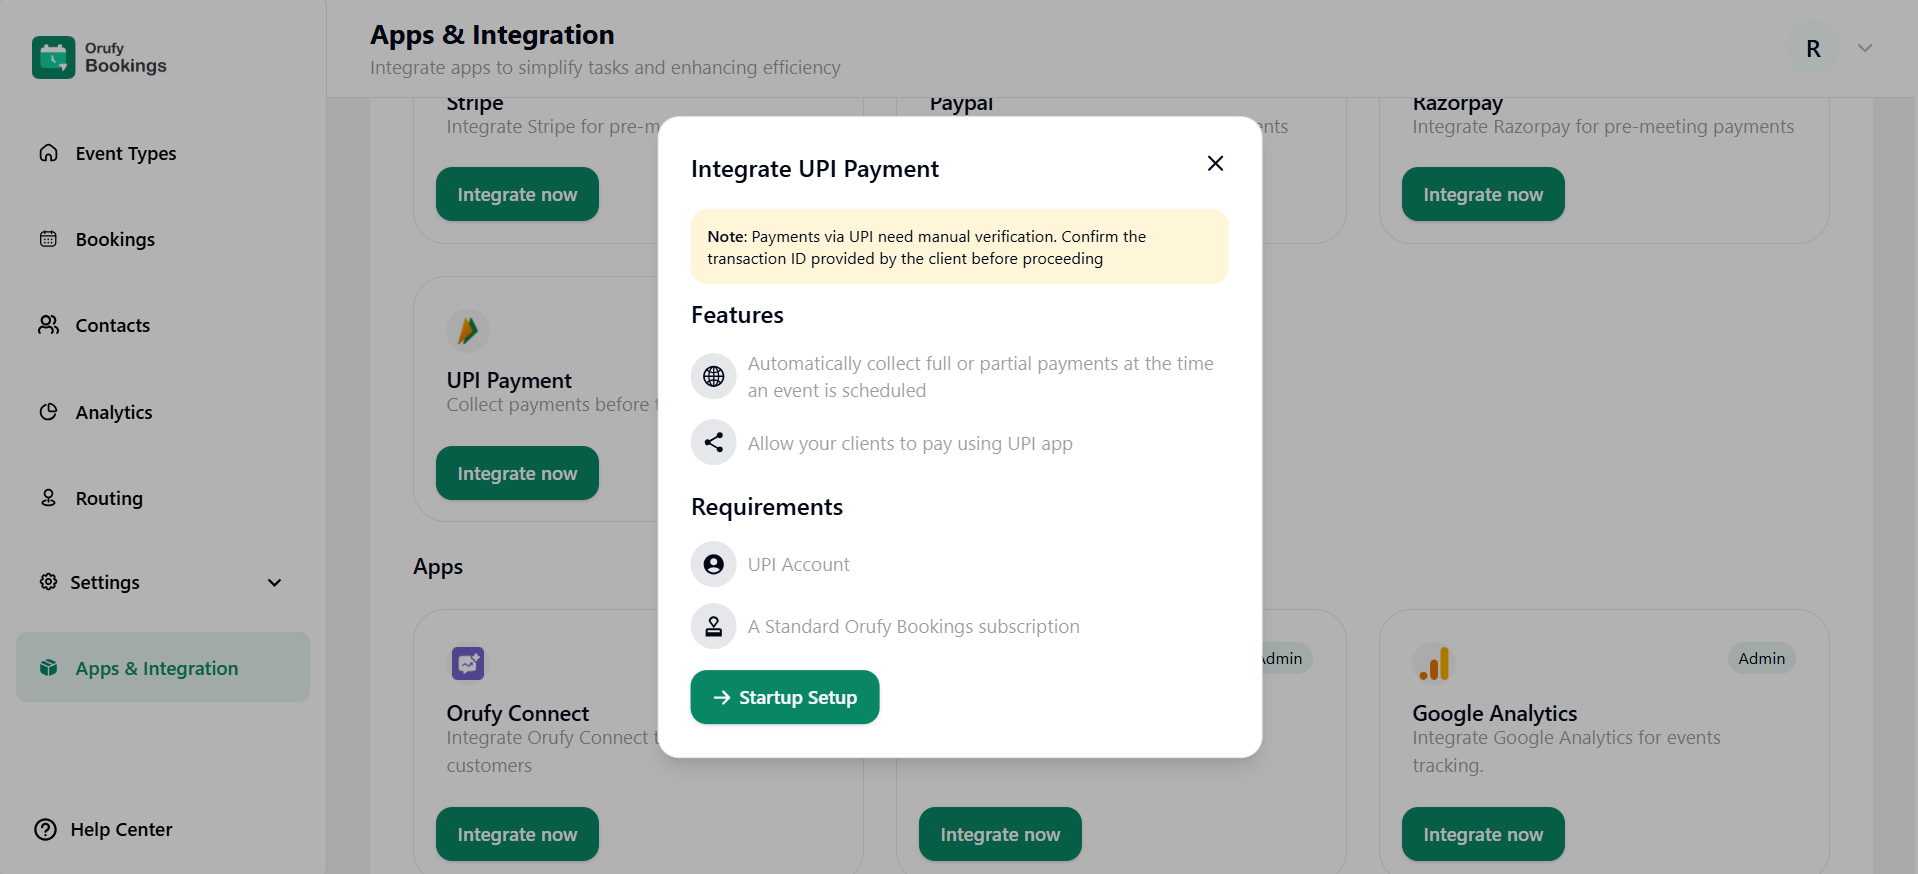
2. Read the features and requirements of UPI Payment.
3. Now, click on Startup Setup.
4. Enter the UPI ID.
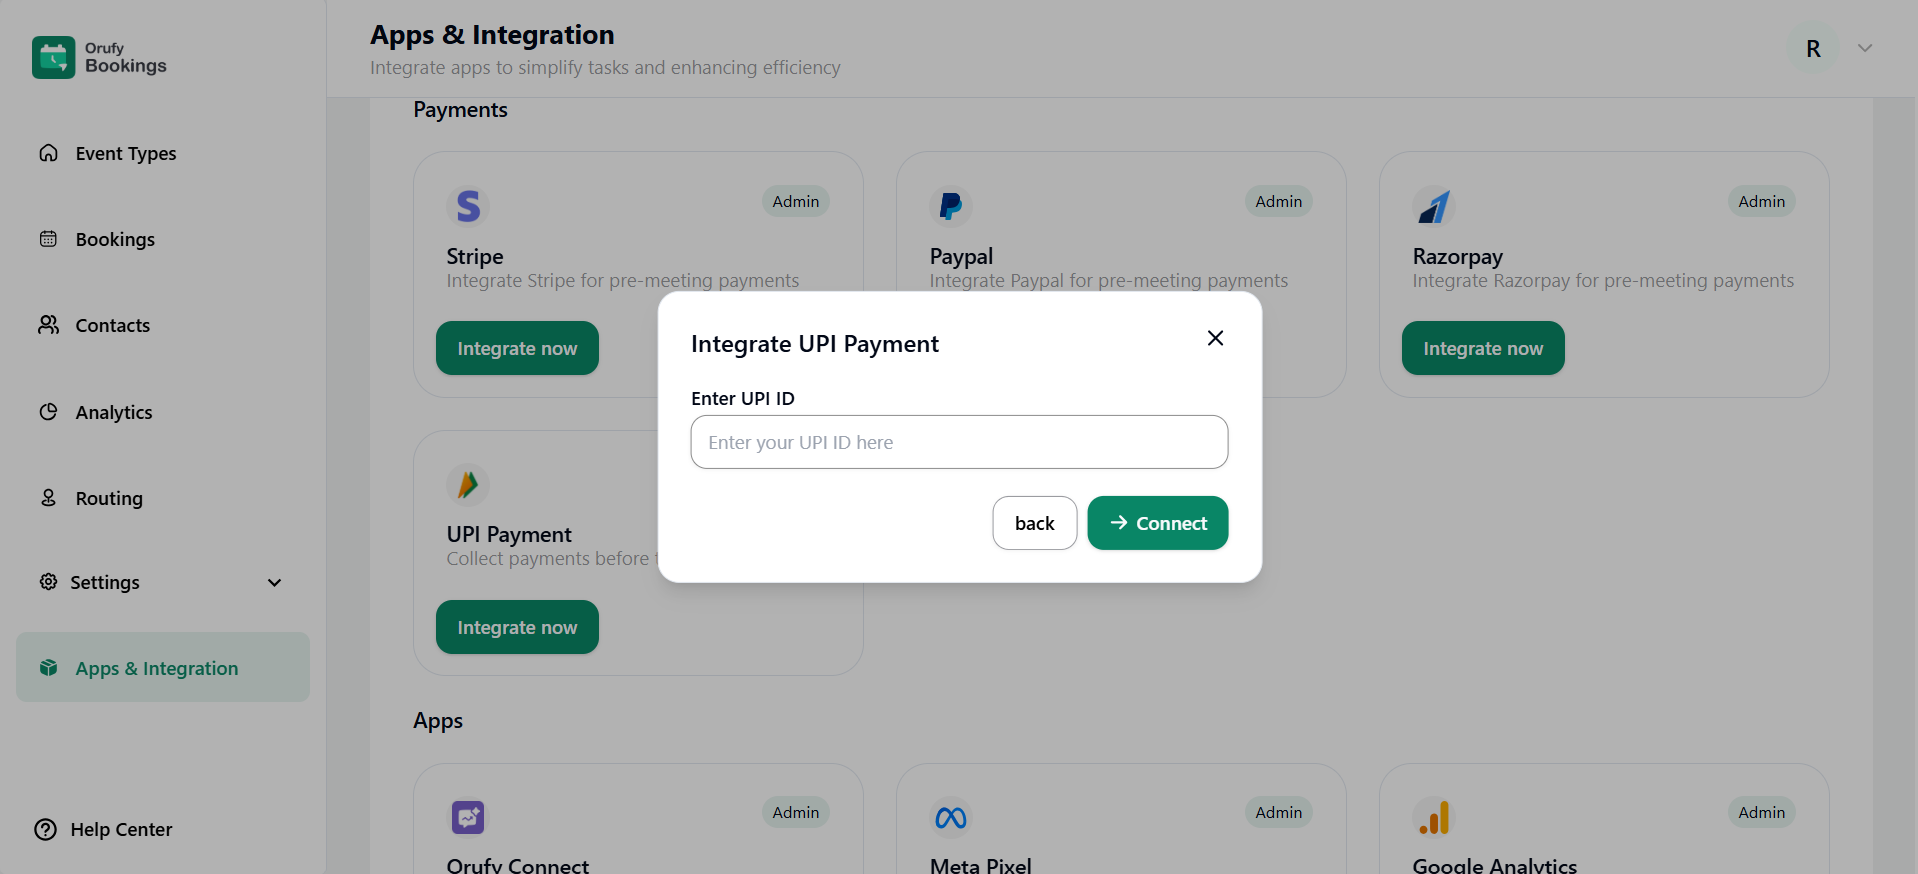
5. Click on Connect to integrate UPI payment successfully.

