
Webhook
A Webhook is a way for an application to provide other applications with real-time information. It is essentially a user-defined HTTP callback: a URL that is triggered when specific events occur. This allows your applications to communicate seamlessly and react instantly to changes, such as booking events, cancellations, or rescheduling.
- Click on “+ Create Webhook” to create your own Webhook.
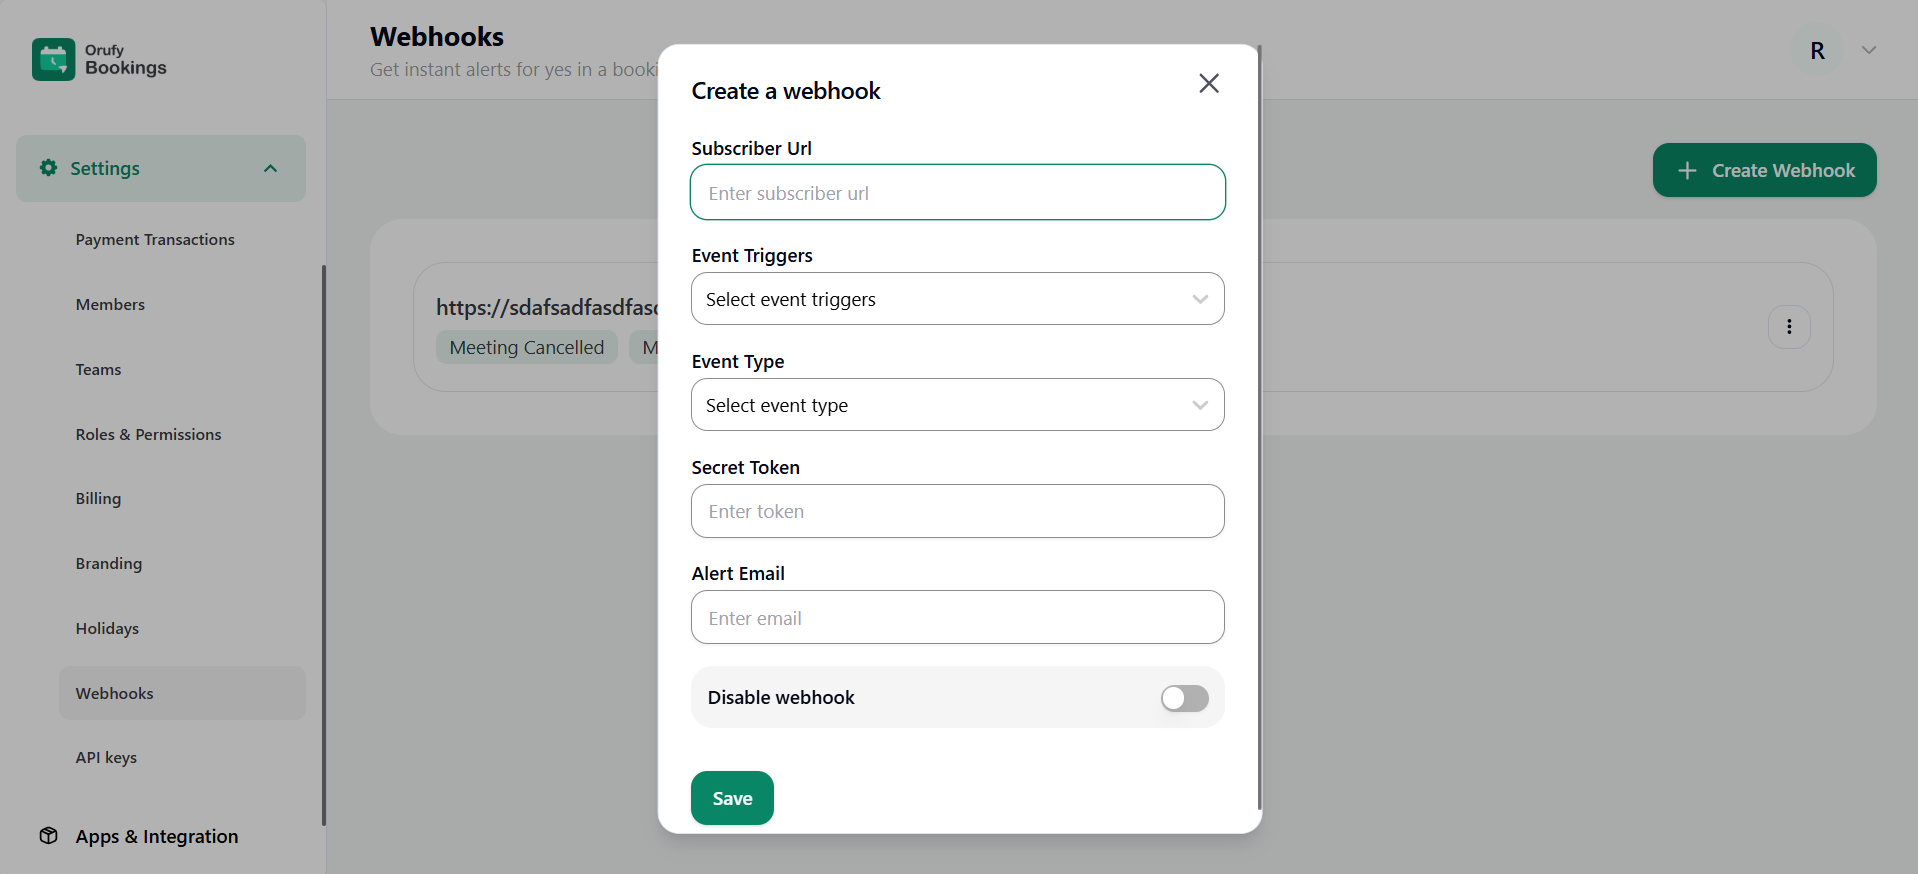
- Fill in the details to create your Webhook.
1. Subscribe URL: Enter the webhook URL of your server that will receive the webhook notification.
2. Event Triggers: Select the events to trigger the webhook notification.
- Meeting Booked: Triggers when a new meeting is booked.
- Meeting Cancelled: Tiggers when a meeting is cancelled.
- Meeting Rescheduled: Triggers when a meeting is rescheduled.
- Mask as no-show
3. Event Type: Select the event types that match the ones you have created.
4. Secret Token: Webhook authorisation URL.
5. Alert Email: When the wekhook is not working properly, we will be notified through an alert email.
6. Disable Webhook: If you disable the webhook, it will not trigger.
Click on *Save to save the settings.
- Go on More Options for advanced settings:
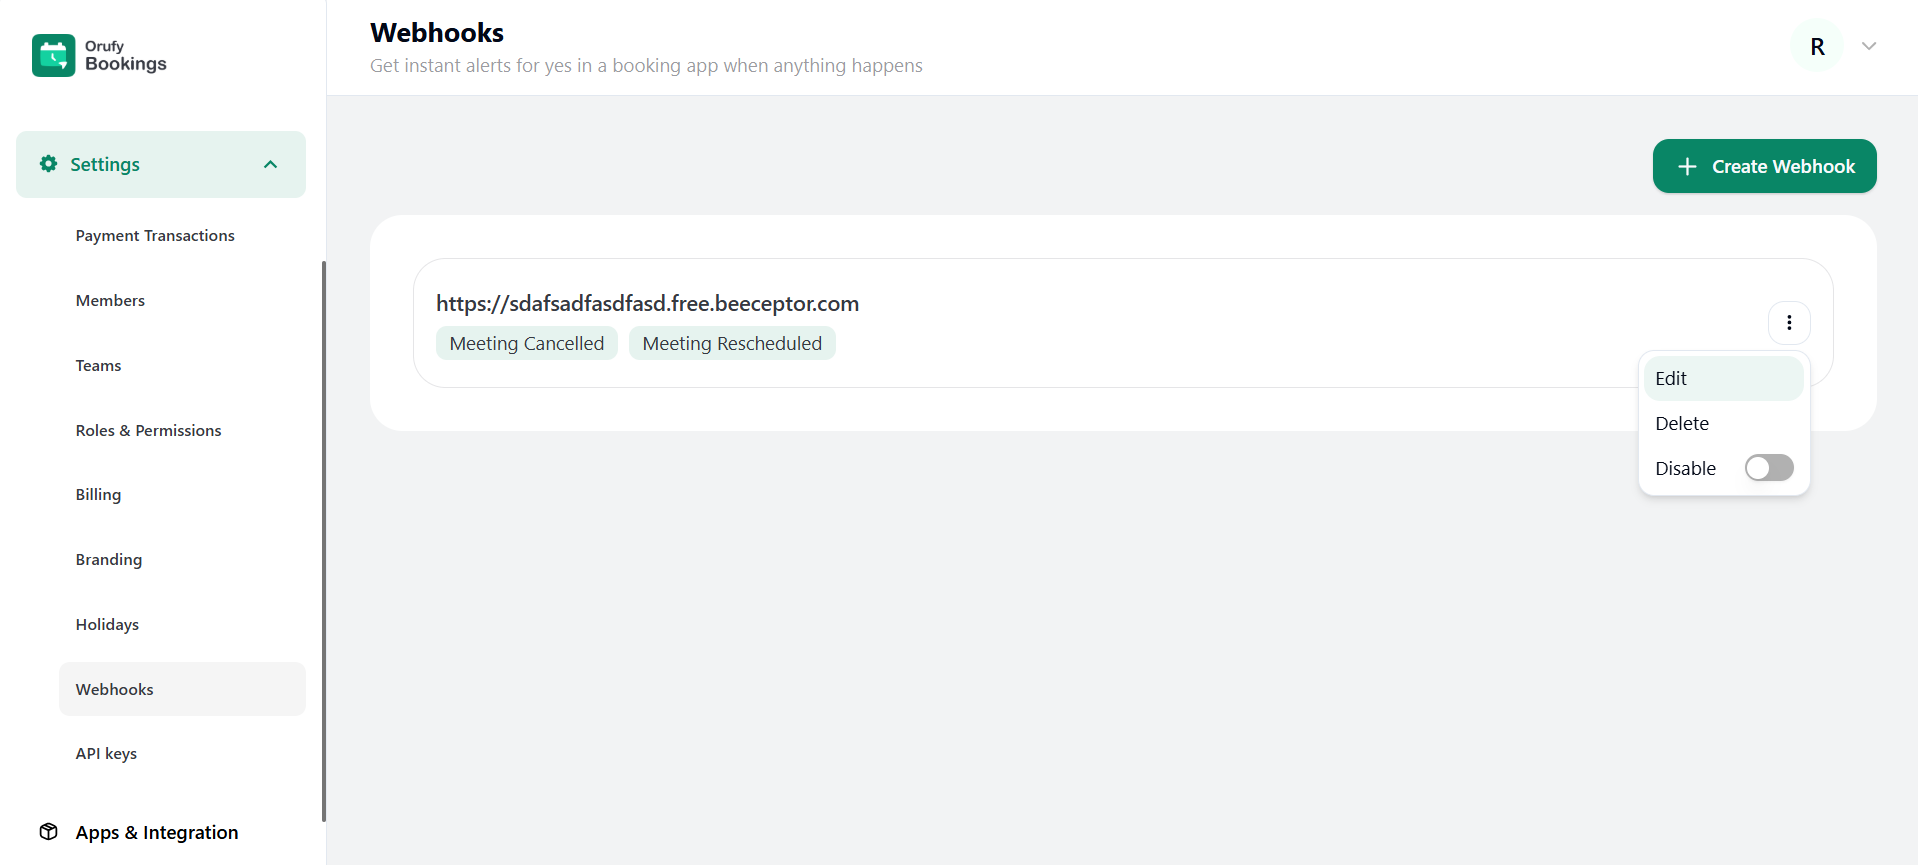
1. Edit: You can edit the webhook.
2. Delete: You can delete the webhook.
3. Disable: You can disable the webhook to not trigger.
Webhook Data Explanation
eventType Type of the event being logged. Example: 'BOOK' indicates a booking action event, 'CANCEL' indicates a cancellation action event, and 'RESCHEDULE' indicates a reschedule action event.
meetData Contains detailed information about the meeting or event.
_id Unique identifier for the meeting instance.
appId Identifier of the application under which the meeting was created.
eventId Unique identifier of the event.
time Scheduled start time of the event in ISO format (UTC).
agents An array of agent IDs assigned to host or manage the meeting.
attendeeIds List of IDs representing attendees for the meeting.
createByContact Boolean value indicating if the meeting was created directly by a contact.
duration Length of the event in minutes.
externalIds Array to store external reference IDs, useful for integrations.
followUp Holds follow-up action details (if any) related to the event.
markAsNoShow Once marked, your attendee will no longer receive any automated follow-ups related to this event.
maxAttendees The maximum number of attendees allowed in the meeting.
modeNote Additional notes about the meeting mode (e.g., online, offline).
modifiedEventName Stores a custom/edited name for the event if modified.
multipleBookingIdentifier An identifier to group multiple bookings if linked.
notes An array of notes or comments is attached to the meeting.
reminders An array of reminder configurations for the meeting.
status Current status of the event (e.g., ACTIVE, CANCELLED).
type Specifies the format of the event. Example: 'SOLO', 'GROUP', 'ROUNDROBIN', 'COLLECTIVE'.
calendarEvent Reference to the linked calendar event, if synced with an external calendar.
agentsDetails Contains detailed profile information of assigned agents/hosts.
attendees Contains detailed information about attendees of the meeting.
attendees[].status Remains 'ACTIVE' since attendees are still part of the rescheduled meeting.
attendees[].cancellation Empty object, since this is a reschedule, not a cancellation.
attendees[].reschedule Empty object reserved for future attendee-specific reschedule metadata.
attendees[].payment In case of payment booking: _id → Unique identifier for the payment record.
appId → The application ID under which the payment was processed.
amount → The amount charged for the booking.
currencyCode → The currency in which the payment was made (e.g., USD, INR).
method → Payment gateway or method used (e.g., STRIPE, PAYPAL).
status → Current state of the payment (e.g., PENDING, DONE, FAILED).
billingName → Name of the person making the payment.
billingAddress → Address associated with the payment method.
paymentTime → Timestamp when the payment was completed.
externalPaymentId → Reference ID from the payment provider (e.g., Stripe Payment Intent ID).
emailId → Email used for payment confirmation/invoice.
note → Any additional notes provided during payment.
meetCreatedAt → Timestamp when the meeting was created after payment.
amountOnDuration → A mapping of duration vs. amount charged (e.g., 30 minutes → $1).
orderId → Internal order identifier generated for tracking.
createdAt / updatedAt → System timestamps for record creation and updates.
eventName The name or title of the event.
eventSlug A URL-friendly version of the event name, typically used for sharing.
cancellation Object capturing cancellation details: timestamp, reason, and who cancelled.
prevMeetId References the ID of the previous meeting in case of rescheduling.
reschedule Object capturing reschedule details: timestamp, reason, who rescheduled, and new meeting ID.

