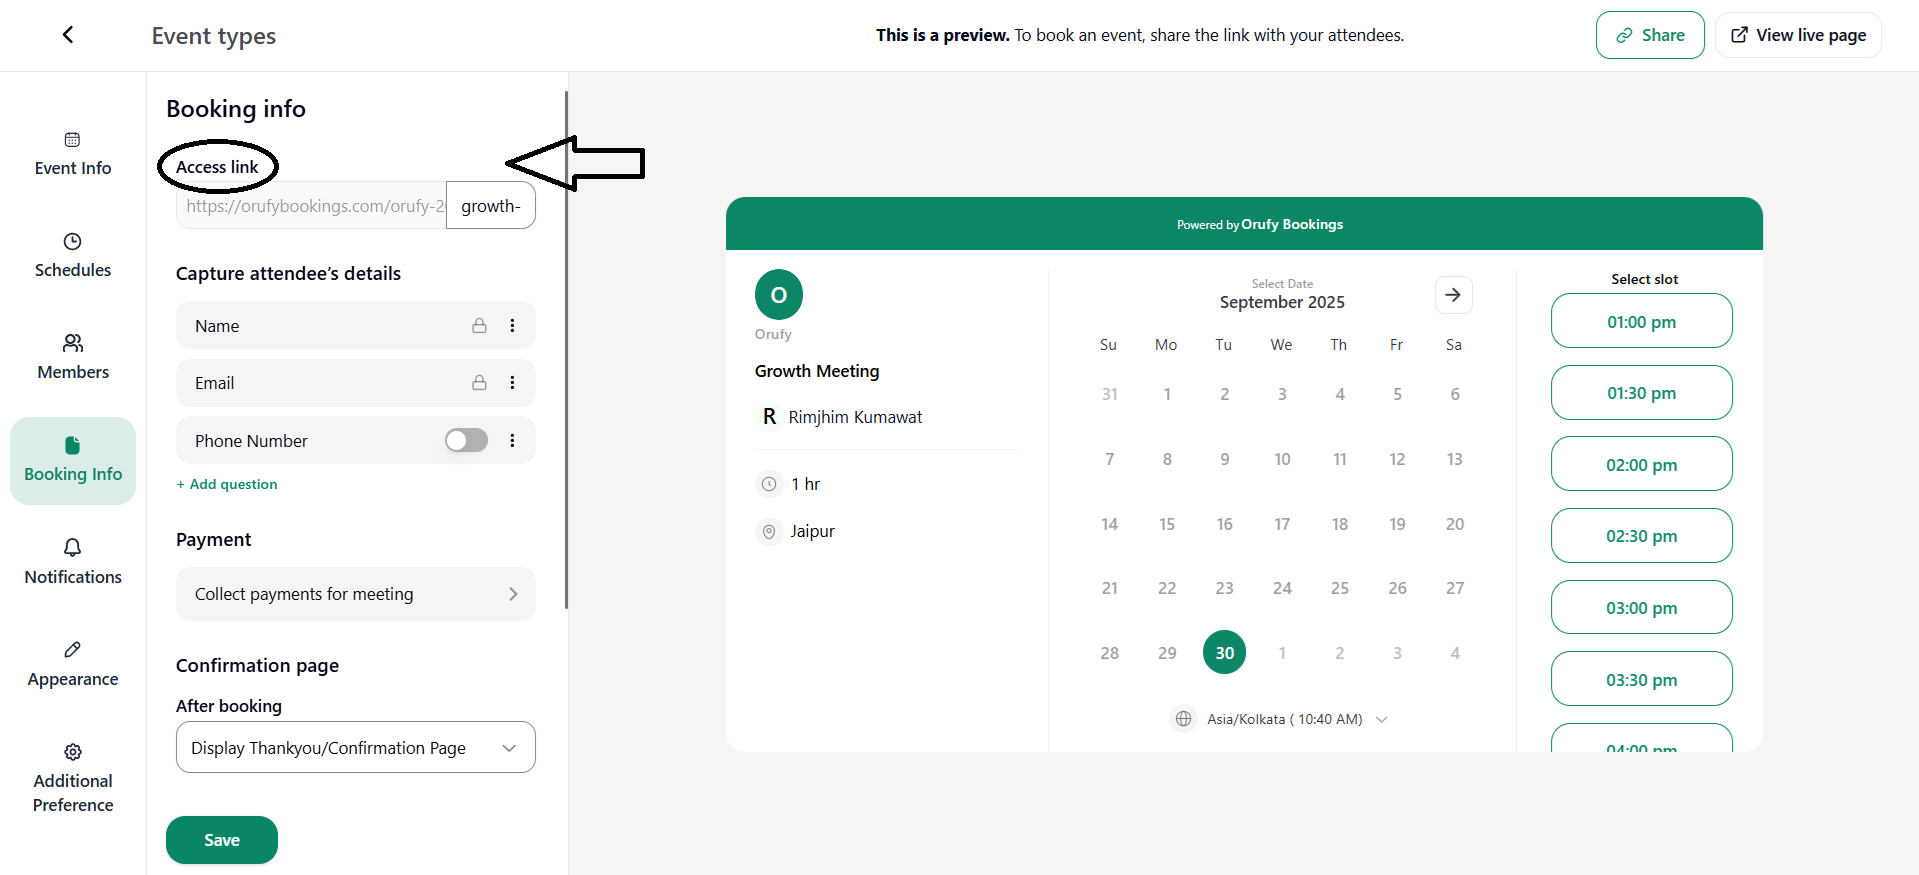
Booking Info allows you to collect all attendee details such as name, email, and phone number. All the details of the attendee at one place.
1. Access Link: The link to access the event to book a meeting.
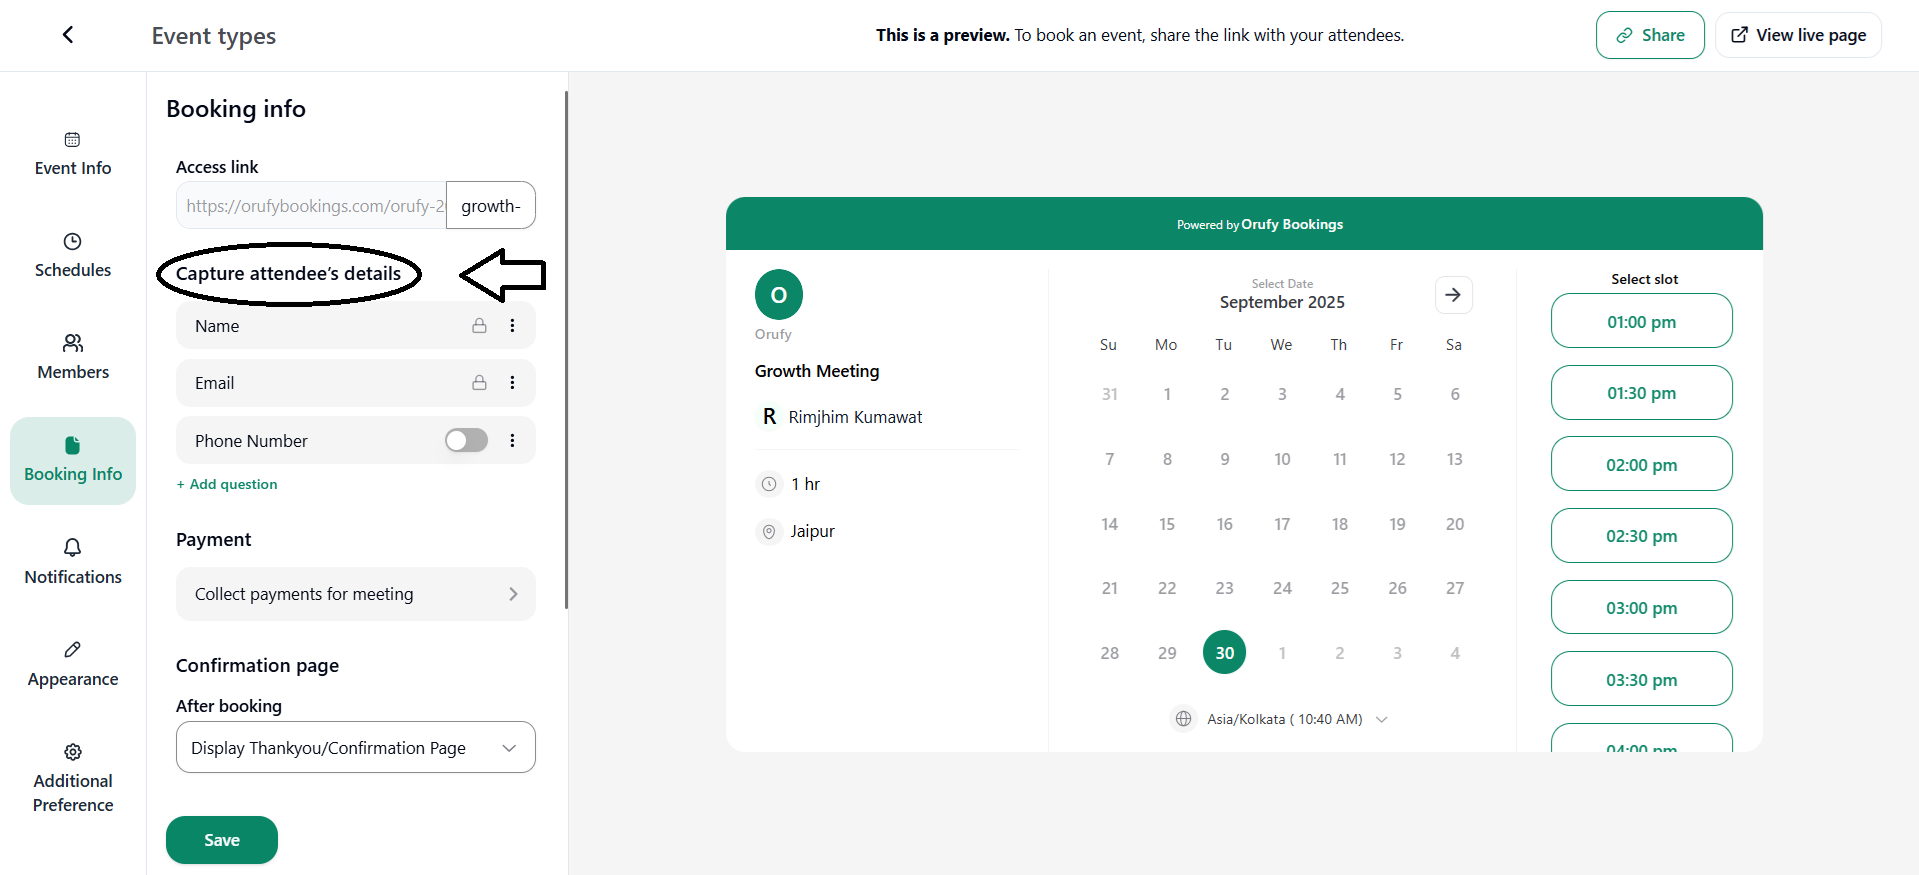
2. Capture Attendee’s Details: You can get all the details of the attendee before scheduling a meeting. Name, Email, and Phone Number are the default details you cannot change, but you can edit them.
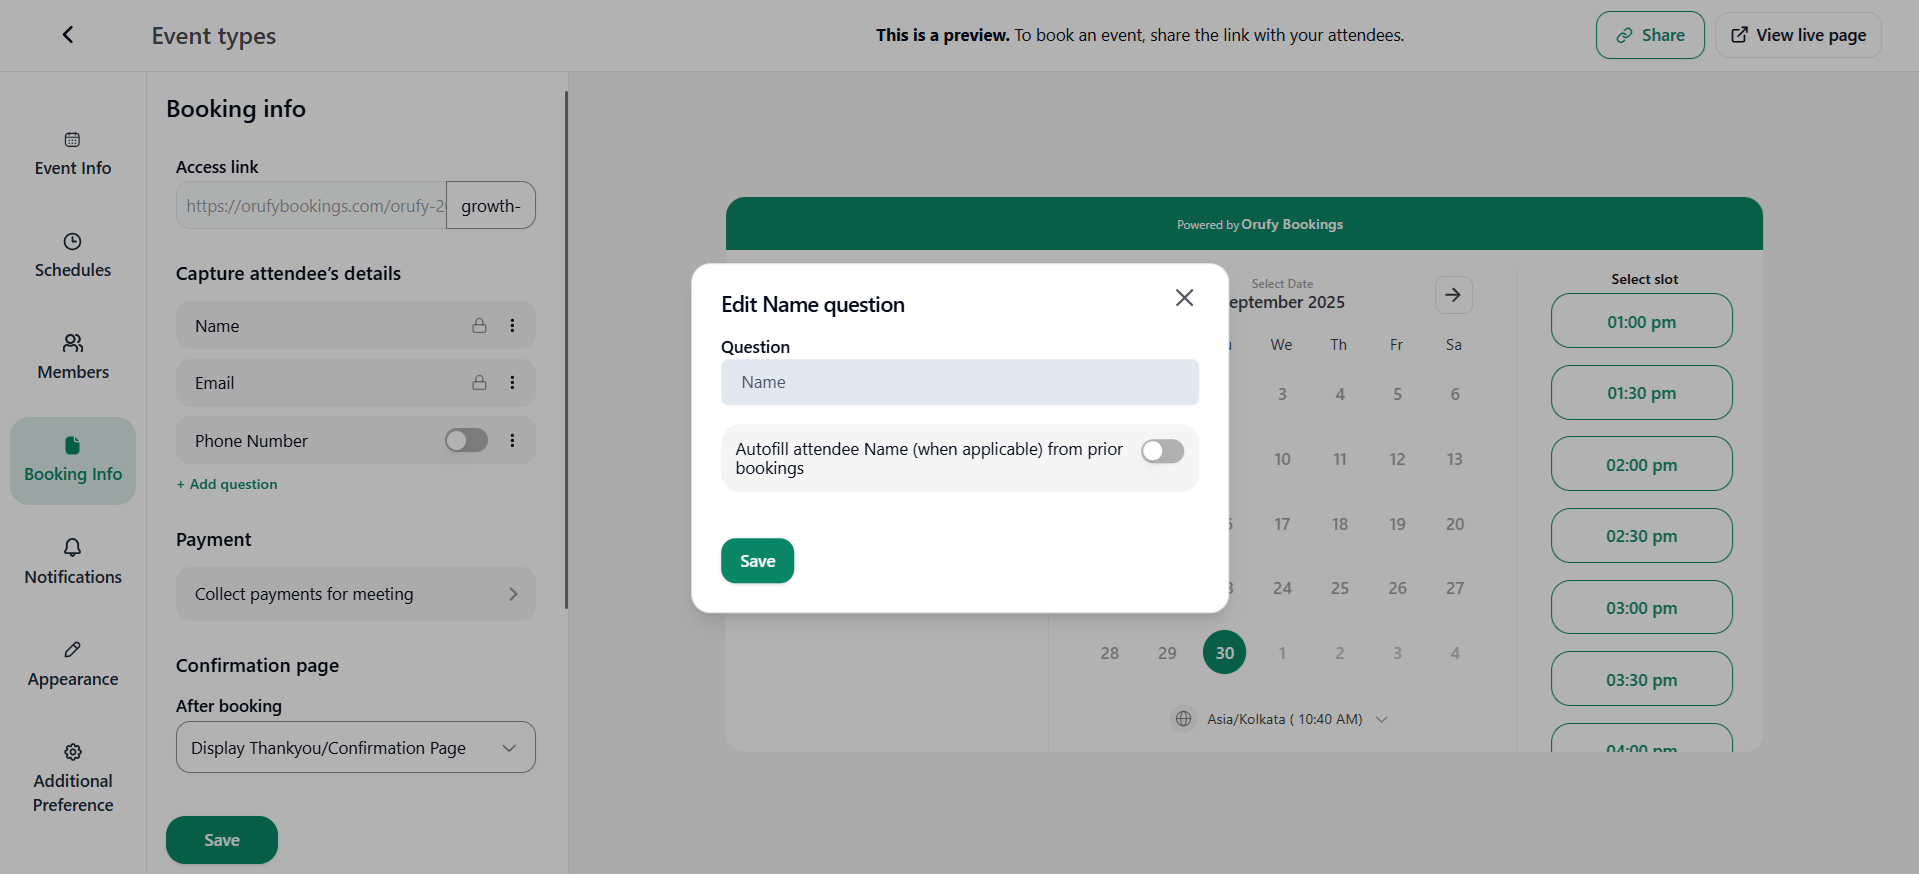
- Name: The attendee needs to fill the name section; it is the default setting.
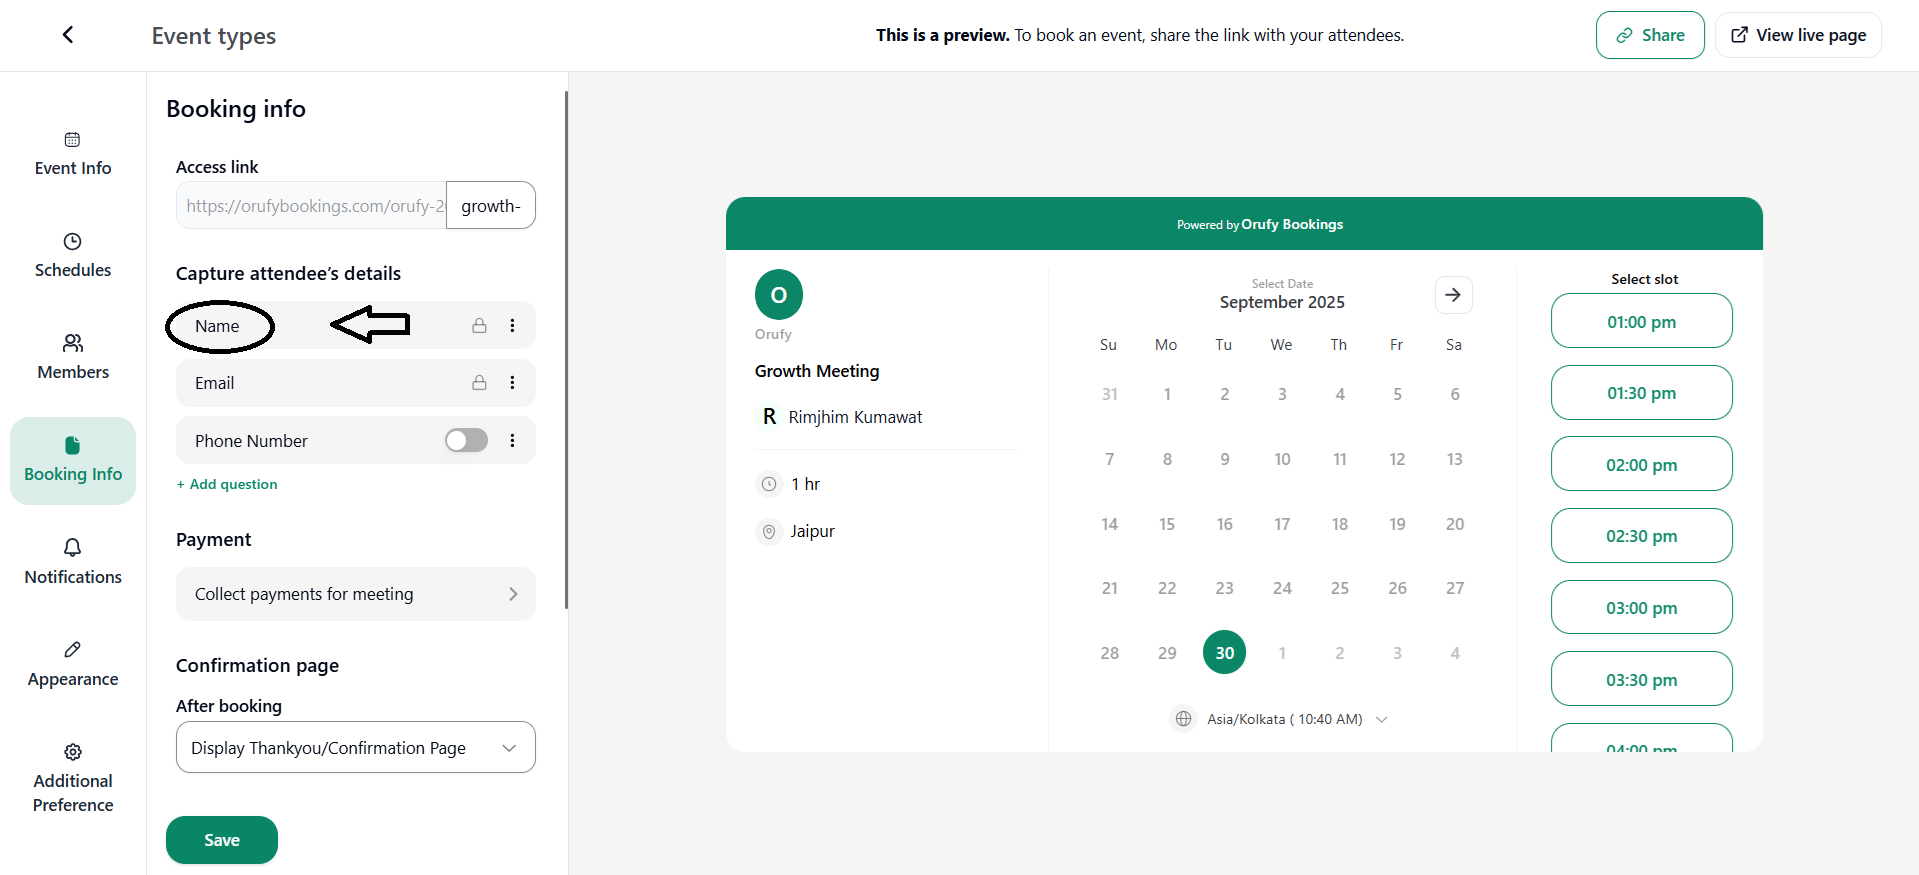
Go on the More Options to edit the name section. Autofill attendee Name (when applicable) from prior bookings, enable to automatically fill the attendee name from past bookings and disable to make the attendee enter the name each time.
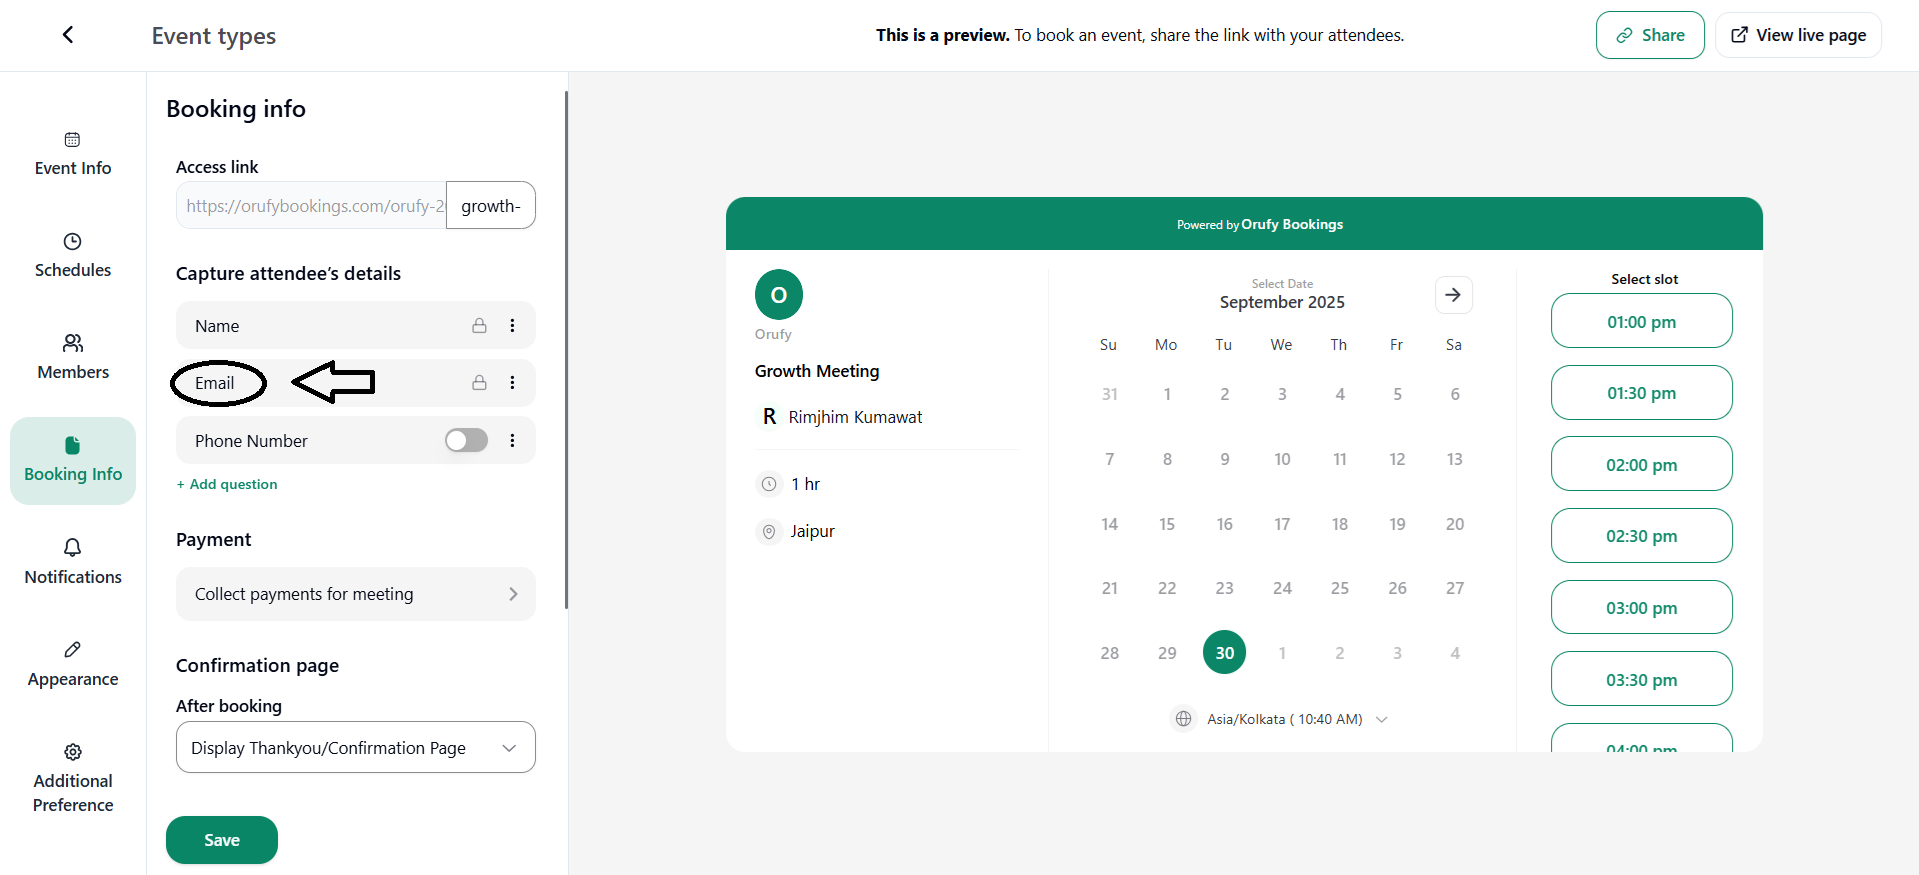
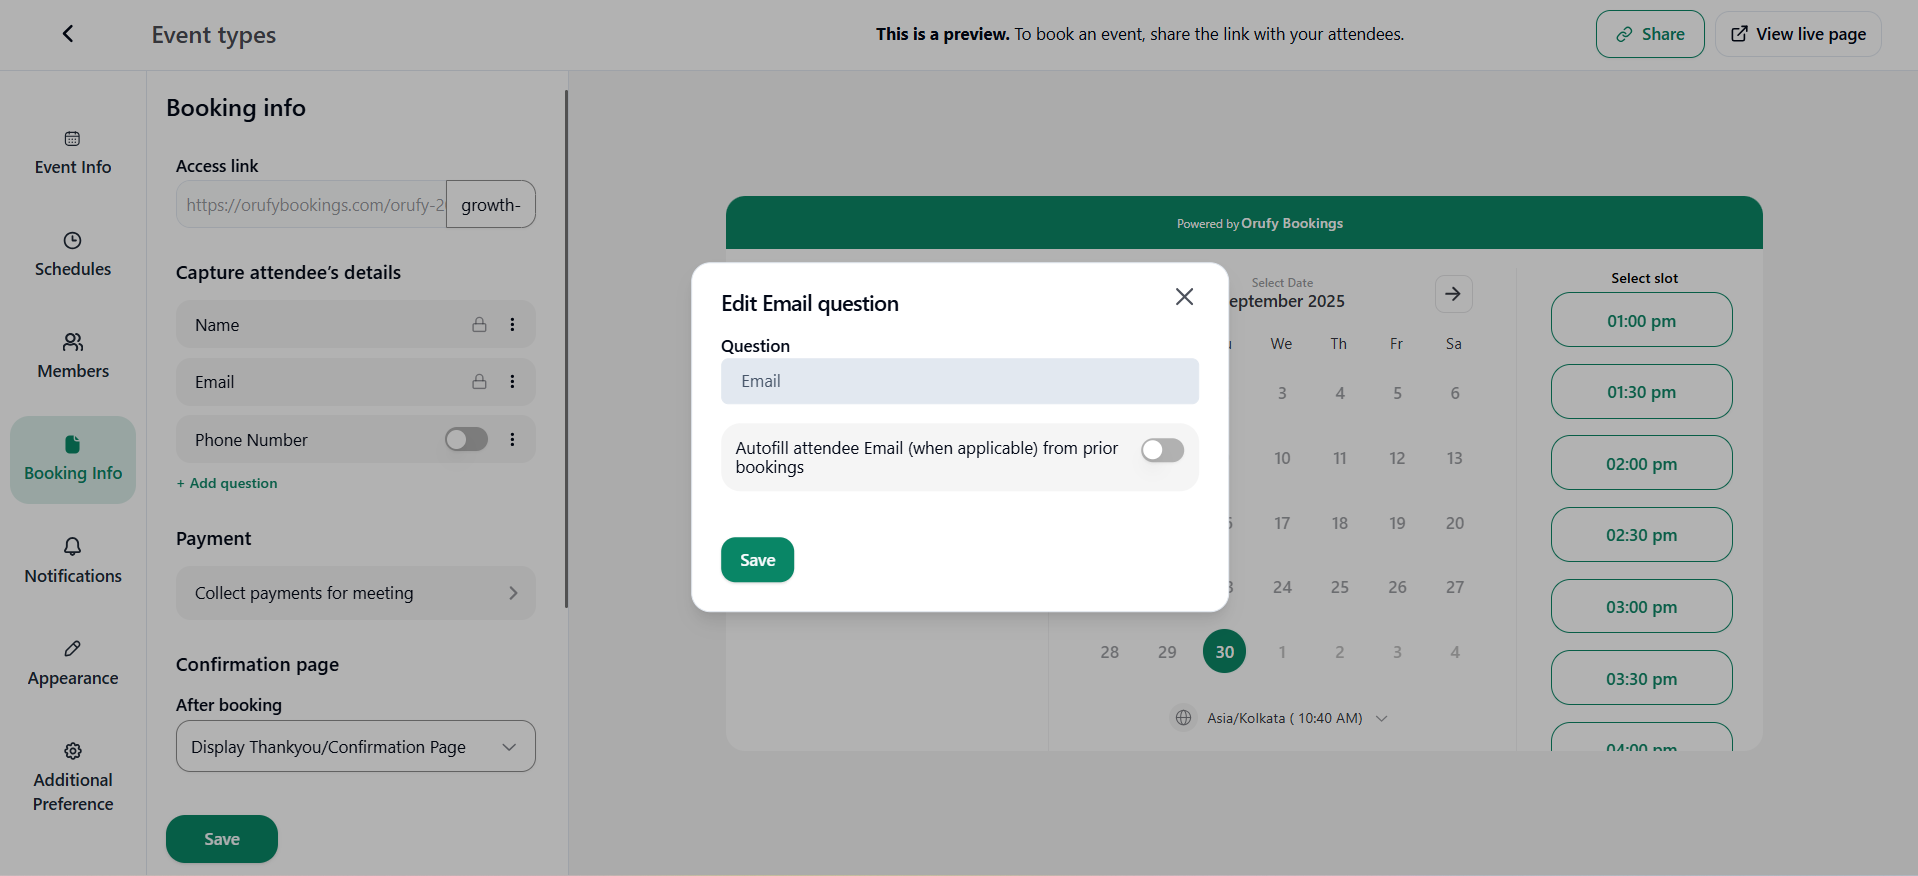
- Email: This field is also default. The attendee has to fill the email address to go further in the process.
Go on the More Options to edit the email section. Autofill attendee Email (when applicable) from prior bookings, enable to automatically fill the attendee email from past bookings and disable to make the attendee enter the email each time.
- Phone Number: Enter the phone number in this field. It is also default filed.
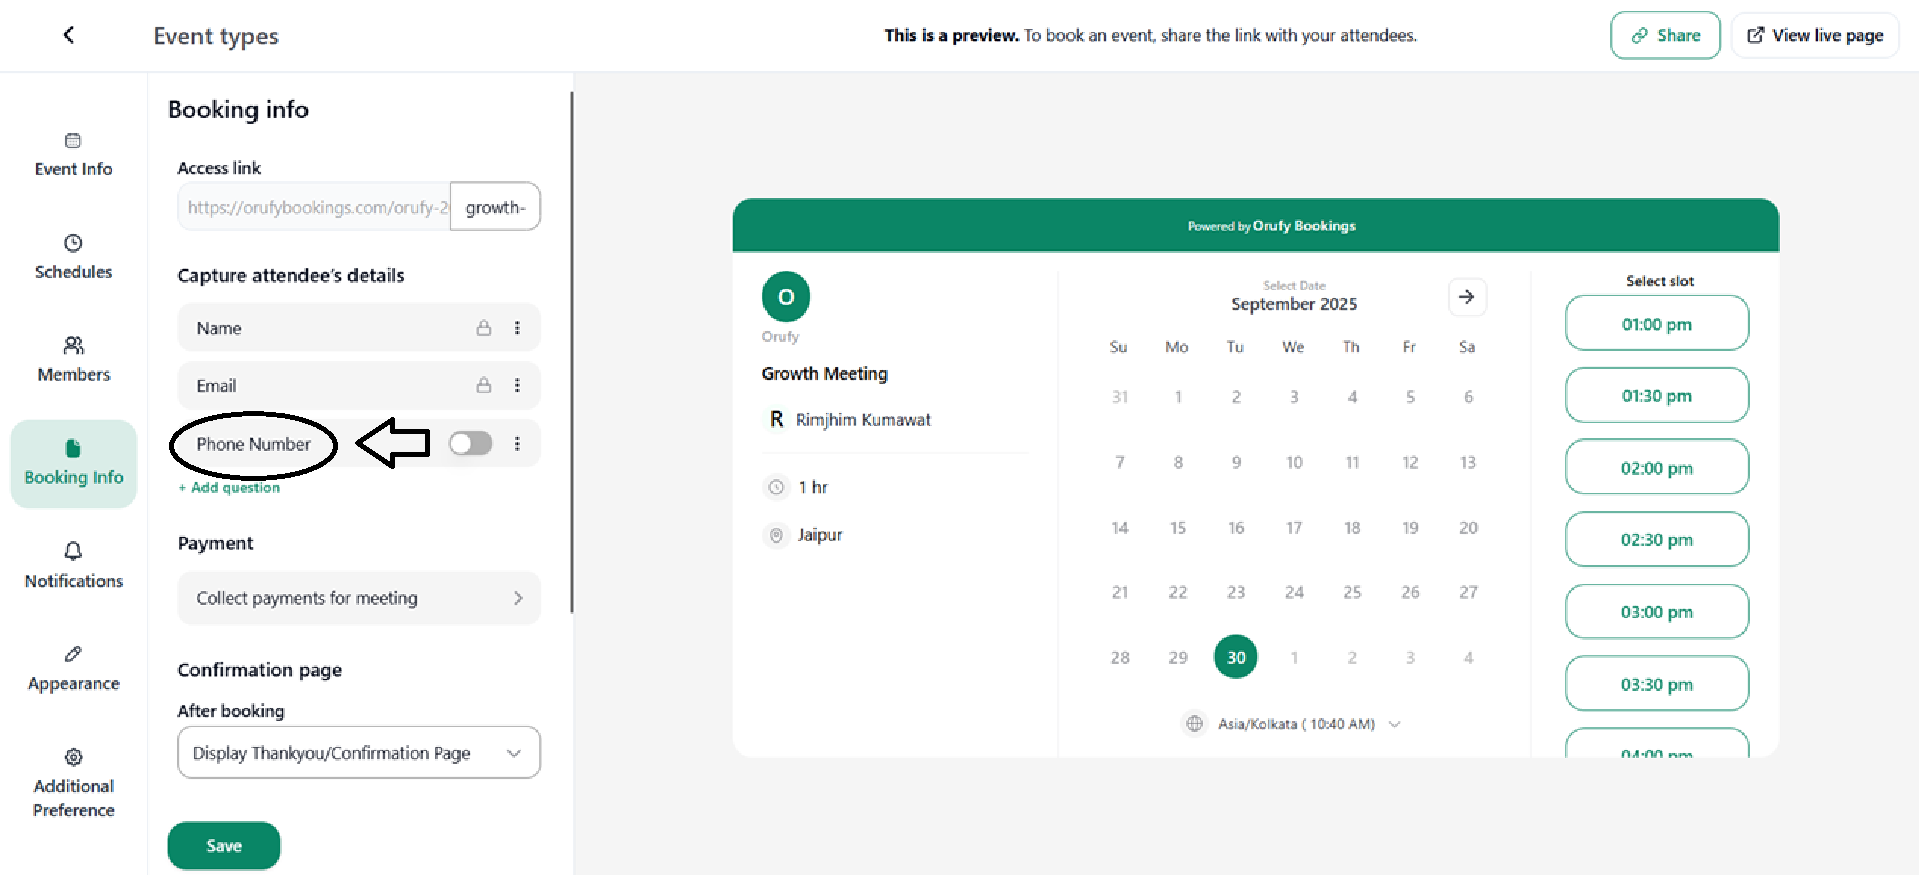
Go on the More Options to edit the phone number field. You can toggle this field as enable or disable to appear on the main booking page when the attendee is filling in the information.

- You can add a question from the “+ Add question” to get any additional information. For example, Added a field of Birthday.
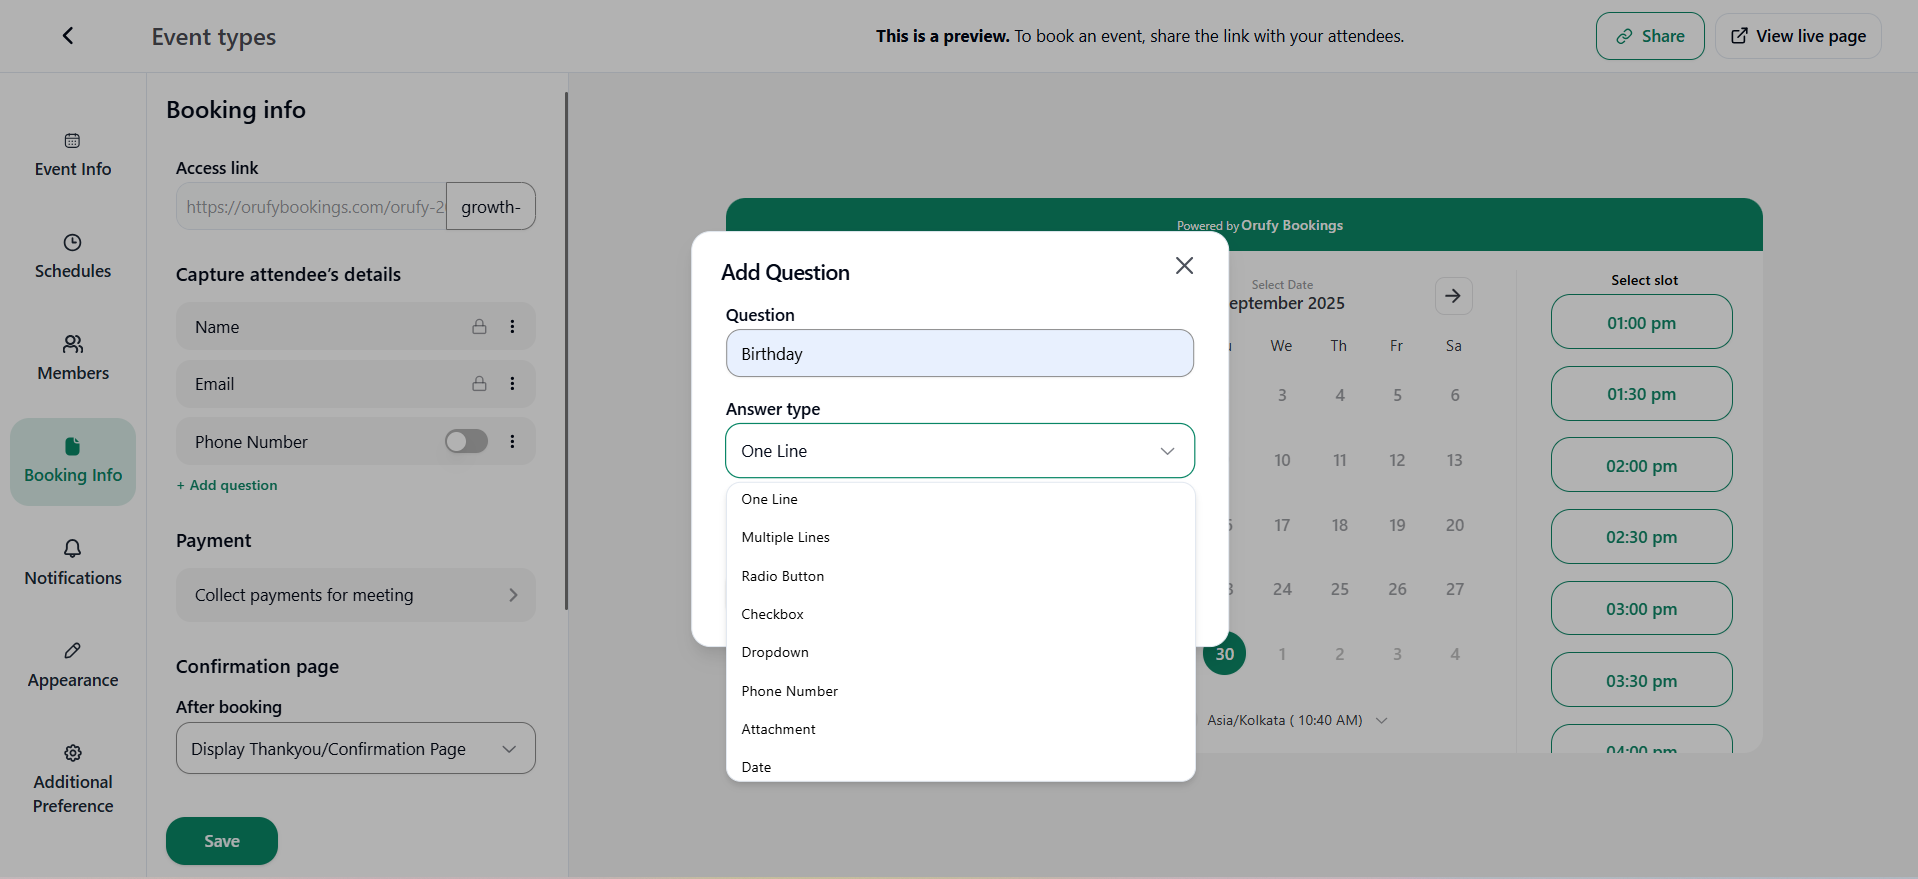
1. Question: Add a question, What information do you want from the attendee. For example., if i added birthday as a question.
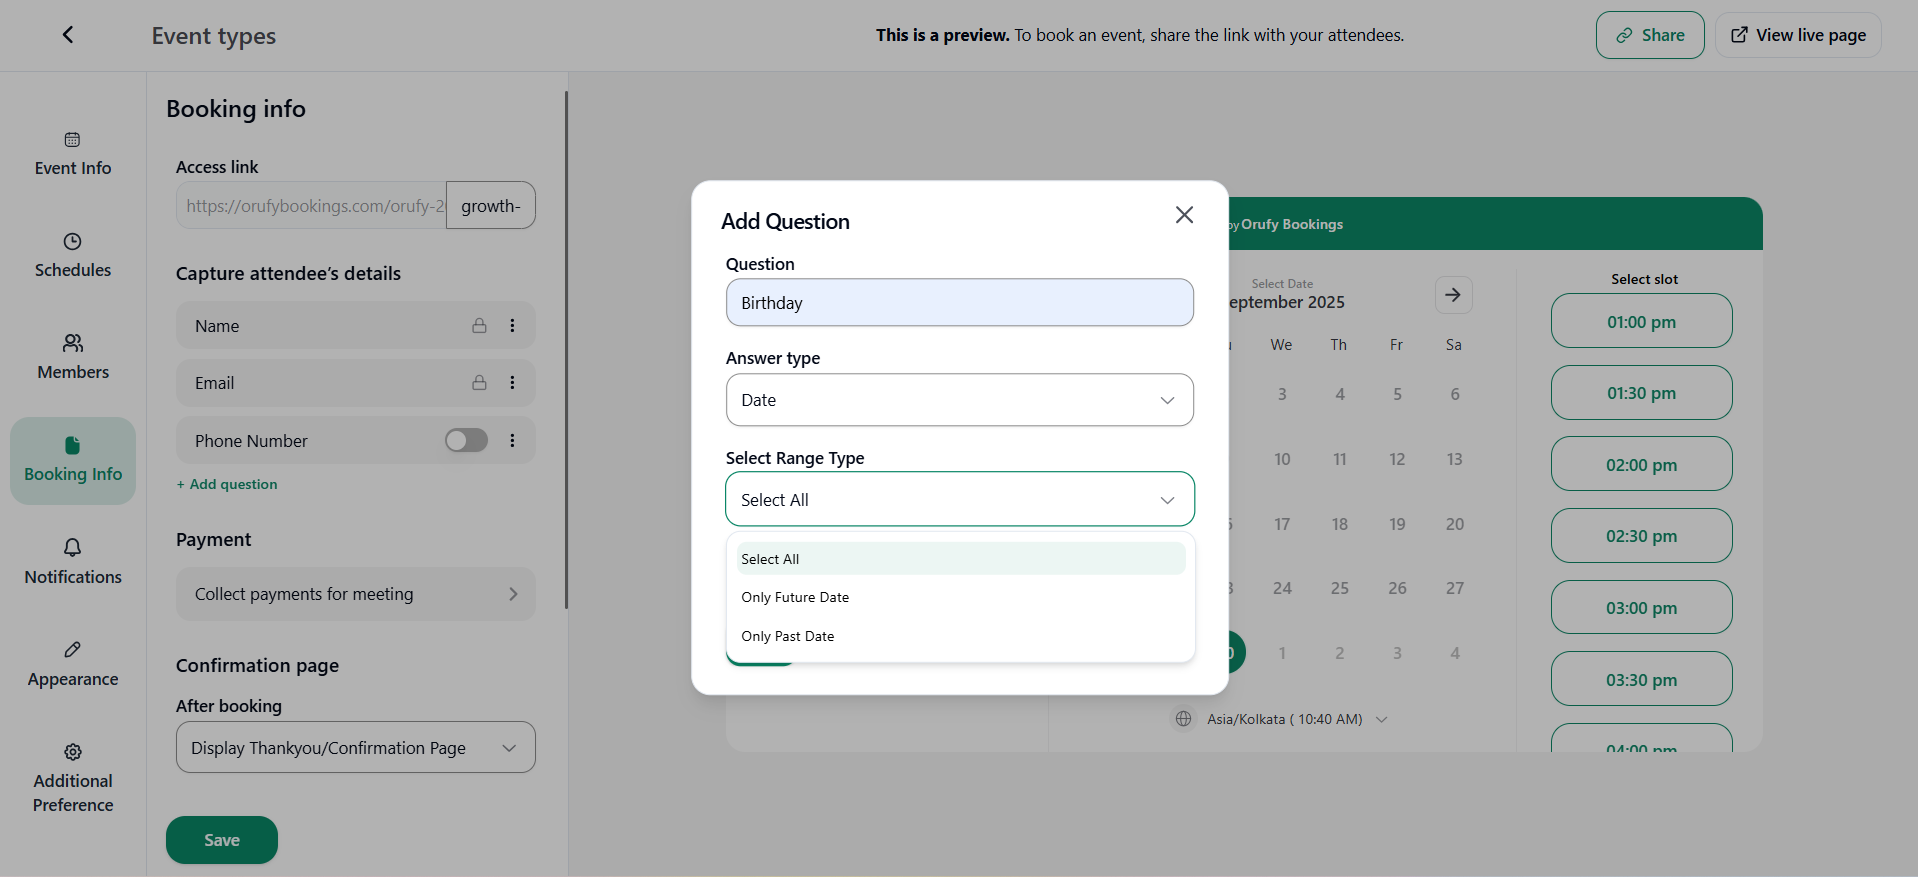
2. Answer Type: The format in which the question is to be answered, such as date, radio button, one line and many more. Than answer type of the question should be in date format.
3. Select range Type: What date, future or past date. Here I have selected the past date according to my question.
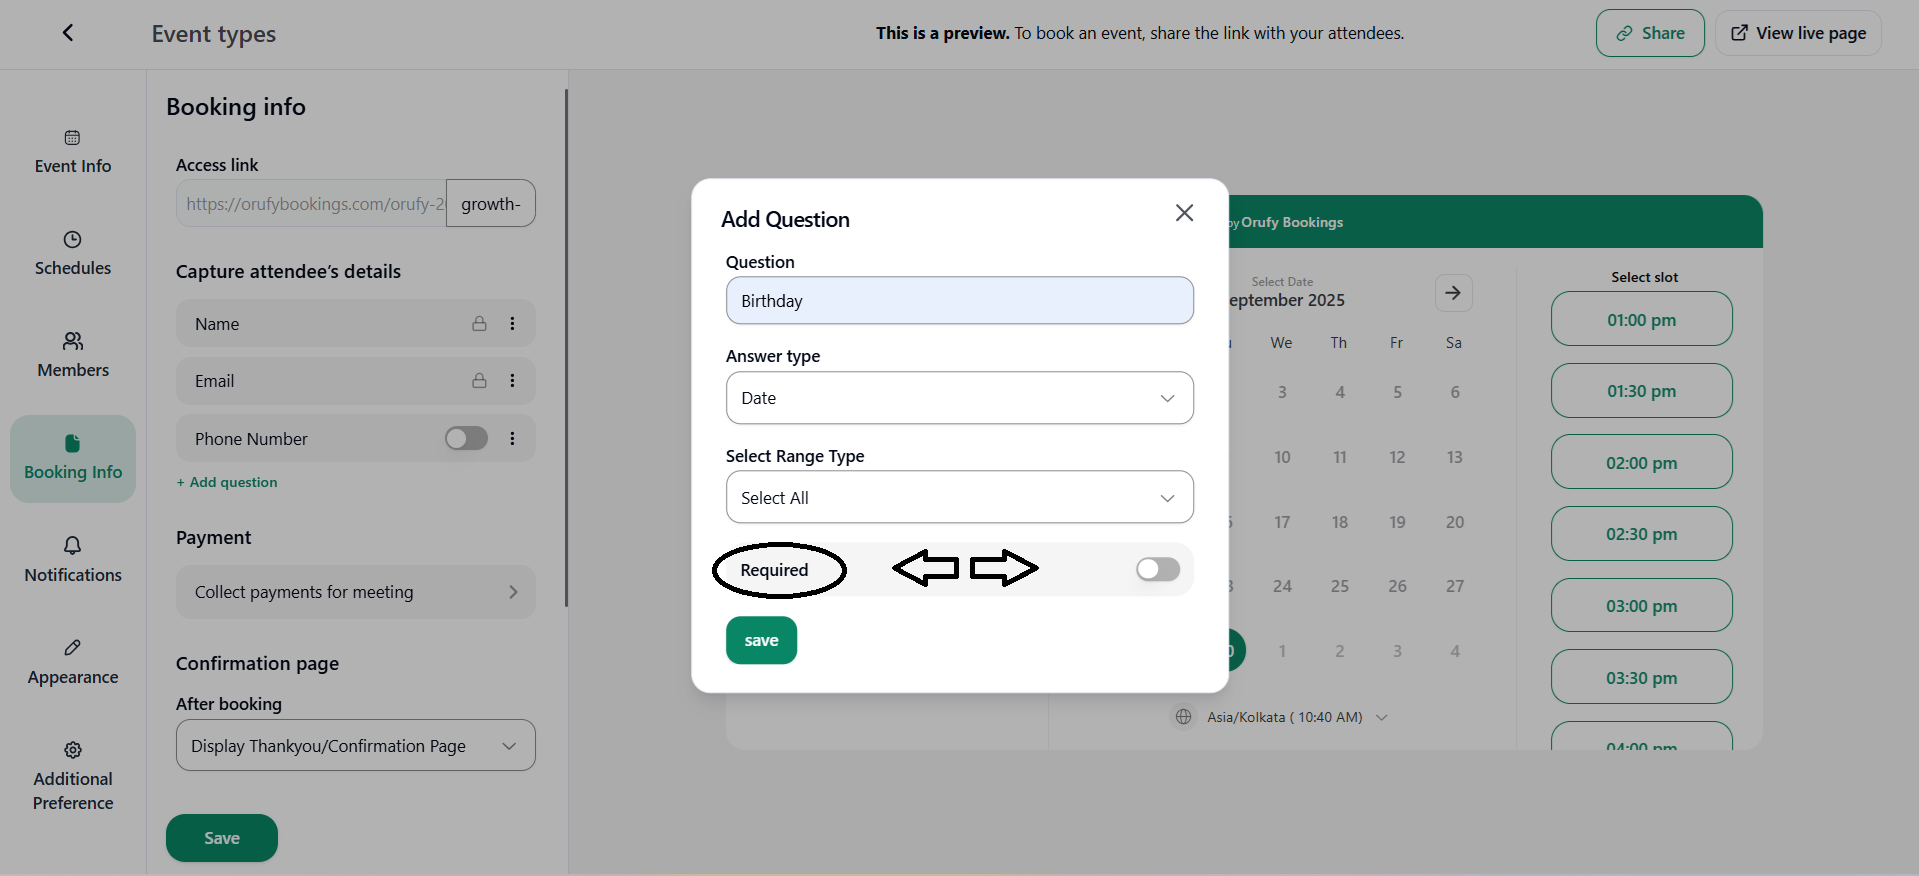
4. Required: Show this field on the main bookings page or not. You can toggle this field as enabled or disabled, depending on whether you want to show it or not.
3. Location Options: This refers to the locations where the meeting will be held. The host has given two locations for this meeting, which can be selected by the attendees as per their convenience.
4. Payment: Any payments collected for the meeting. You can enable or disable this feature as per your meeting for an event. You can integrate multiple payment methods such as Stripe, PayPal, Razorpay, and UPI Payment (these integrations are supported by Orufy Bookings).
-
Payment Methods: Select the payment mode for attendees to make payment for an event.
-
Default Pricing: Set the pricing and currency for the event that the attendees will be charged while making a booking.
-
Payment Terms: Add notes or conditions related to payment, such as refund policies and transaction rules or processes.
-
Allow Pay Later: If you toggle this option to enabled, the attendees book the event and complete the payment process later.
-
High Price: If you toggle this option to enabled, the price of the event is hidden from the booking page. It later sends the price separately.
-
Disable Per-Slot Pricing: This option will only be displayed in case you enabled the option of Allow attendee to select multiple slots.
If you enable this option, the booking for the event is charged at one fixed price even when multiple slots are booked. If you disable this option, the price will be calculated per slot for the event booked
5. Confirmation page: After the booking confirmation, you can either display a Thank You page and Confirmation Page or Redirect the attendee to an external link.
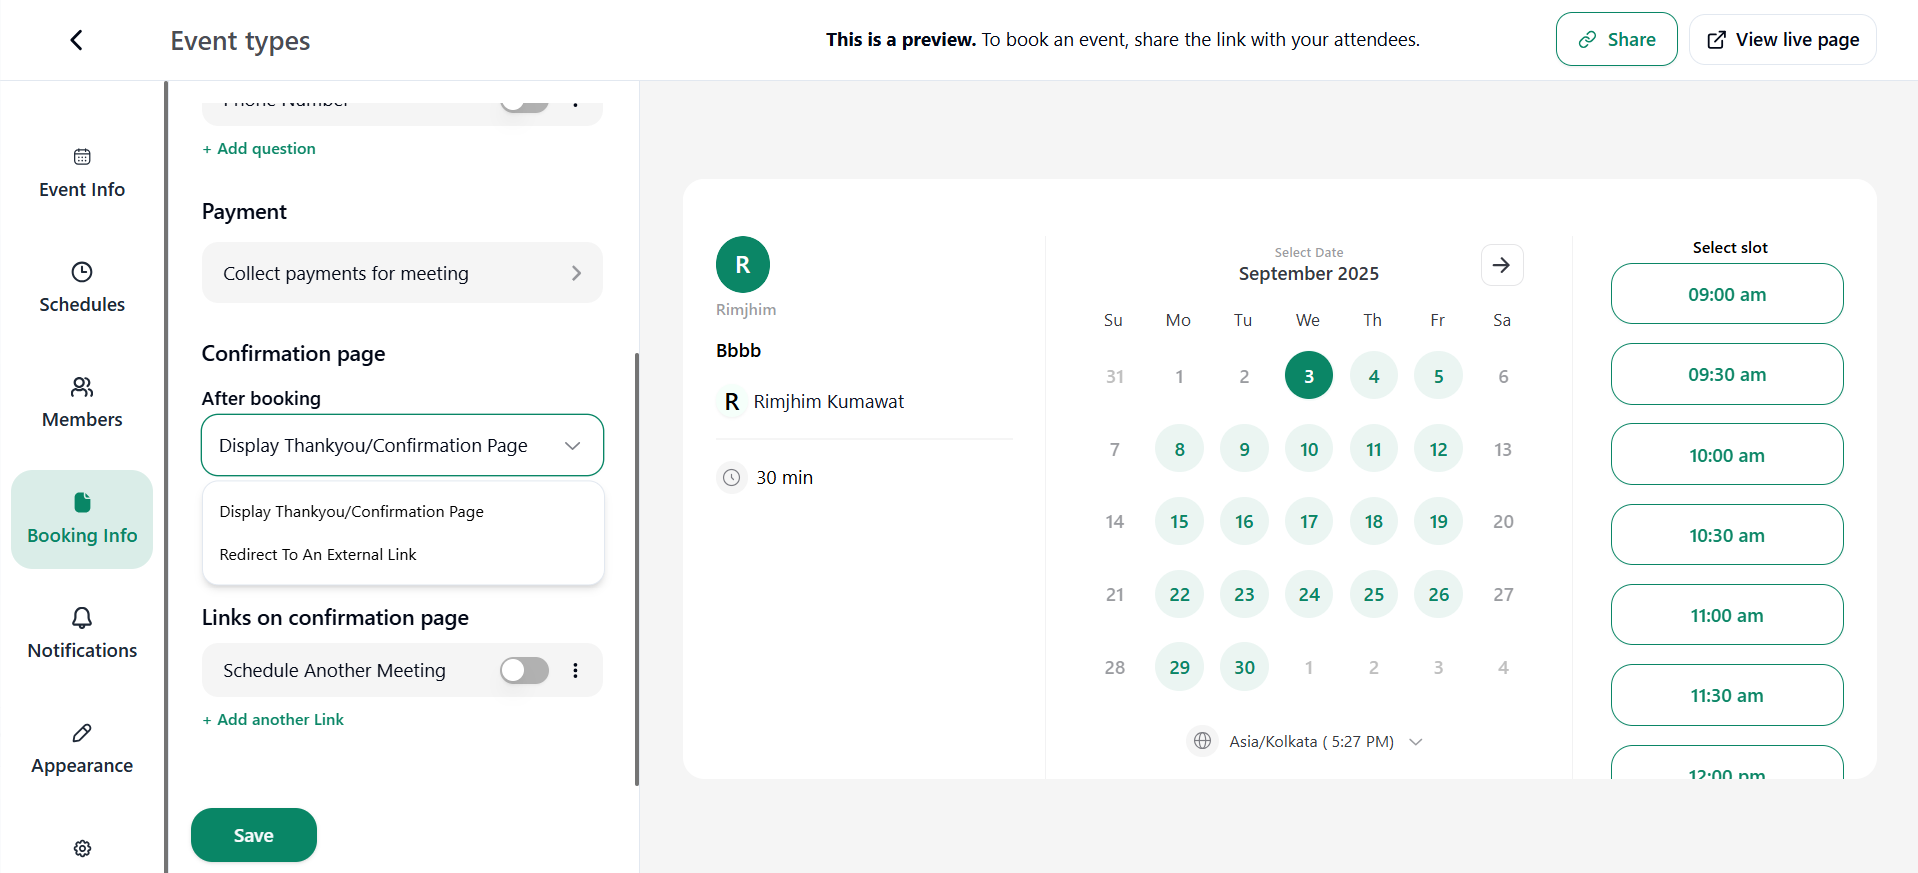
- Thank You Page Customisation: You can customise the Thank You page by selecting what to be displayed on the thank you page, such as Event name, date and time, location and many more.
- Redirect To An External Link: Enter an external link where the attendee is redirected after booking the meeting for an event. You can also display the event details in the external link if you enable, Pass event details to your redirected page.
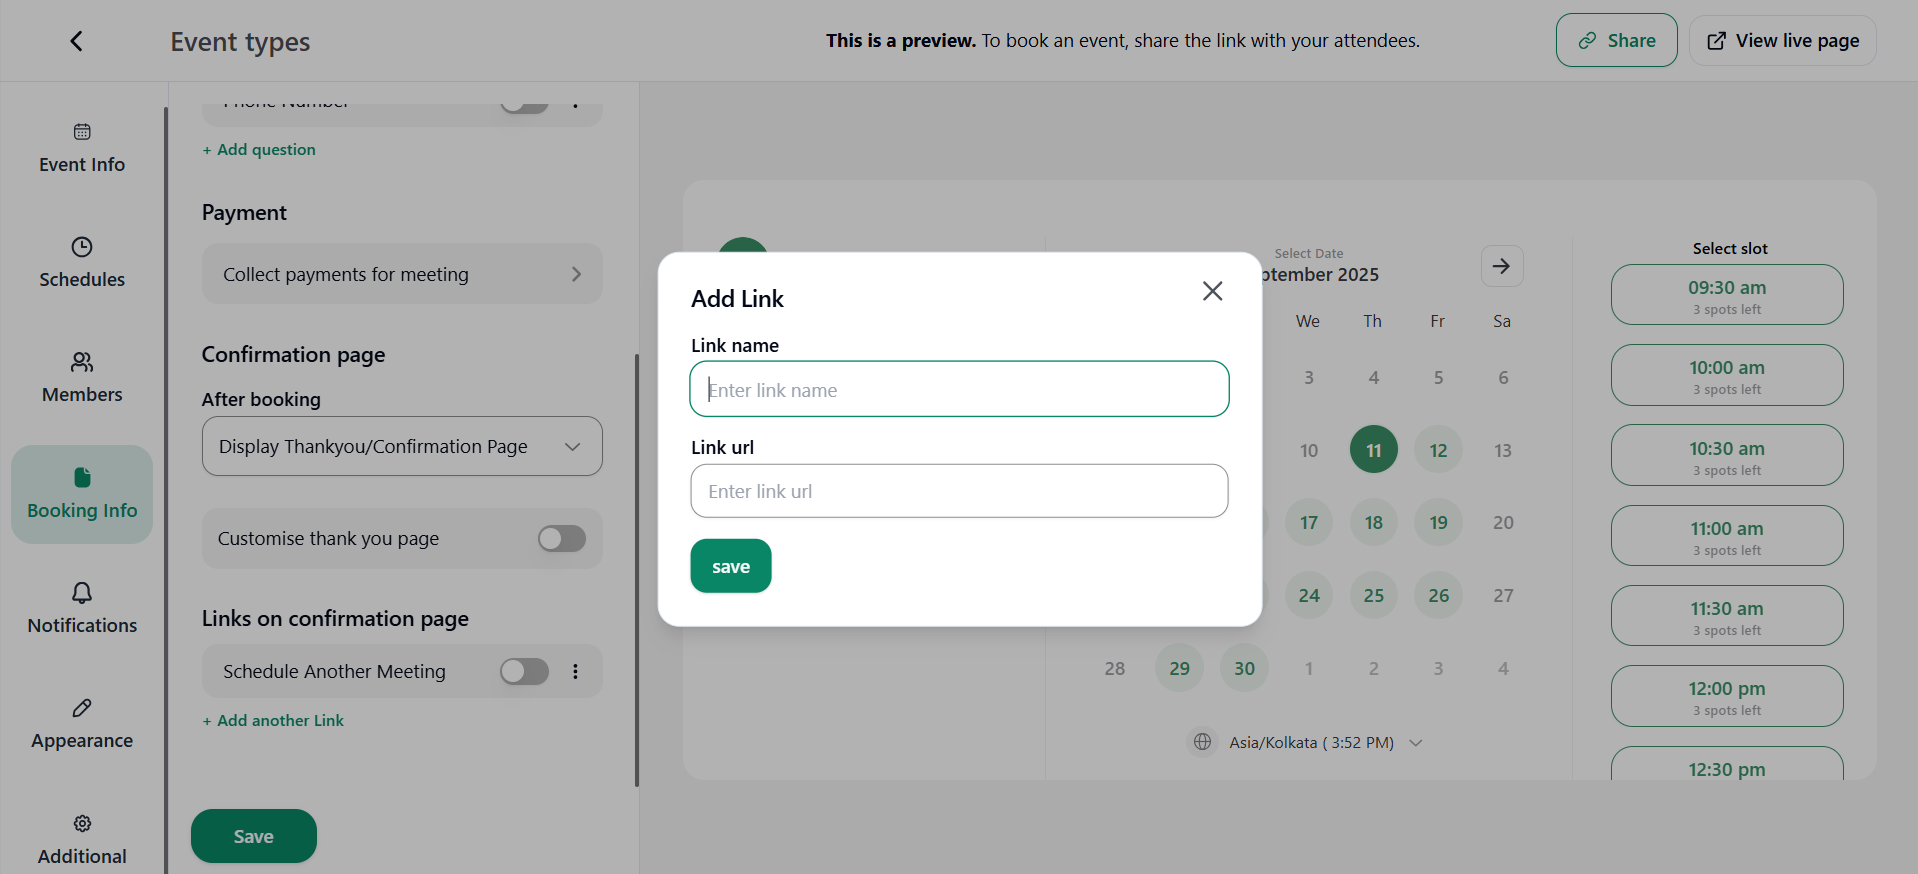
6. Links on Confirmation page: If you select to Display the Thank You Page, then only you will see this field. It refers to linking any page on the Thank You Page so that the user can click on the link if they wish to. You can also add more links to the confirmation page through “+ Add another link”.