
Your First Event Setup
In this section, we will walk you through setting up your first event with a scheduling system, by step-by-step procedure. Simplify and manage your events and meetings in one place with complete personalisation, saving time and effort.
Create Your First Event Type
Let’s Get Started.
Navigate to Orufy Bookings (opens in a new tab). If you don’t have an account, Sign Up or already have an account, then Sign In.
Step 1: Create Event Type
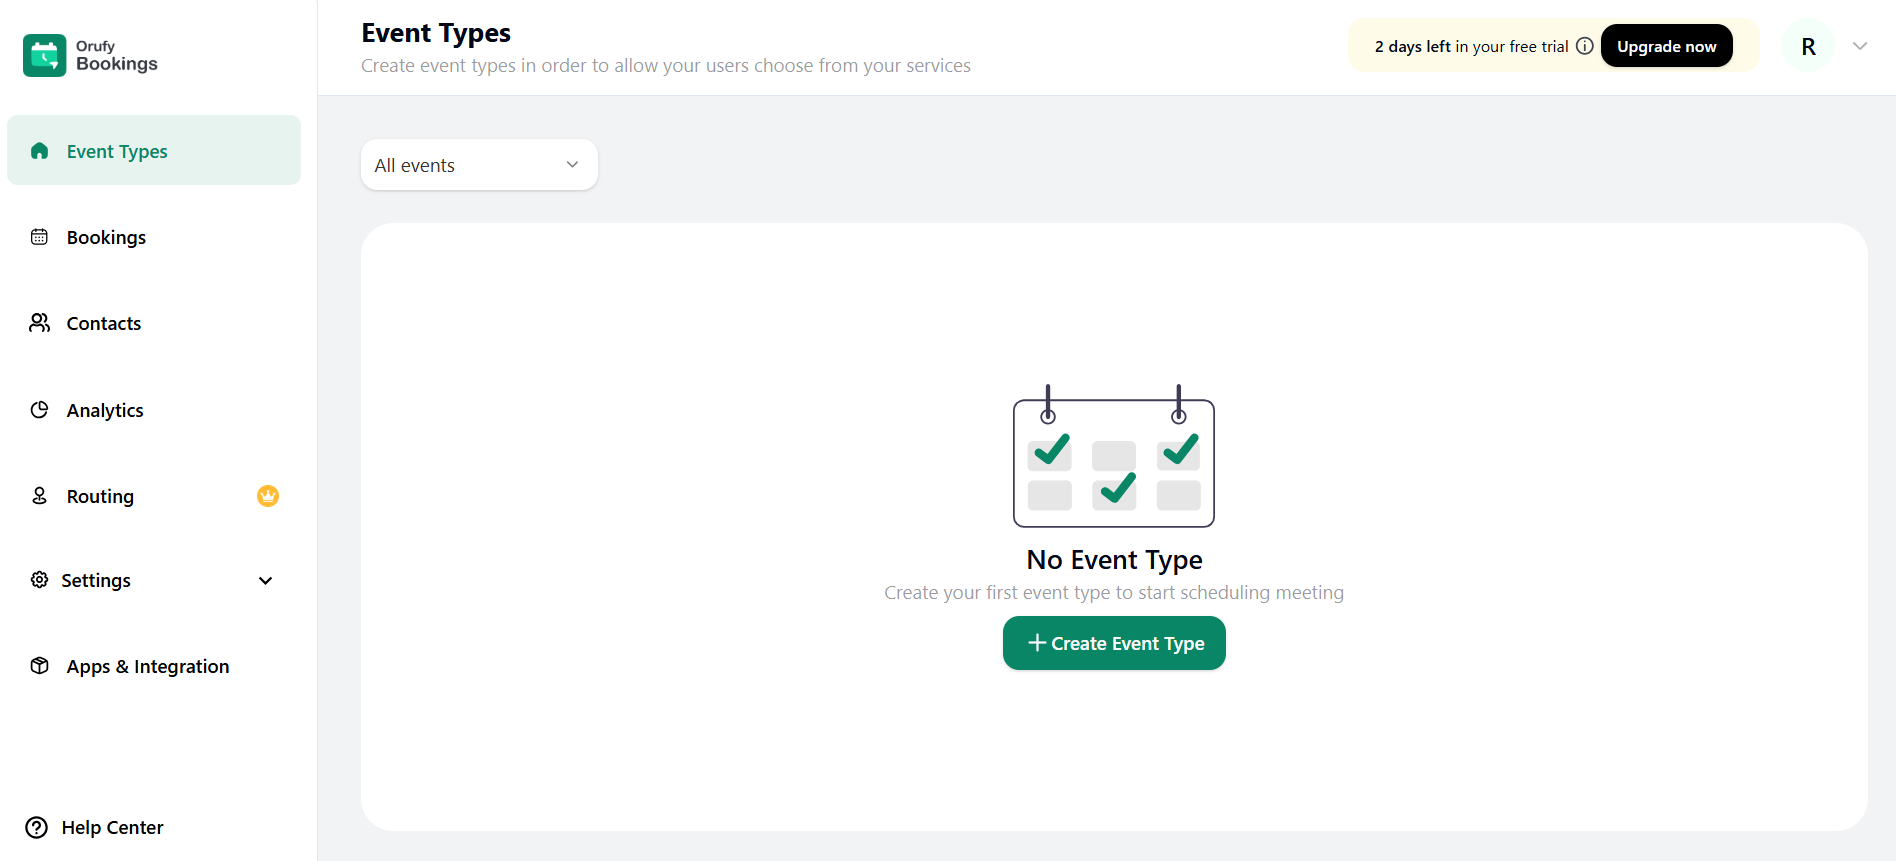
- After signing up or signing in, you will be navigated to the Event Types page.
- Click on “+ Create Event Type” to create your event to start scheduling meetings.
- As you click on the above button, a section will appear to create an Event Type.
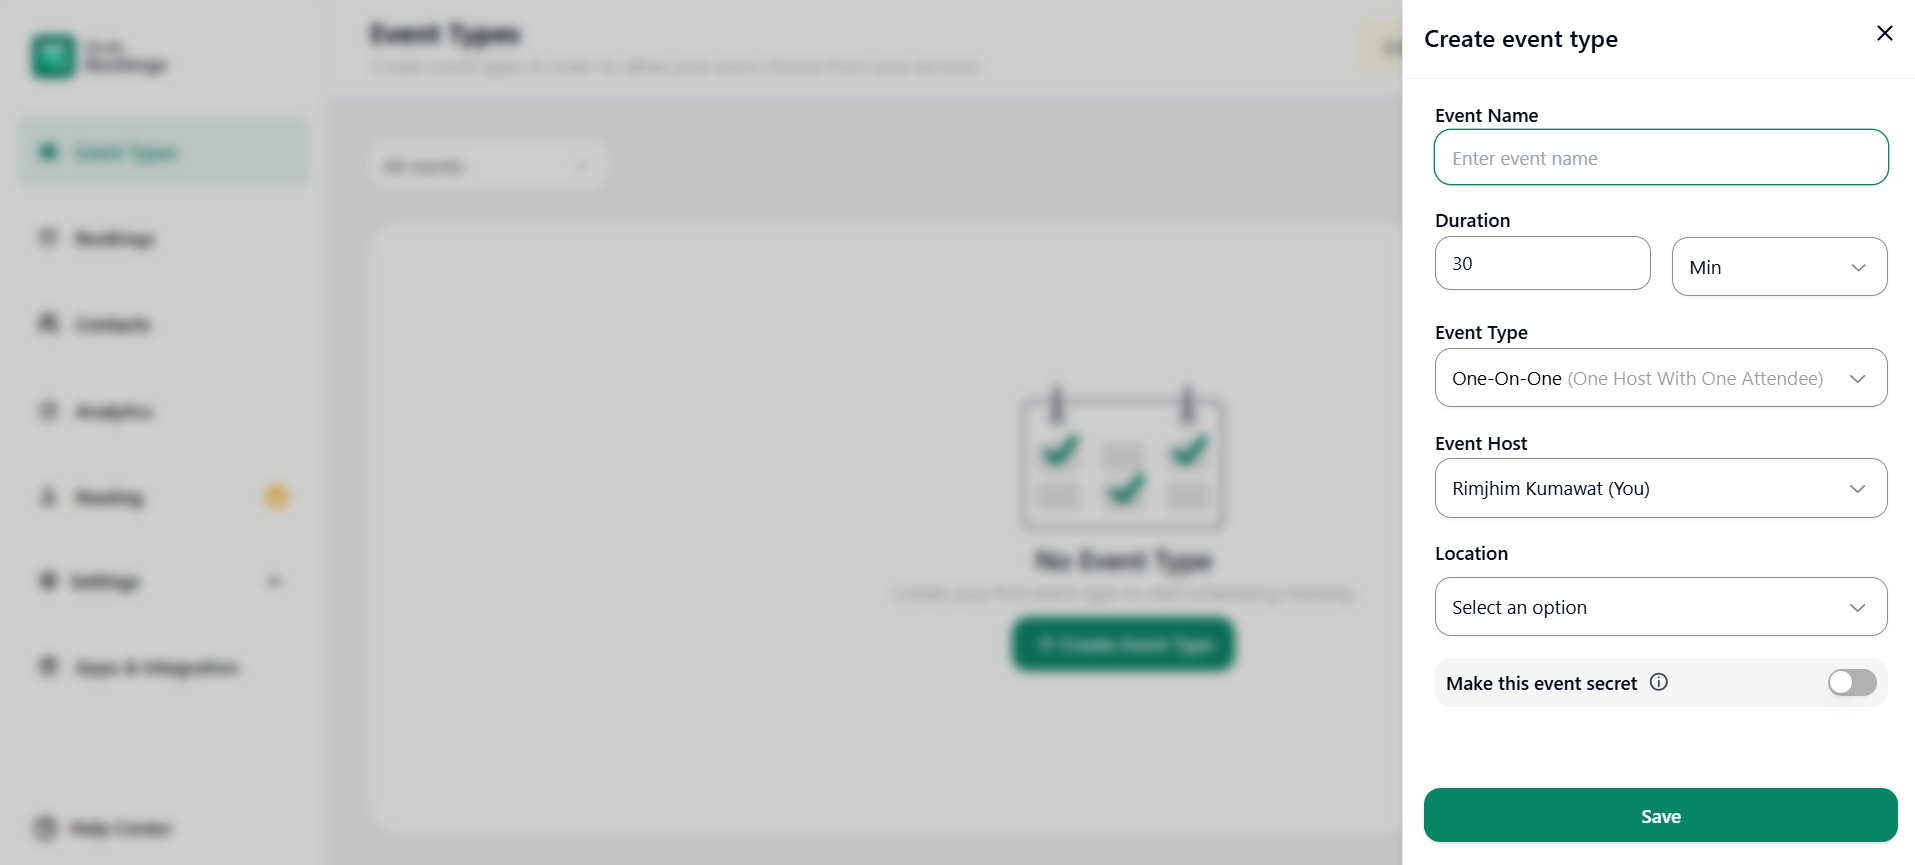
- Fill in the details: 1. Event Name: Name of the event
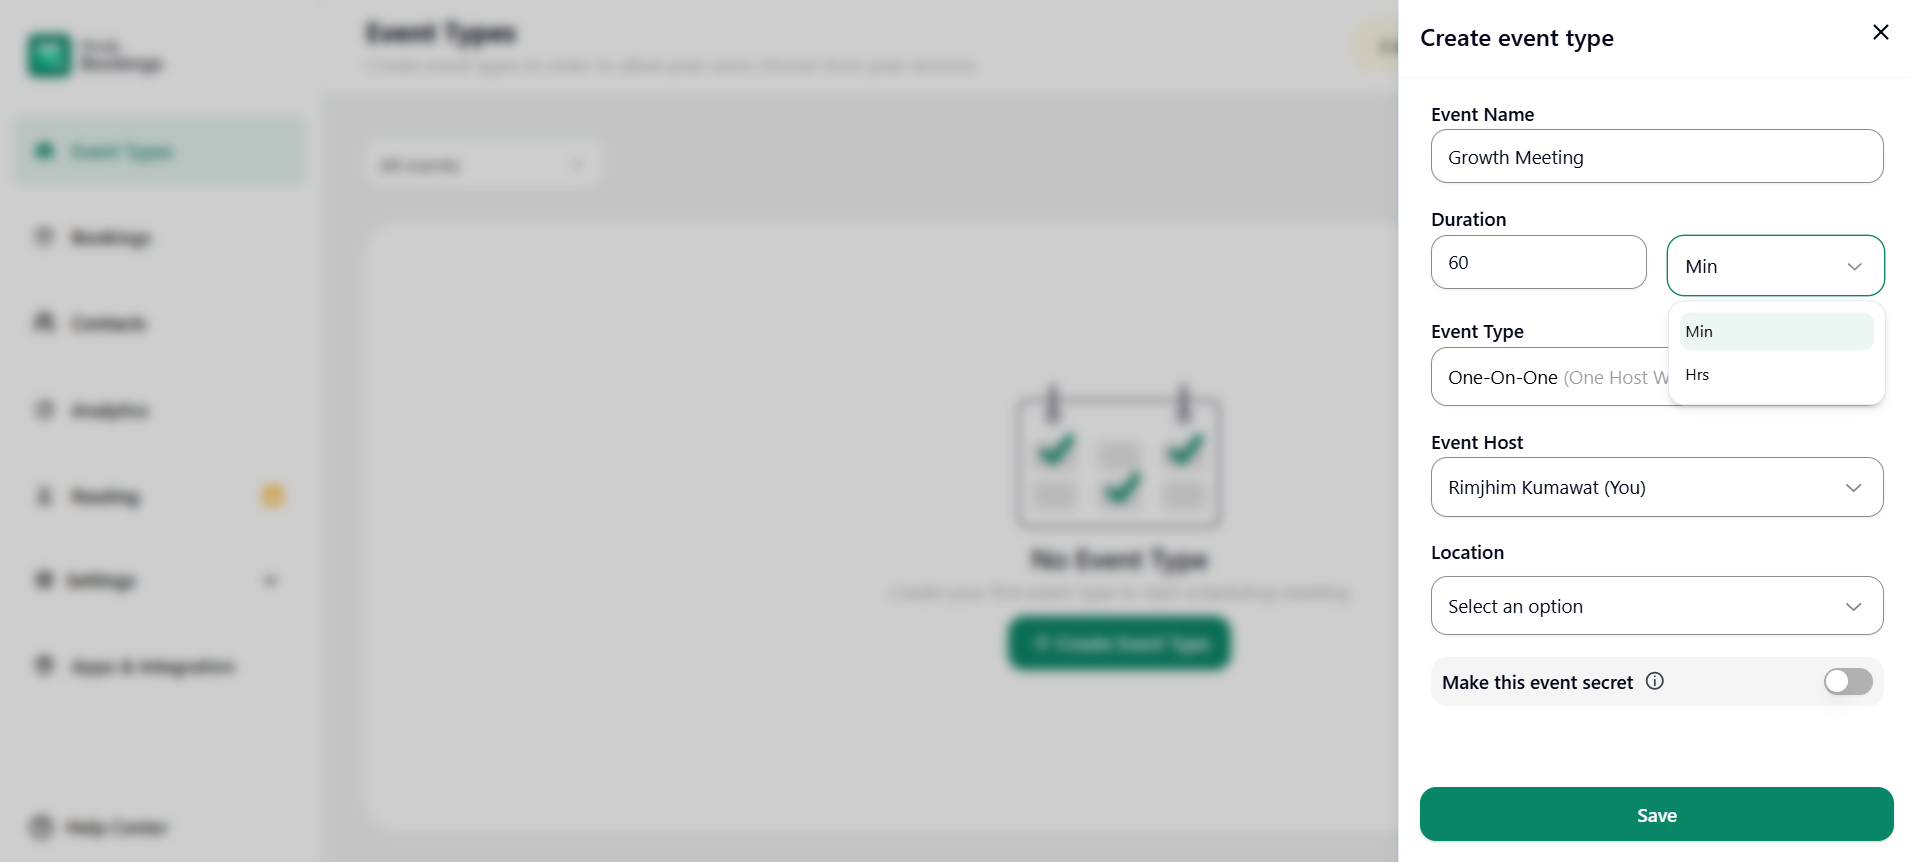
2. Duration: After creating an event, the Attendee can schedule a meeting for how much duration. It has an hours and minutes time format. The default meeting duration will be 30 minutes.
3. Event Type: What type of event do you want, singles or groups.
- One-On-One: One host and one attendee
- Group: One host and multiple attendees
- Collective: Multiple hosts with attendees
- Round-Robin: One rotating host with One Attendee

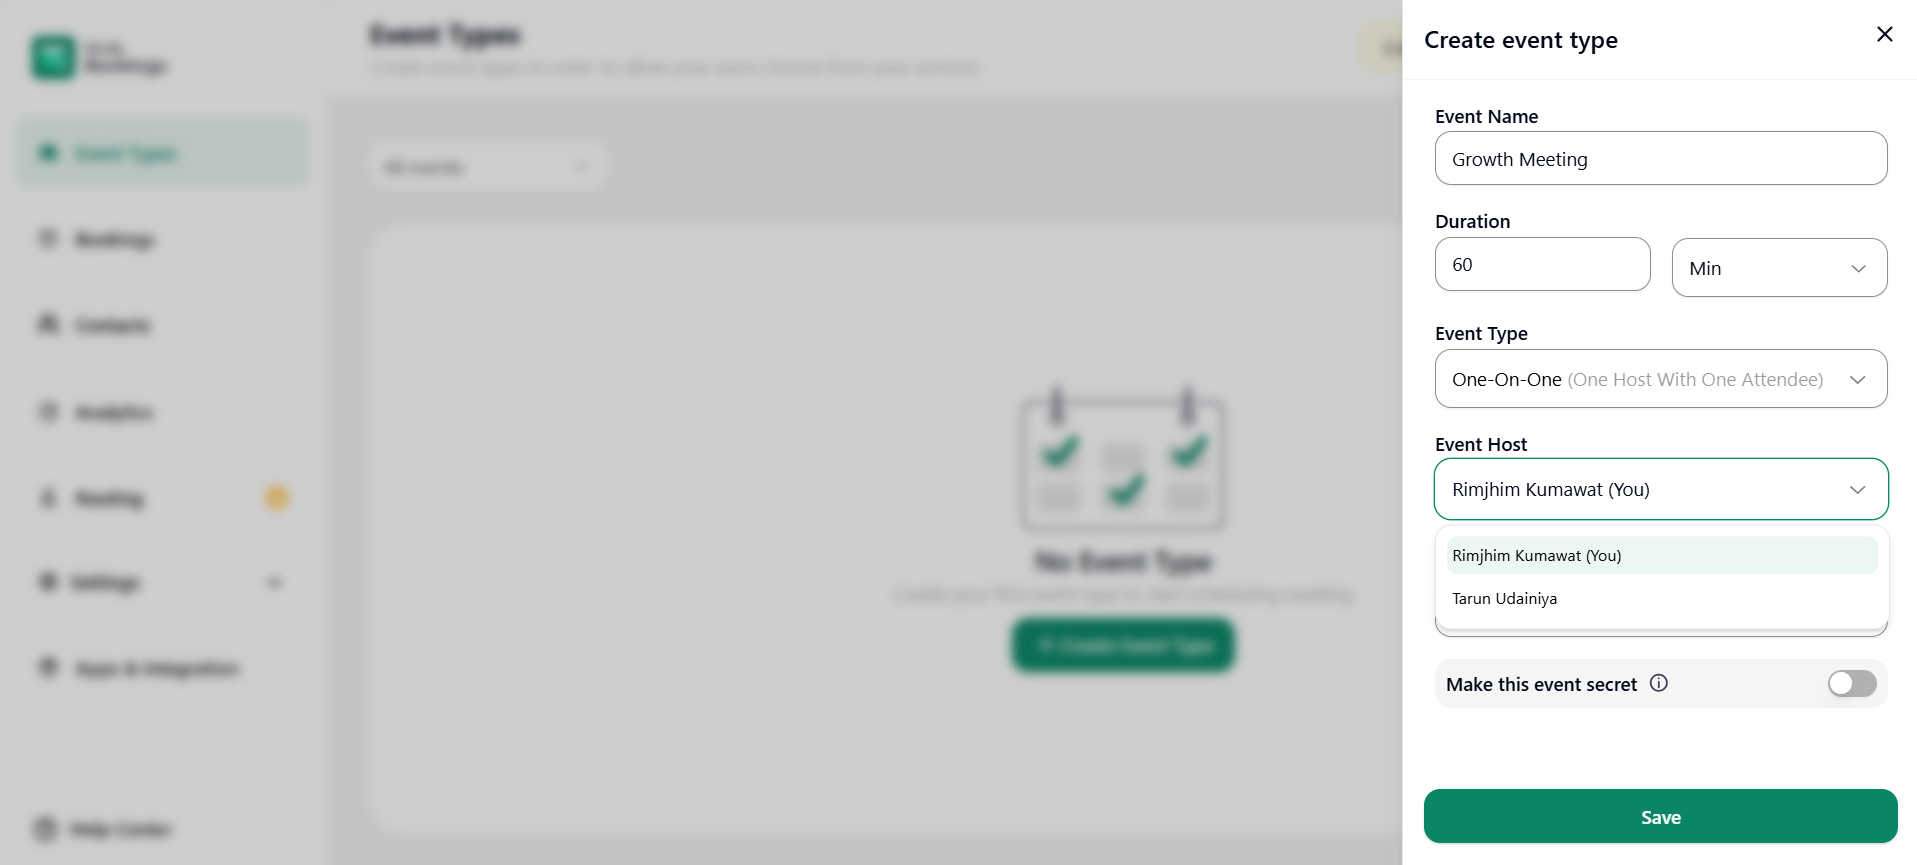
4. Event Host: The one who will host the particular event. You can choose the host if you have multiple hosts.
5. Location: In which place will the meeting be held. Select as per your convenience.
- Zoom
- Google Meet
- Microsoft Teams
- In Person
- Phone Call
- Custom
- Ask Attendee

6. Make This Event A Secret If you enable this, your selected event will be hidden from the main booking page.
Click on “Save” to save your event and appear in the event types section. The event is created with default settings.

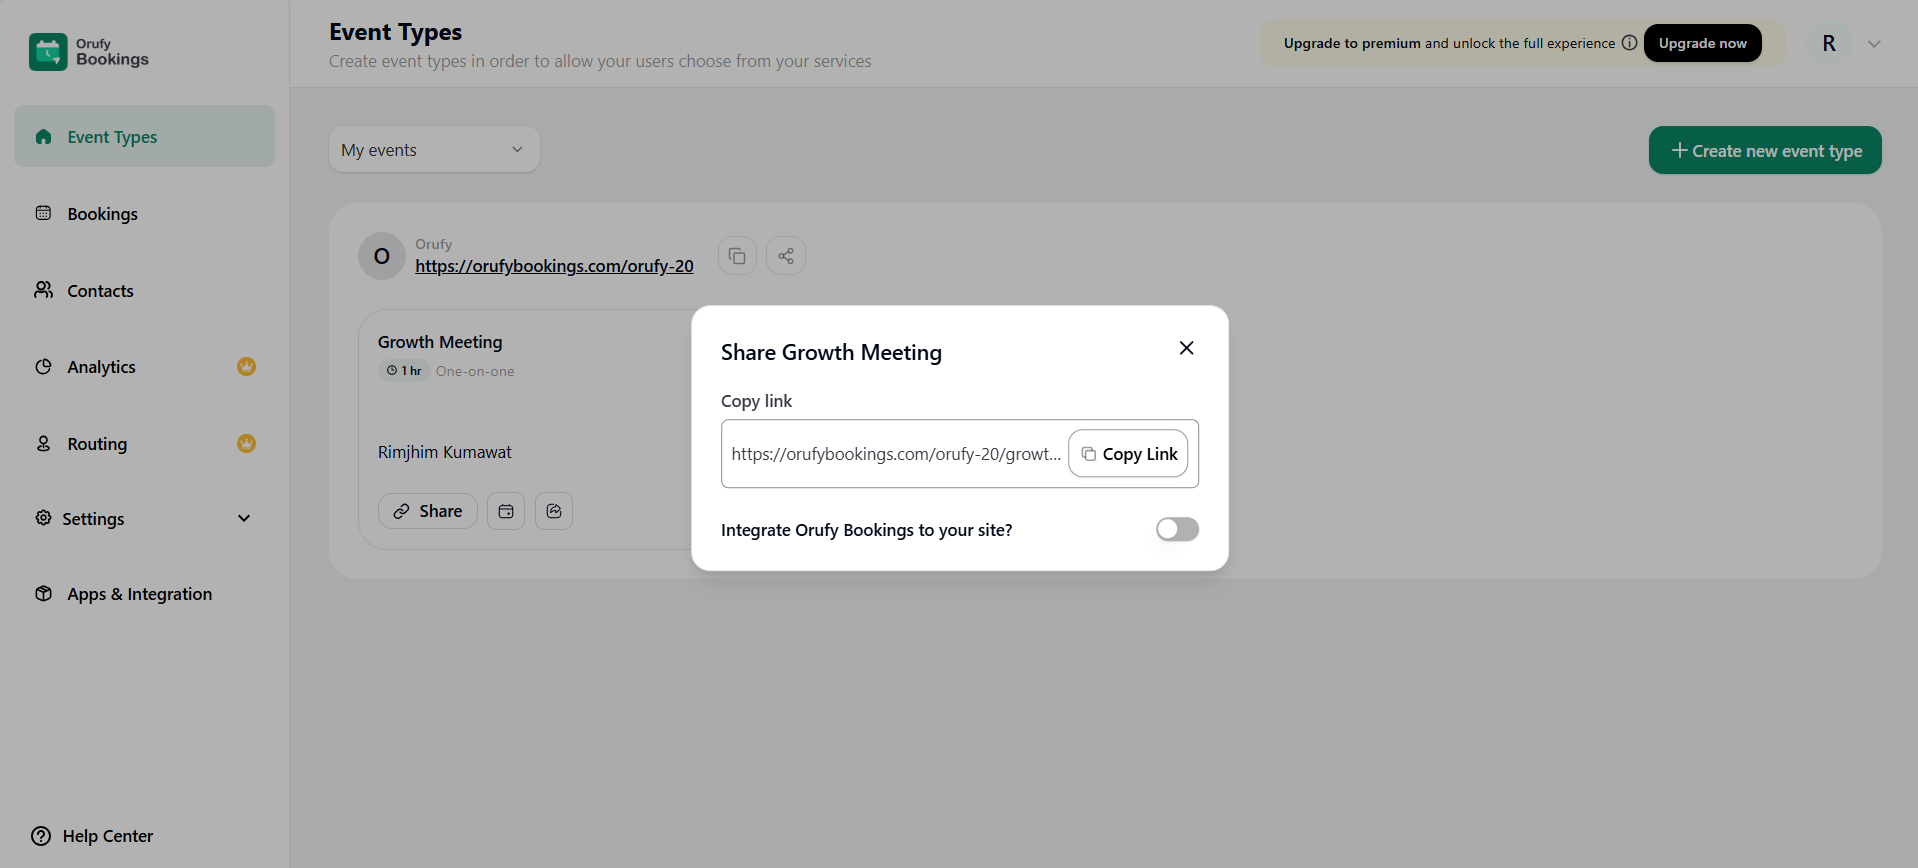
Now you can share the link of the event so that users can schedule their meeting. The two ways of sharing the event link are:
1. Share button
As you click on the Share button, you can copy the link or you can link Orufy Bookings to your website.
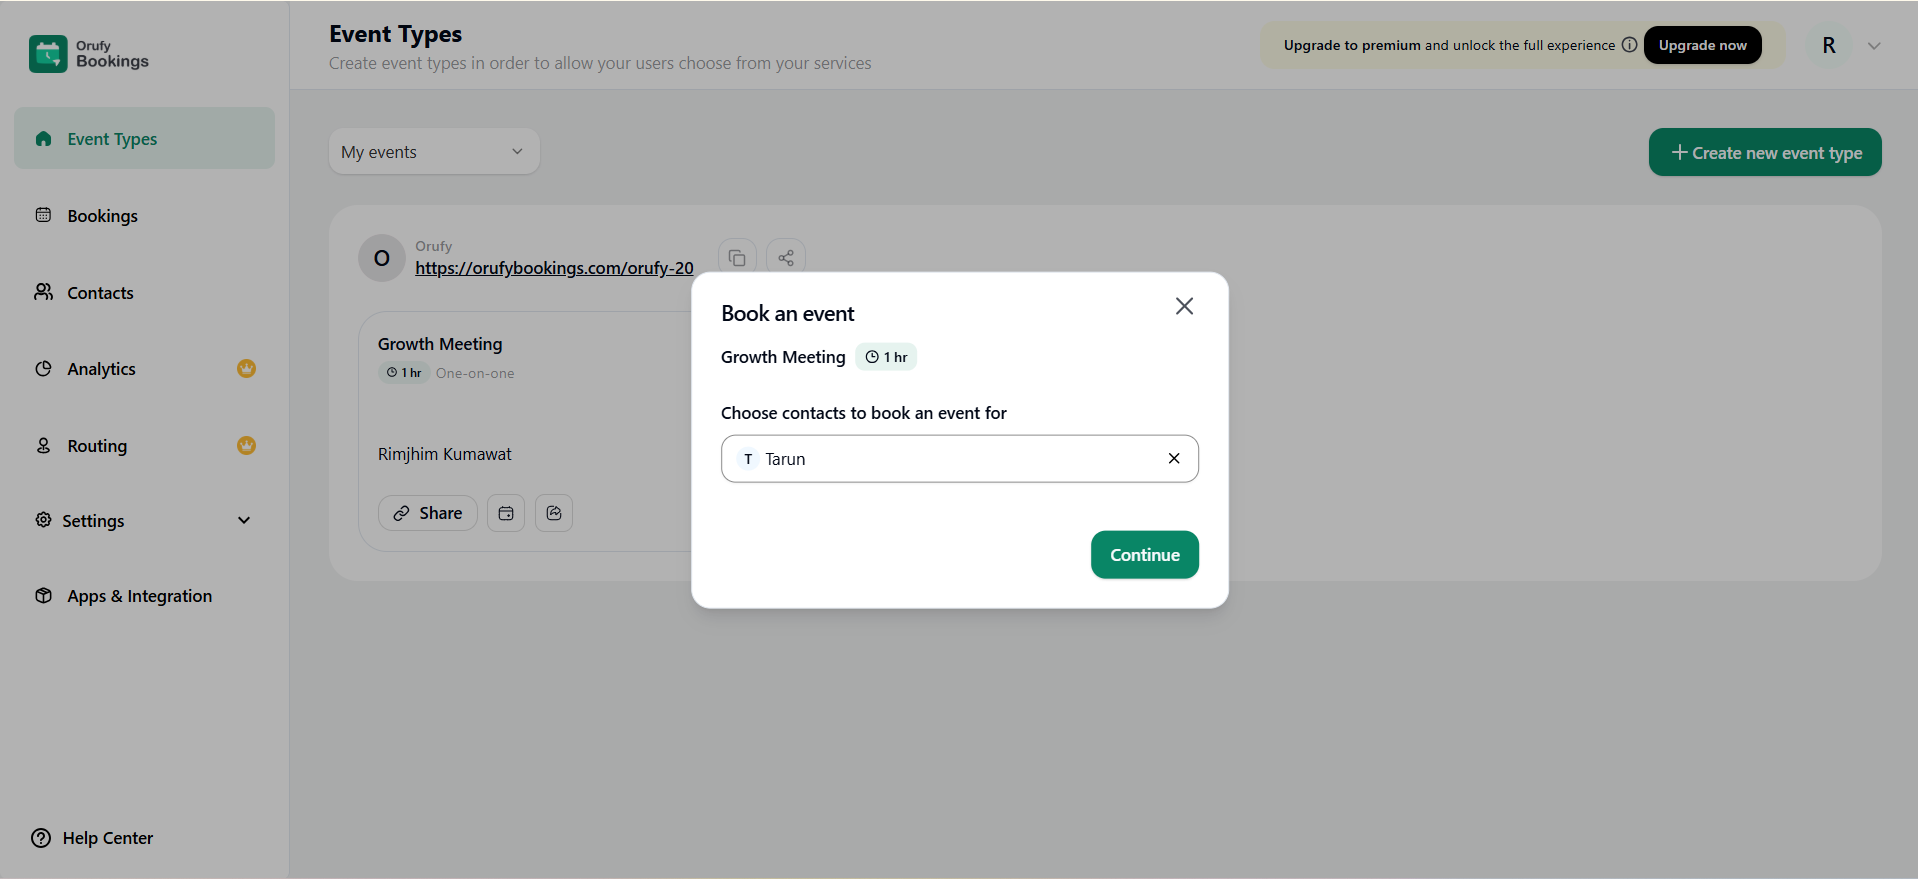
2. Book an Event
The Book an Event option allows you to book a specific event for the selected contacts in the admin panel. You can select the contact from the drop-down.
- Select the contact form the drop-down and click Continue.
- As you click, a pop-up booking page will open to select the slot & customise the event name, mode of event, location and add guests and notes to the event.
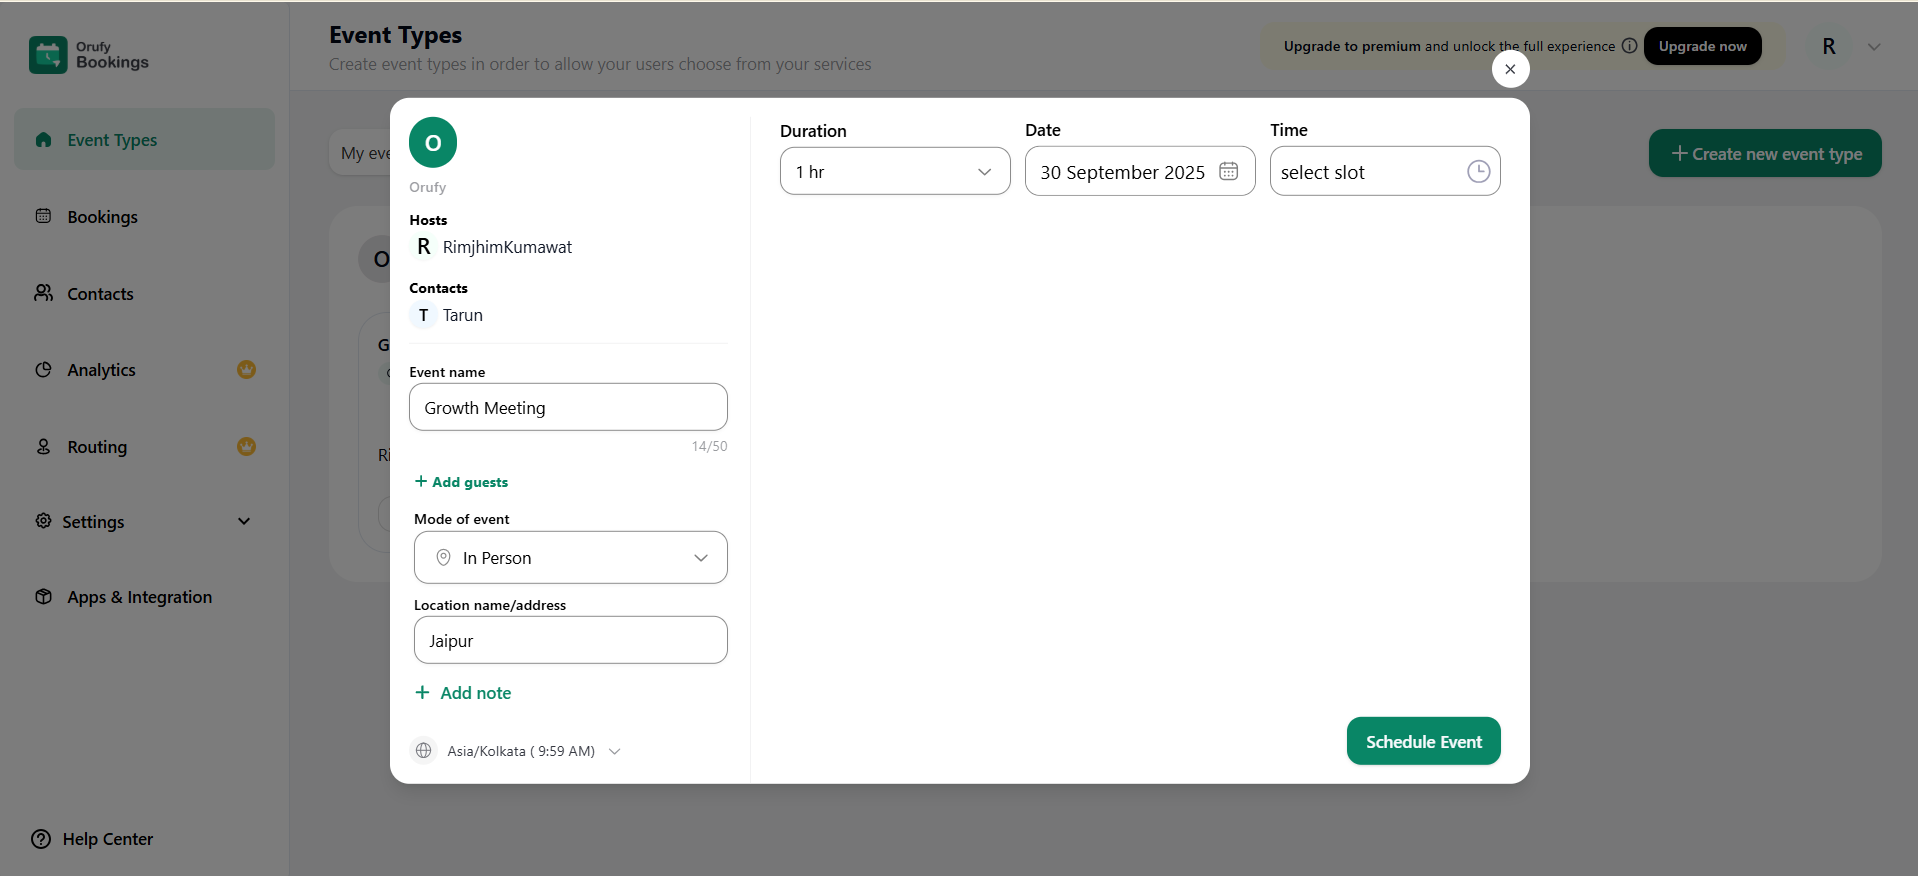
- Click on Schedule Event.
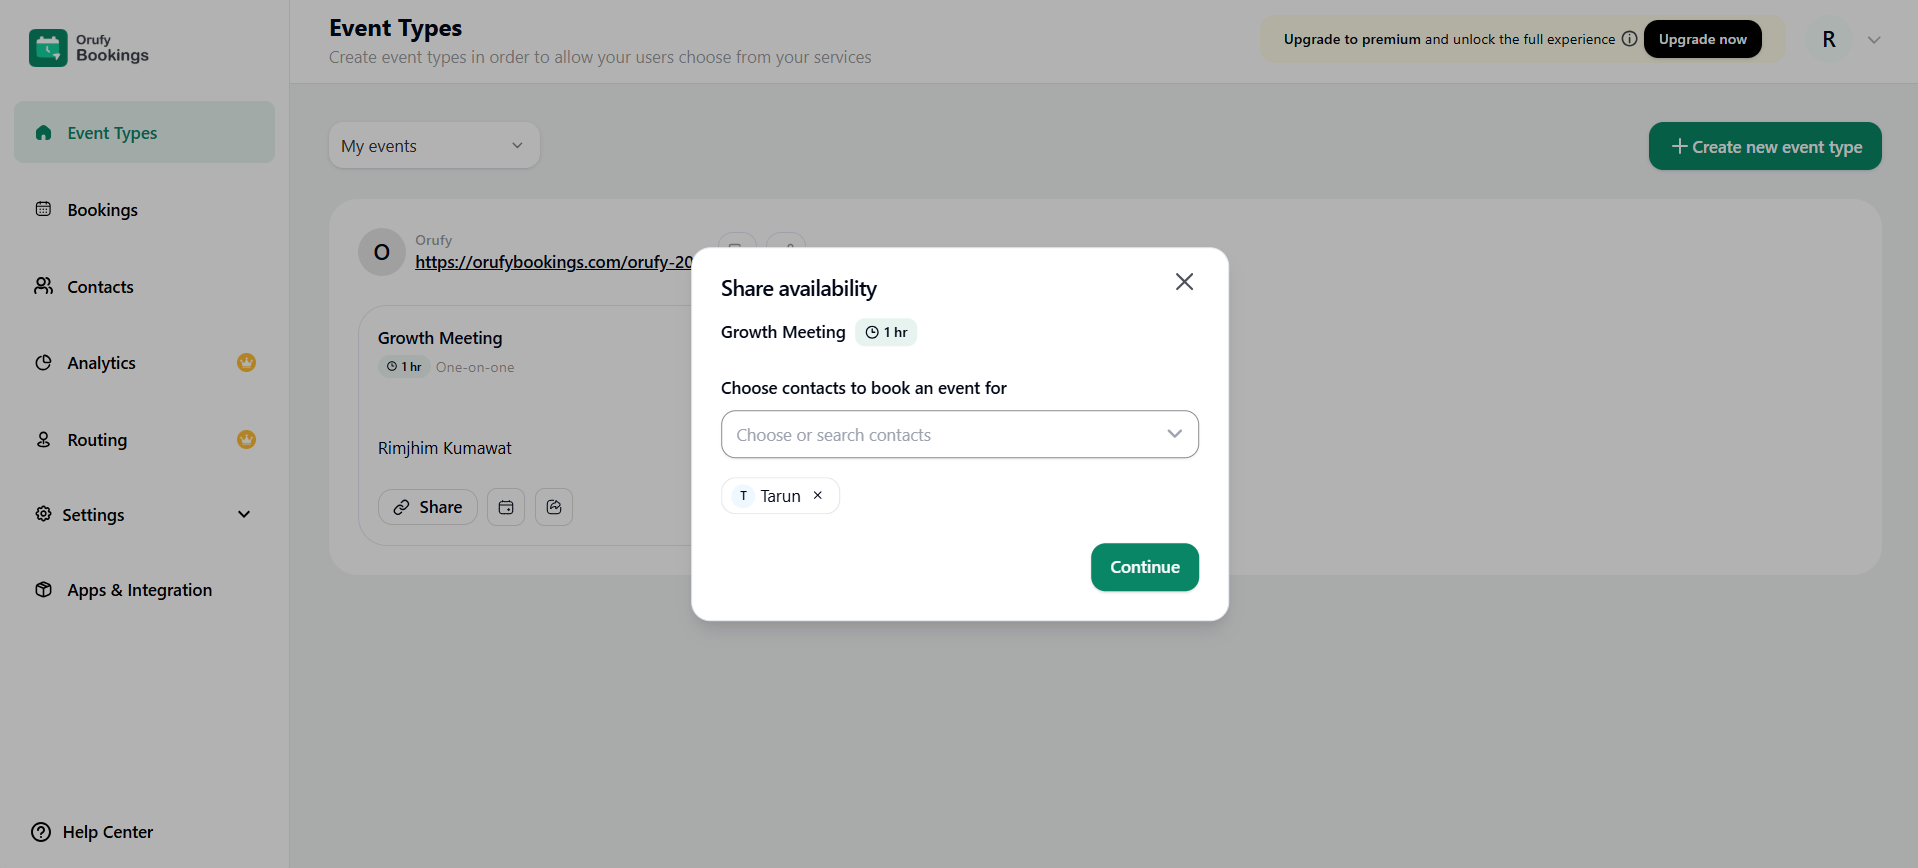
3. Share Availability
The Share Availability option allows you to share the event with the selected contact and ask them to schedule the event at their convenience.

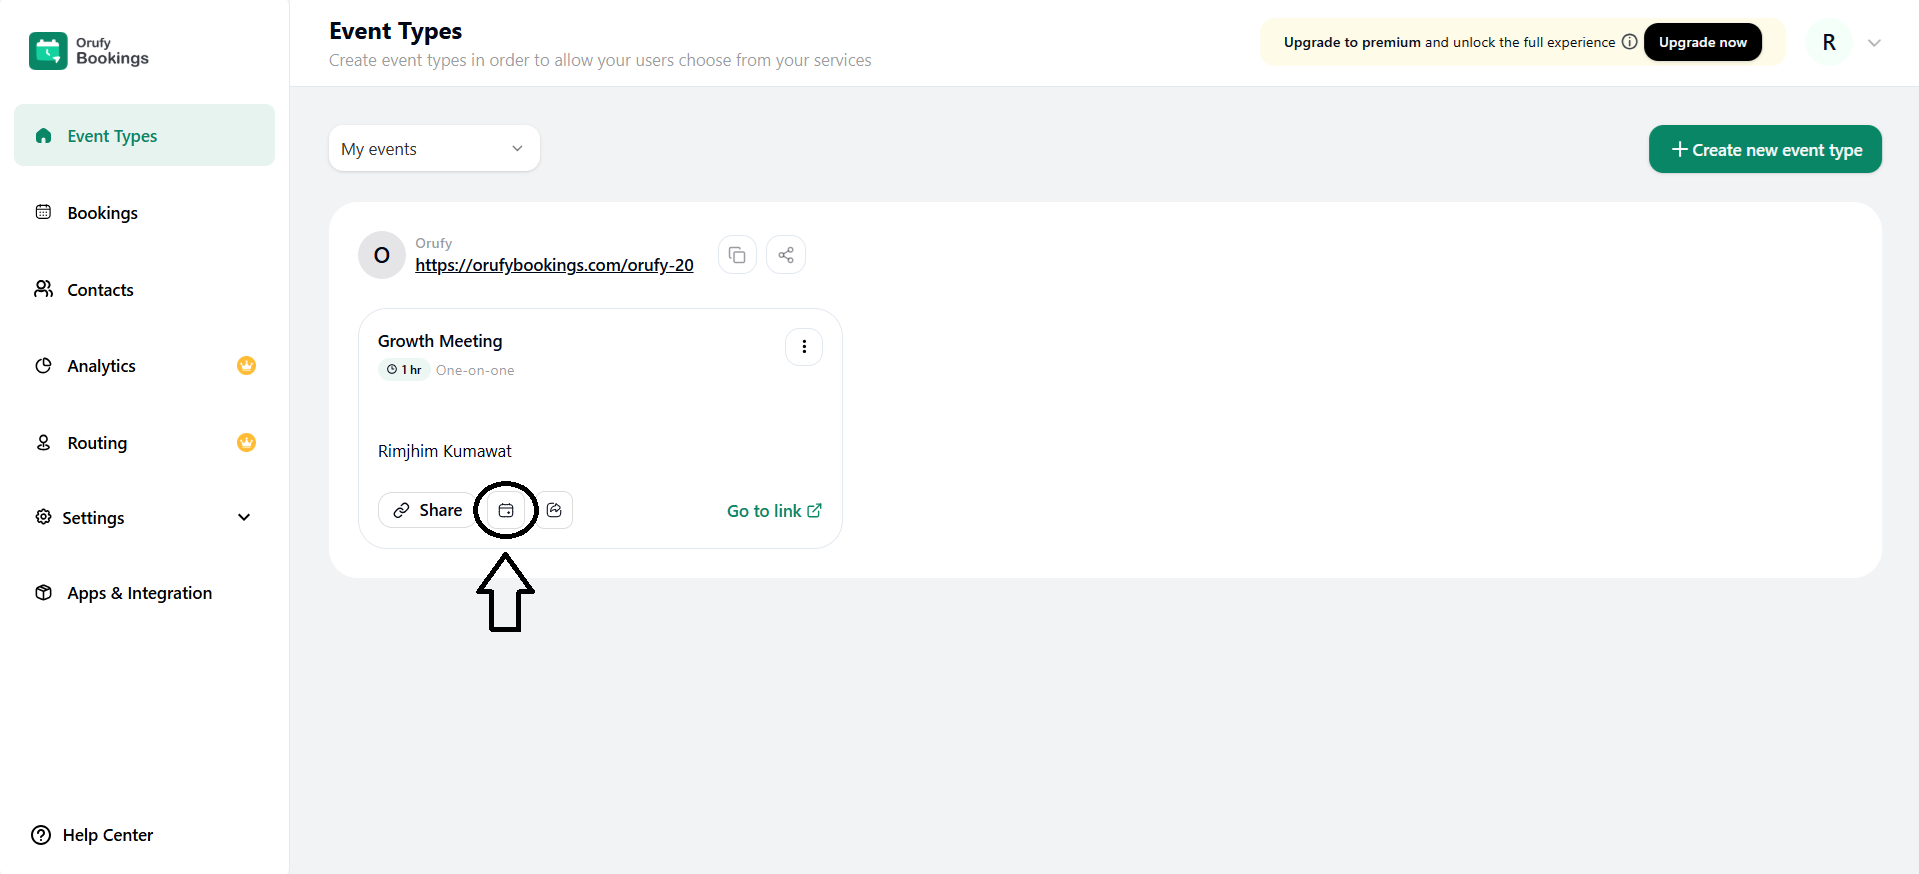
4. Go to the link
By clicking on this, you will be directed to the scheduled meeting link page.
- Select the contact from the drop-down and click Continue.
- As you click, a pop-up will open to select the integrated email address from which the invite will be sent and customise the subject & body of the email invitation.

- Click on Send Email to successfully send the invitation.
The advanced Settings of the Event Type are:
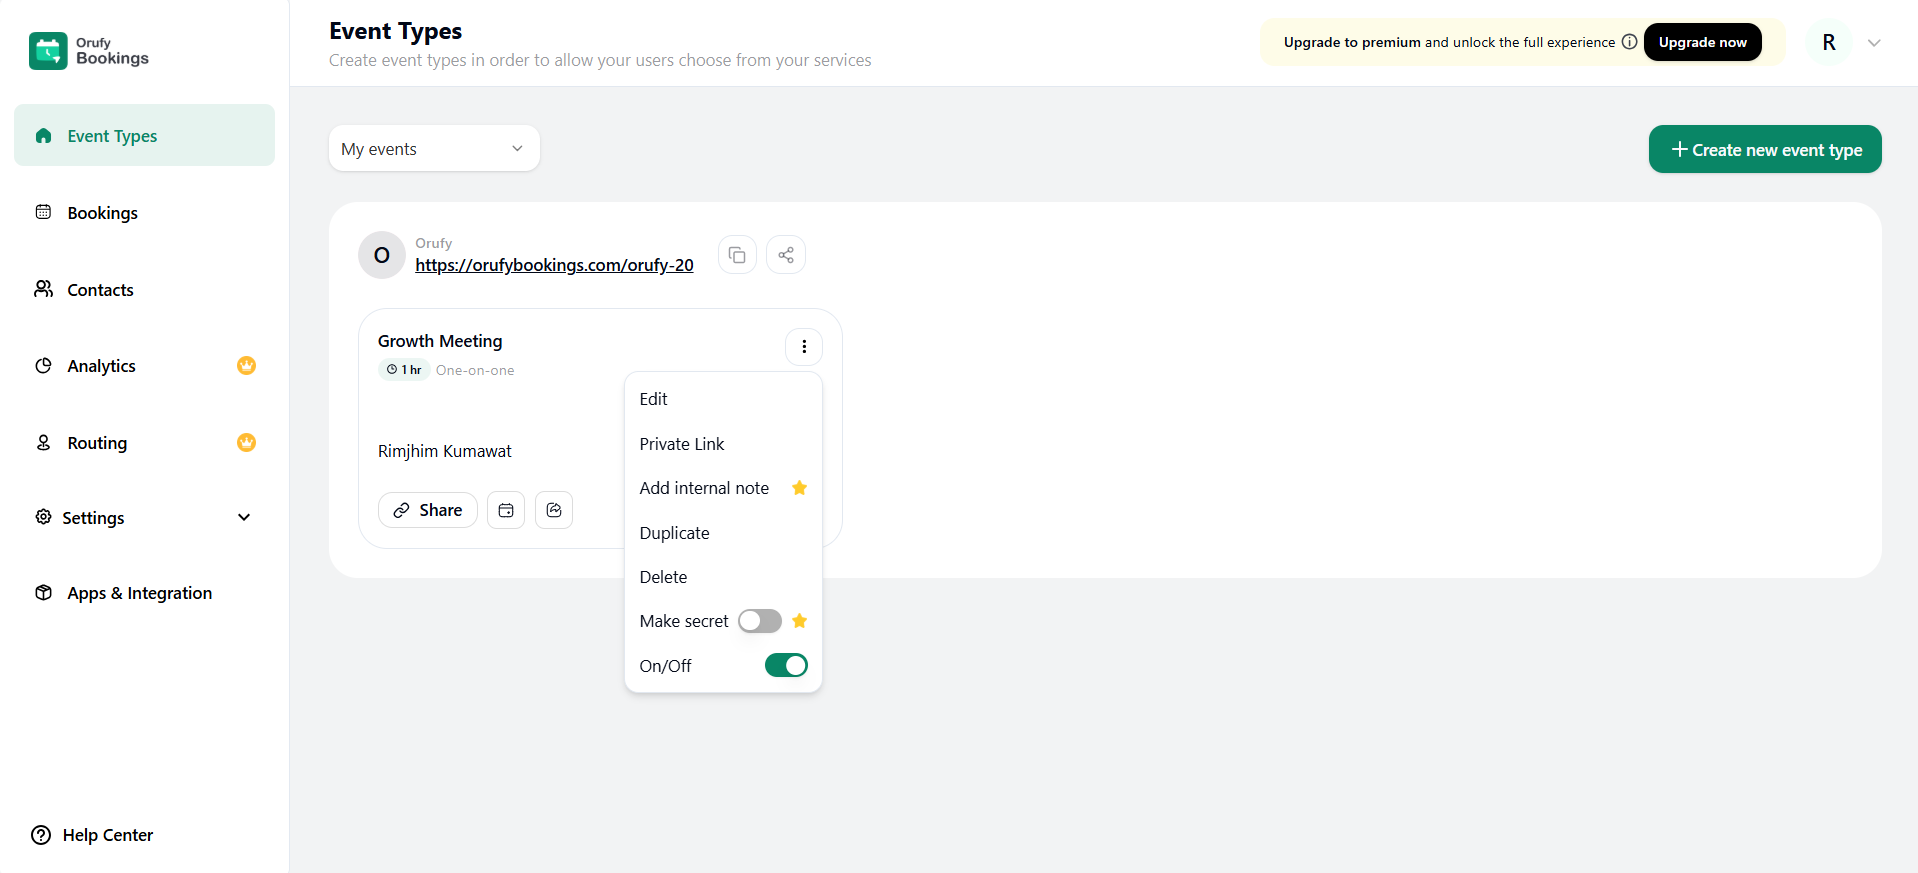
1. Edit: You can edit the Event Type, such as location, duration and many more.
2. Private Link: We can generate private links for an event type. You can select how many bookings can be scheduled in this event type and when the time link will expire.
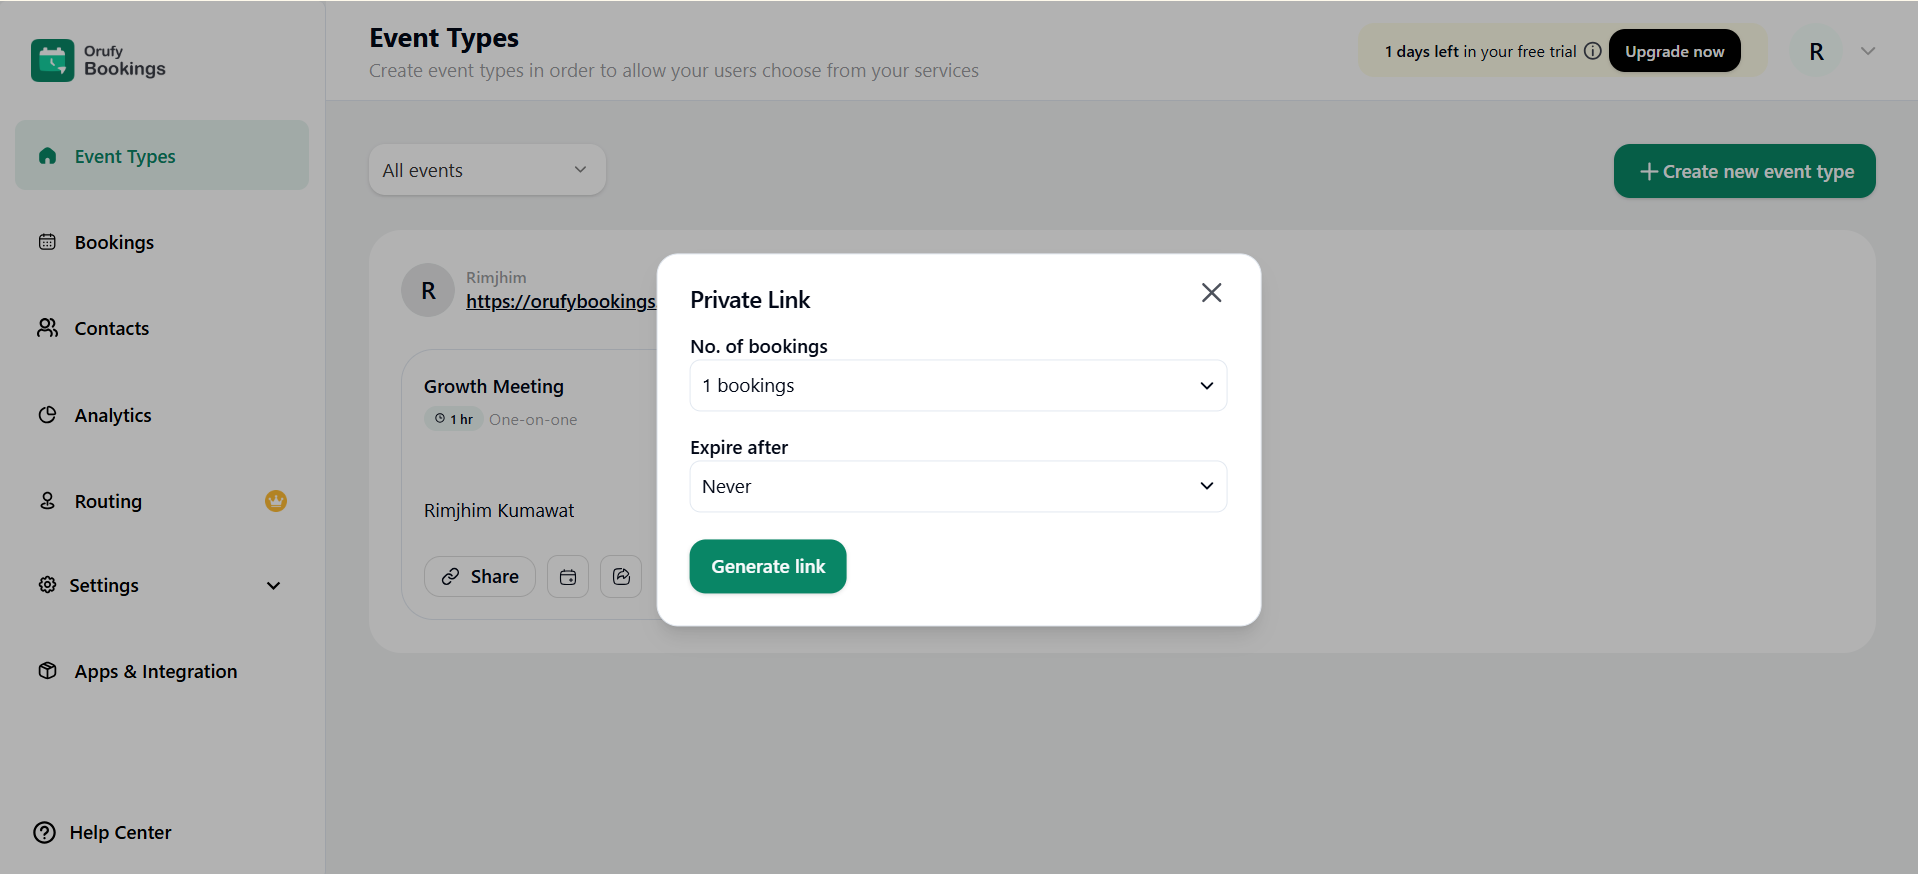
Click on “Generate Link” to access your private link.
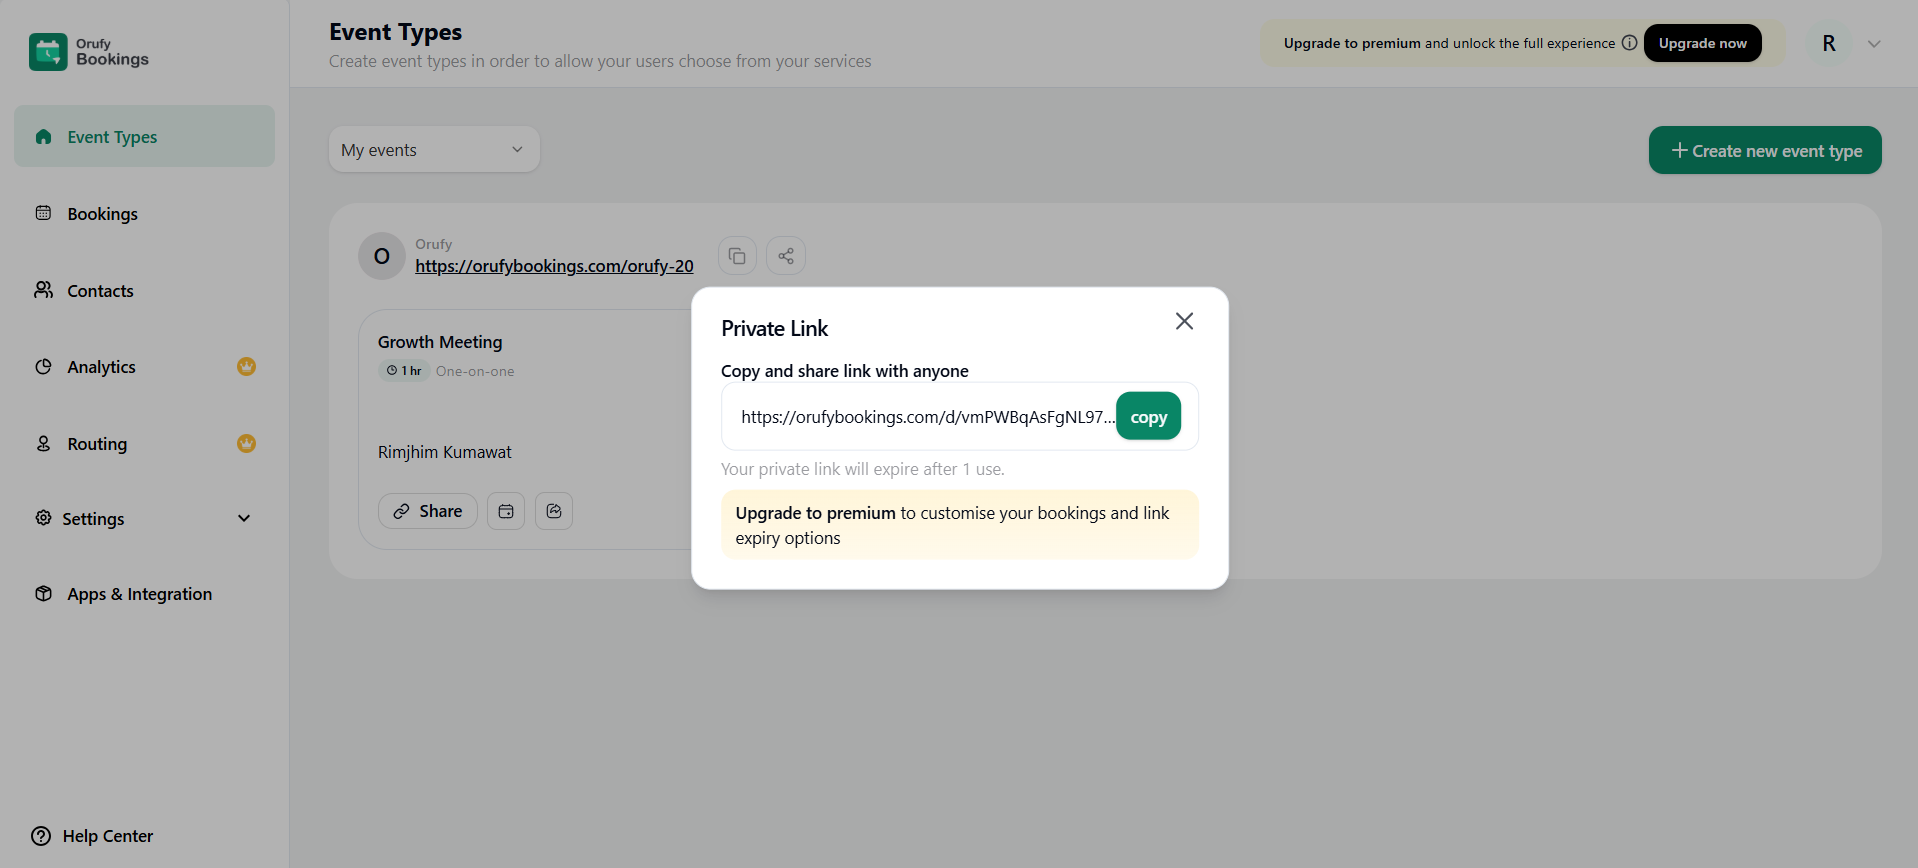
Look at this, I have selected 5 bookings that can be scheduled under this event type, and the link will expire on the custom date and time provided. Copy the link and share it with people.
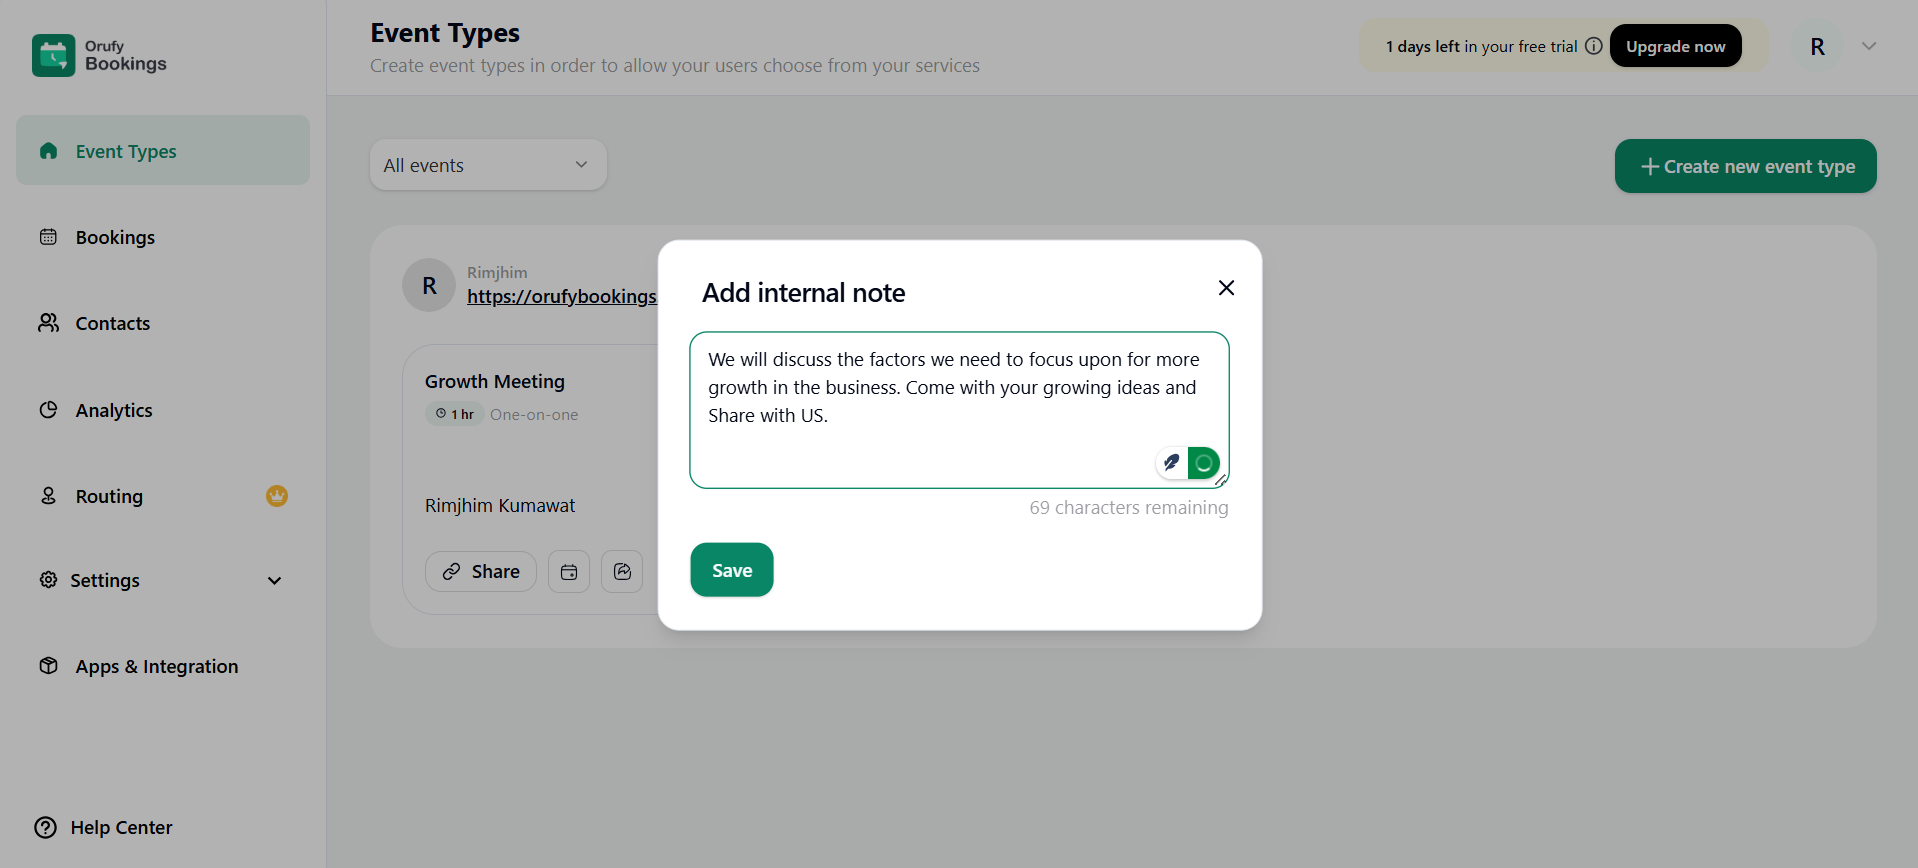
3. Internal Note: You can add some relevant information about the event.
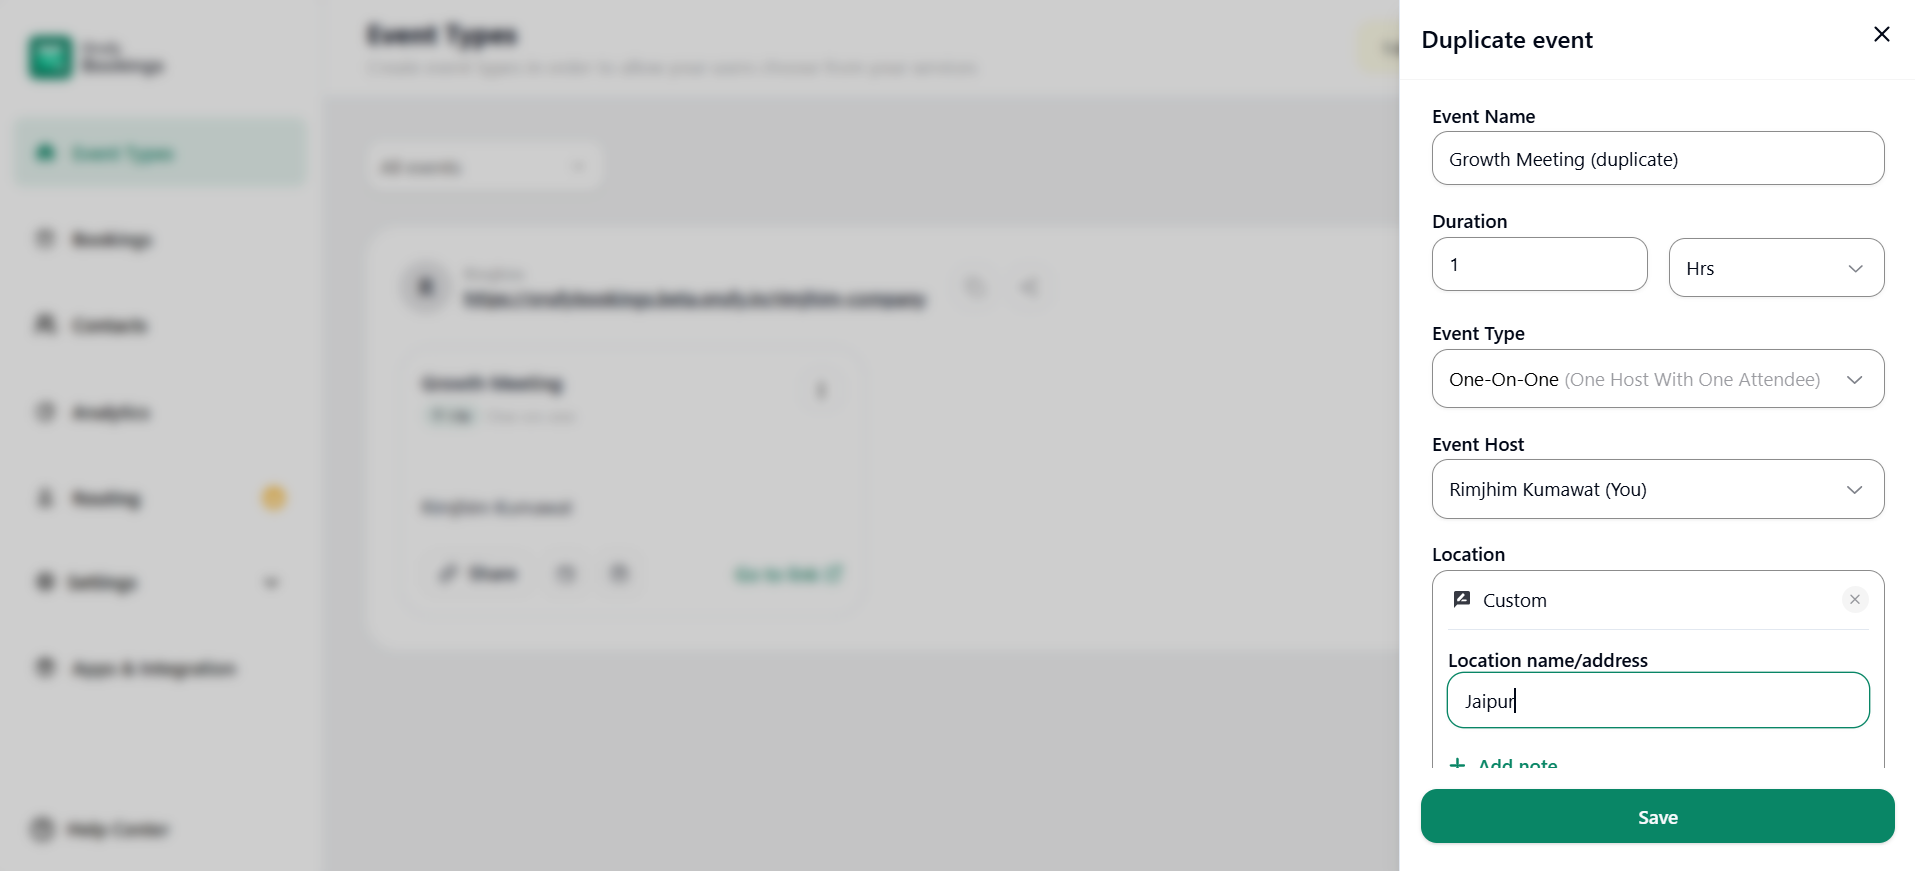
4. Duplicate: The replica of the particular event type will be created with the same settings.
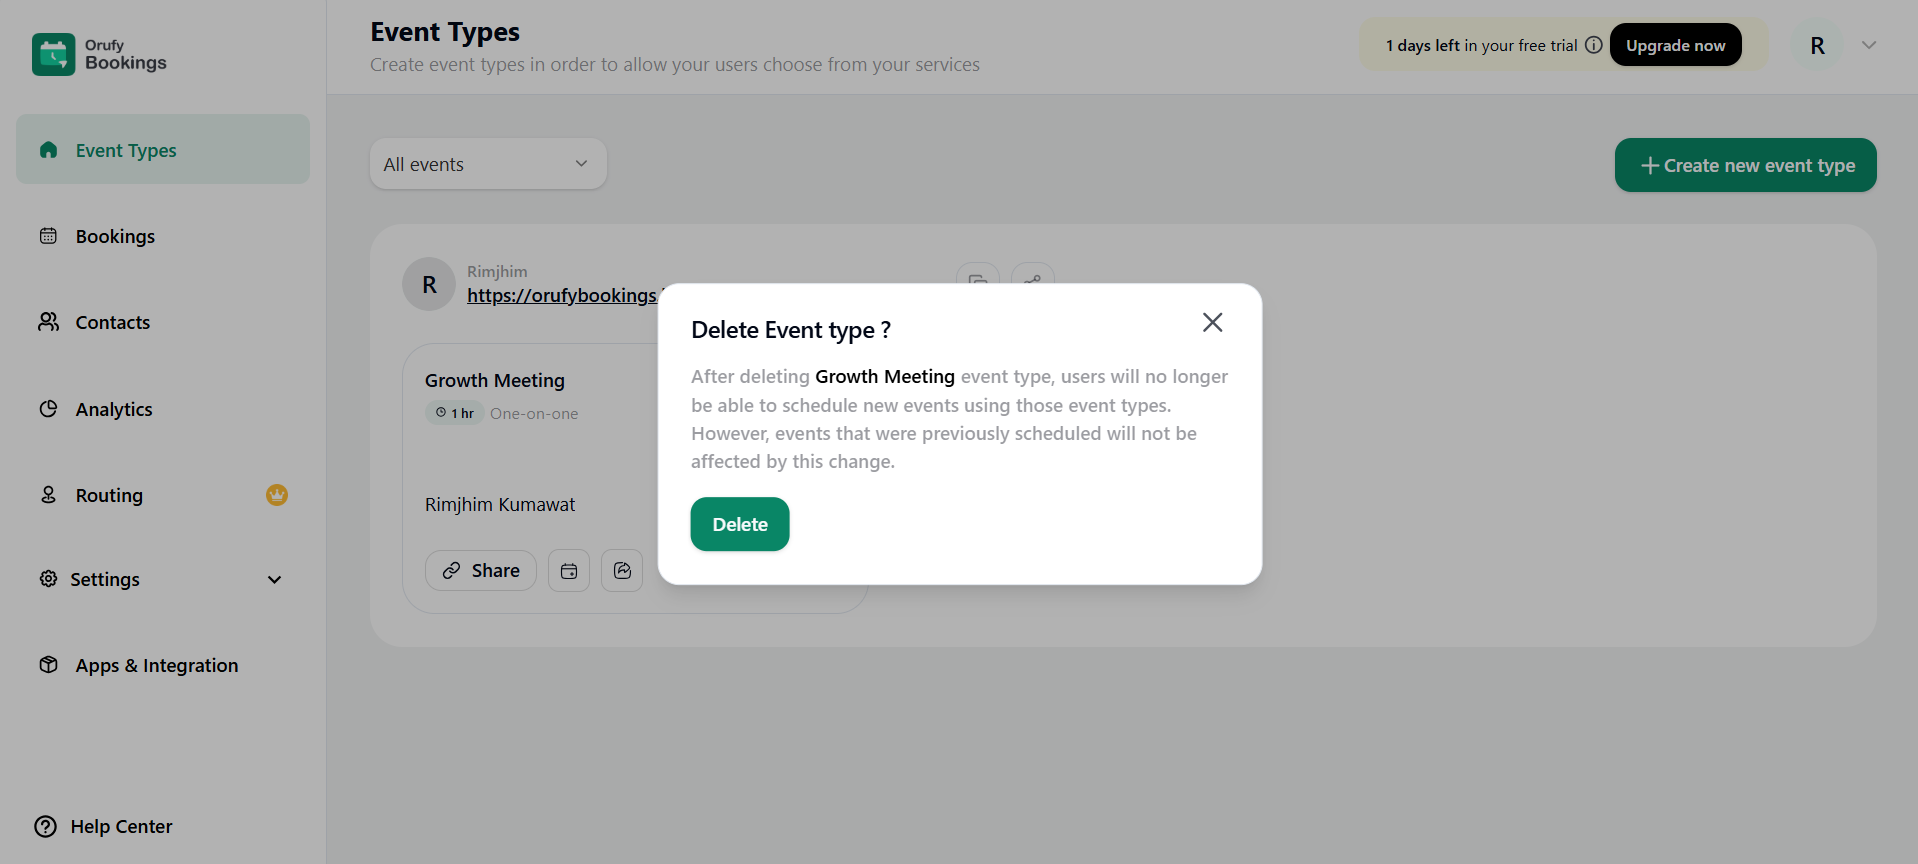
5. Delete: The selected event type will be deleted, and users can no longer access this event type.
6. Make Secret: Enable Make Secret if you want to hide a particular event from the main bookings page.
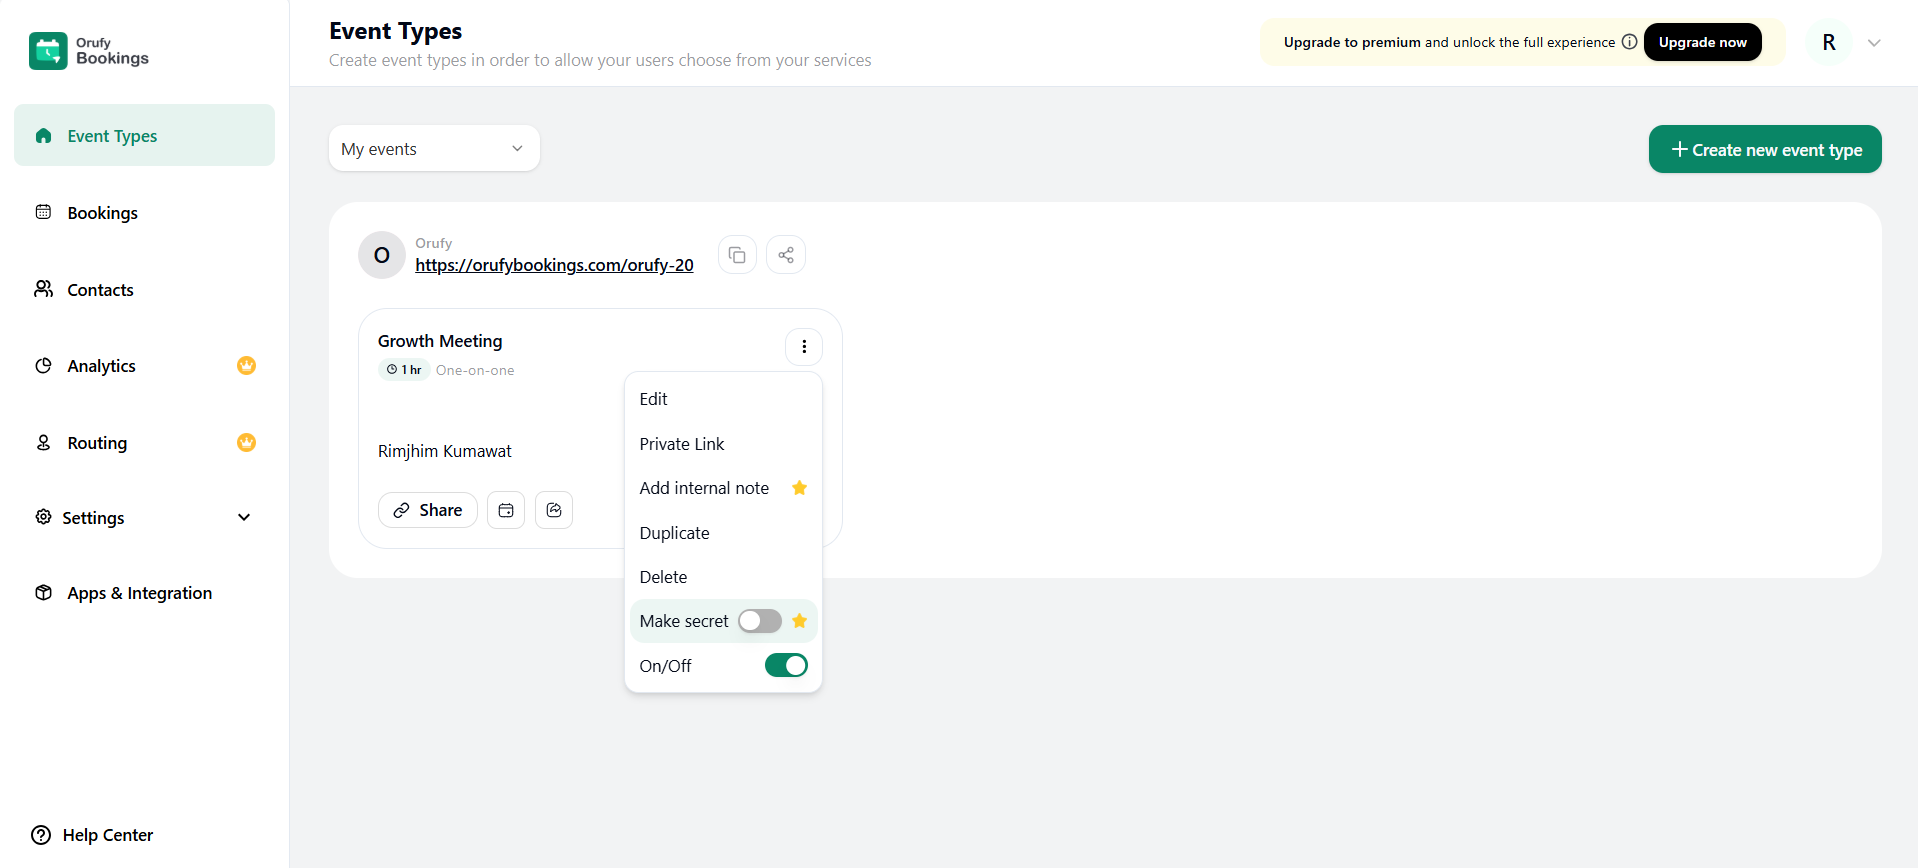
7. On/Off: The status of the event type is either accessible or non accessible.
On refers to the event type that can be accessed by users.
Off refers to the event type that cannot be accessed by the users.
Now, for further customisation of Event Types, navigate to the next page.

