
Teams is a group of users created to manage events together in an organised way. Instead of having one person handle everything, you can manage it team-wise.
- Click on “+ Add Team” to start creating your team.
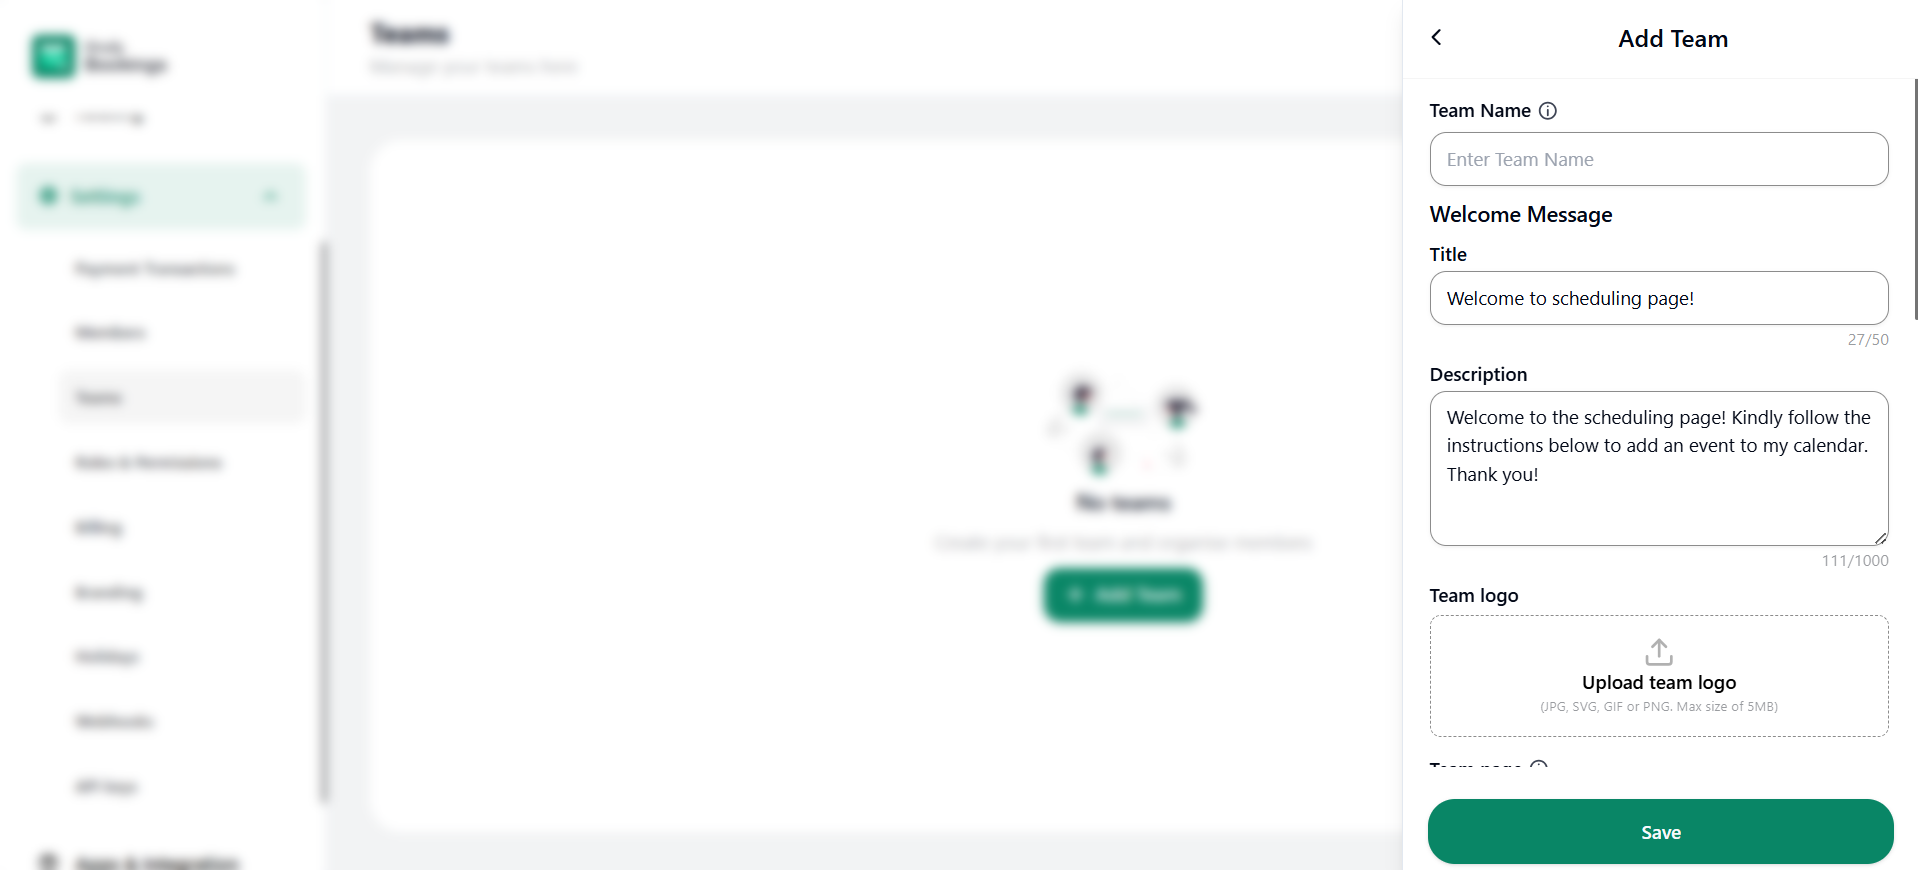
- A pop-up will open named Add Team to add some details about the team.
1. Team Name: Enter the name of your team.
2. Title: The title of the scheduling page or a welcome message that to be displayed on the scheduling page.
3. Description: Add the description for the scheduling page.
4. Team Logo: You can also add the logo of your team.
5. Team Page: You can access specific team events by using the team access link.
6. TimeZone: You can select the timezone.
7. Team Lead: You can select a team member who will become the team lead, but first, you have to add team members to the team. The default team lead will be the person who has created the team.
8. Team members: You can add the team members from the members list.
9. Branding: Enable or disable the display of the Orufy Bookings branding on the scheduling page.
10. Your team Branding: You can display your team branding in three ways:
- Show team logo only
- Show team name only
- Show team name and logo
11. Booking page layout: You can select how to display your booking page layout in three variations:
- Monthly view
- Weekly view
- Form View
12. Brand Colour: You can add your brand-specific colours to the scheduling page, links and buttons.
13. Background colour: Add background colour to your scheduling page.

