
Action Cards
1. Transfer to agent
It allows for to transfer of a conversation from the bot to a human or team.
- Assign Chat To: It the where the chat will go after the bot leaves.
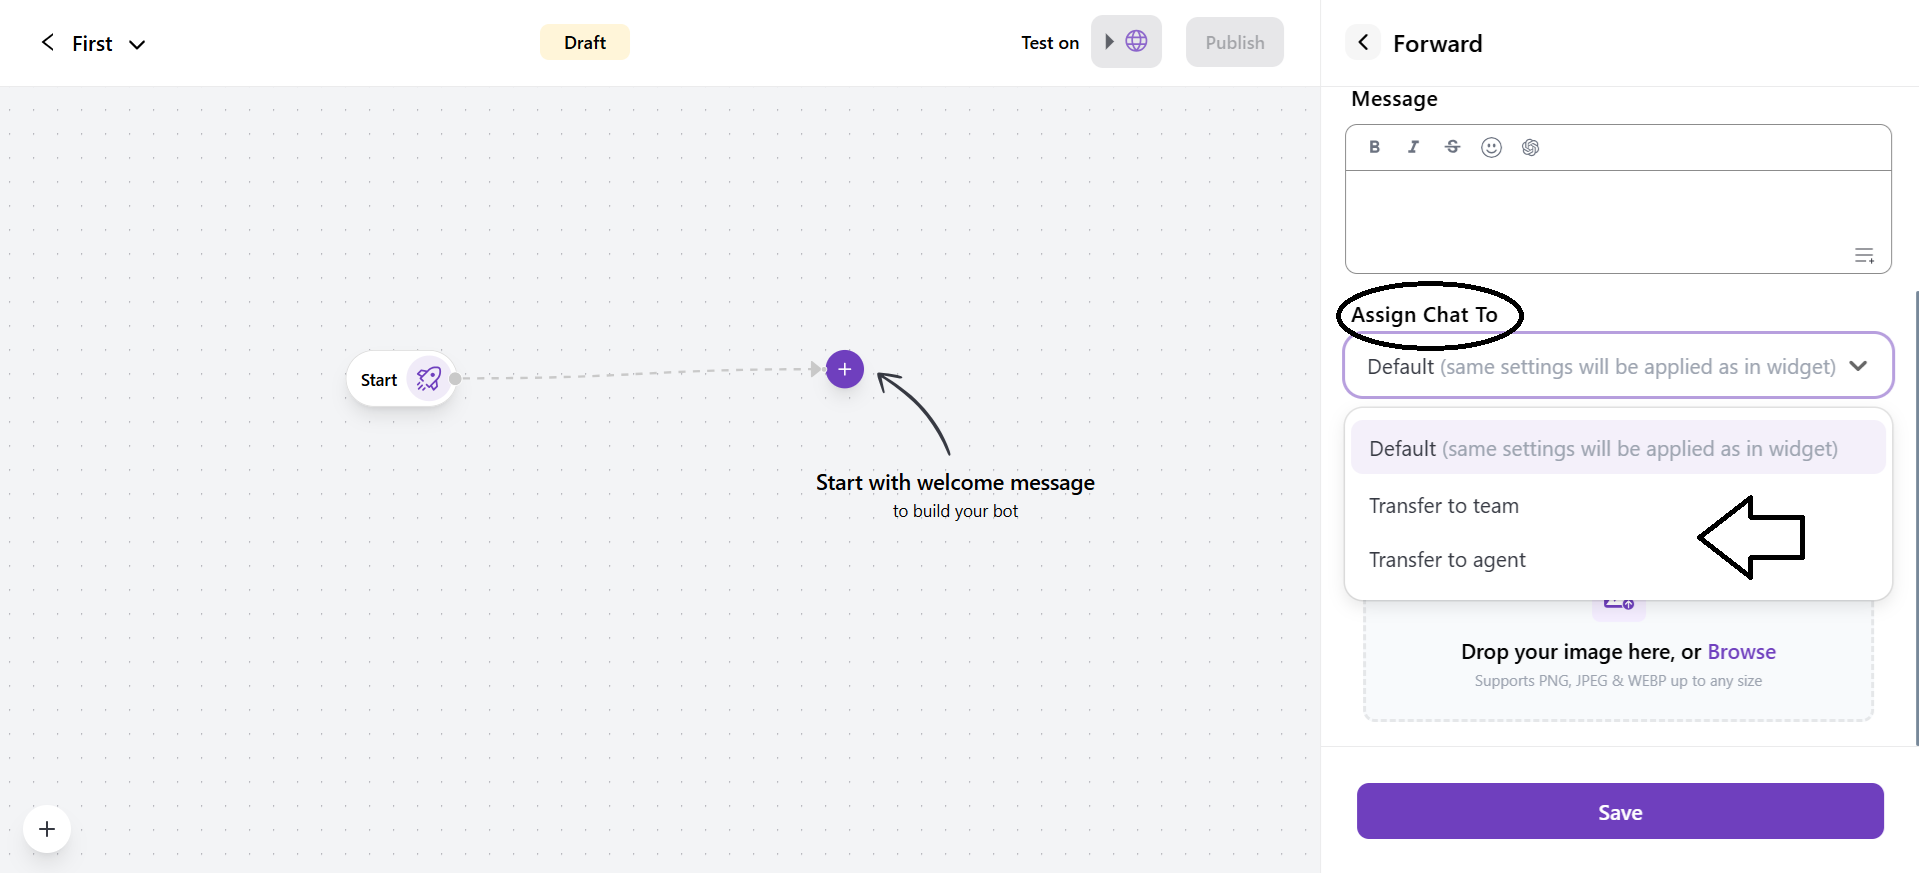
1. Default (same settings will be applied as in the widget): This setting allows the chat to follow your bot’s default settings.
2. Transfer to team: This option allows for transferring the conversation to a team of agents. If you select this option, a drop-down will open to select the team to which the conversation will be assigned or transferred.
3. Transfer to agent: This option allows for transferring the conversation to an agent. If you select this option, a drop-down will open to select an agent to whom the conversation will be assigned or transferred.
- You can also upload the background image in PNG, JPEG, and WEBP file formats from the advanced settings.
2. End Chat
This card is used when you want to end the conversation between the bot and the customer. It works as a signal to the bot to end a conversation.
- Delay Chat Closure
This setting allows you to control when the chat will close after the last message.
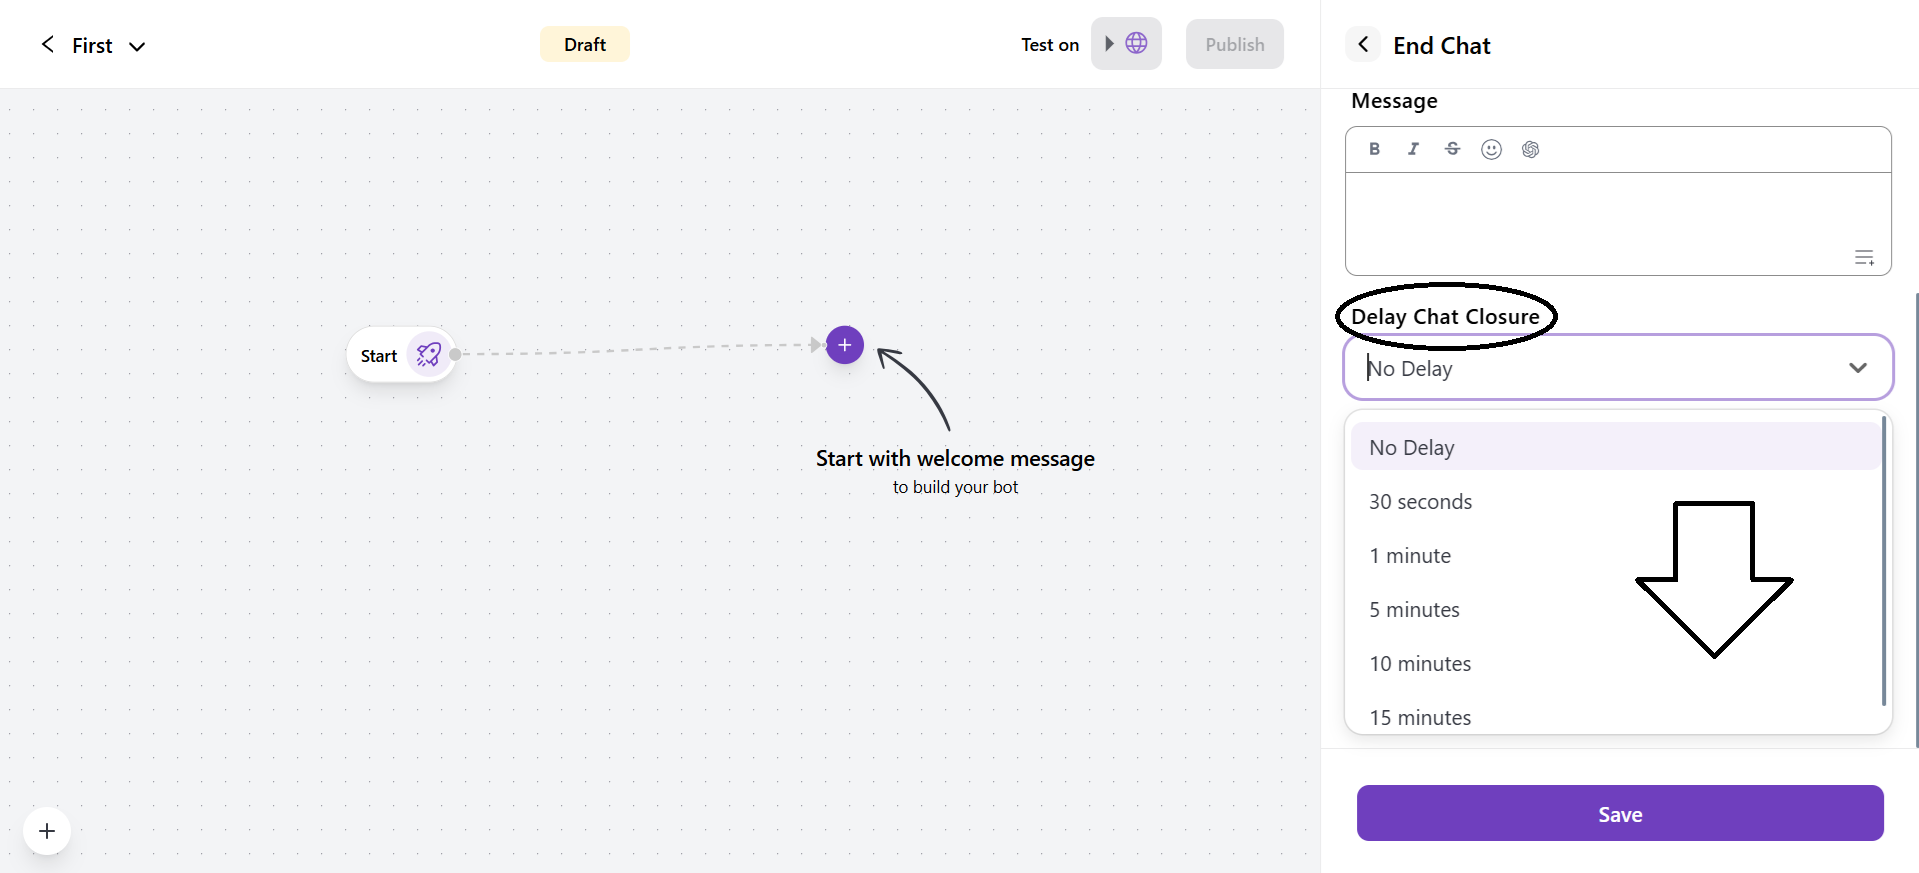
- You have six options to choose from a chat closure:
- No Delay: It ends the conversation just after the last message. It allows you to set the time till the conversation is open in case of customer wishes to reply. You can select the time accordingly.
- 30 seconds - 1 minute - 5 minutes - 10 minutes - 15 minutes
- You can also upload the background image in PNG, JPEG, and WEBP file formats from the advanced settings.
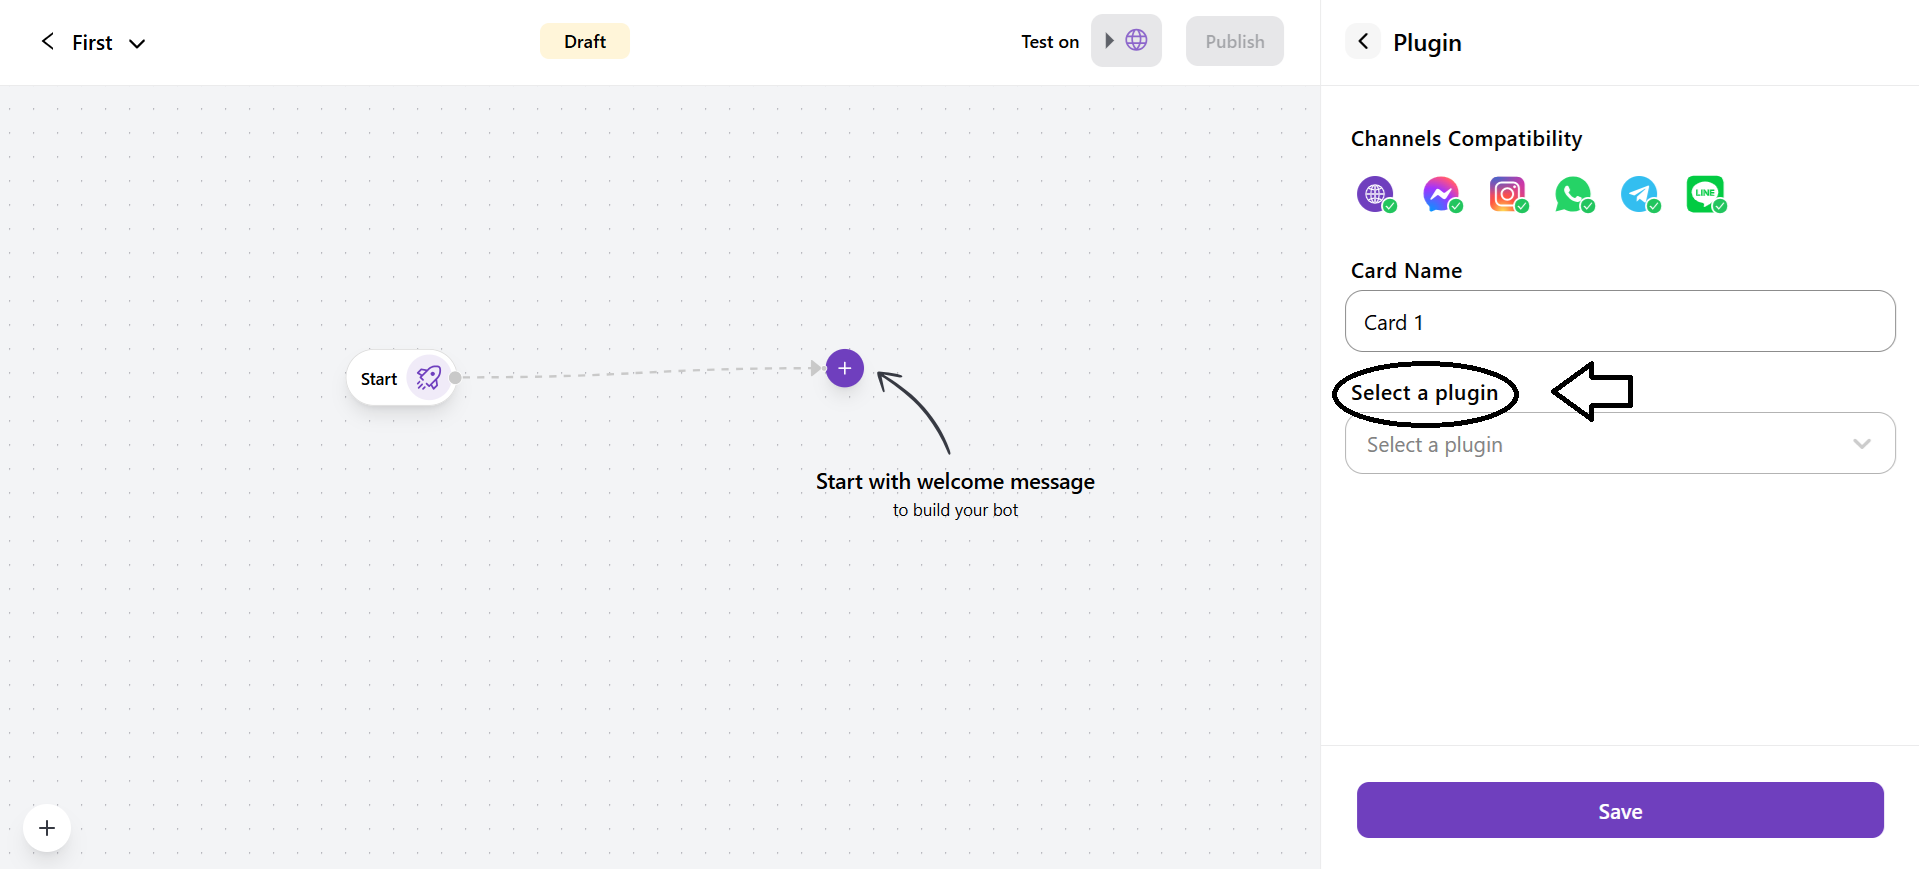
3. Plugin
It allows the bot to connect with an external service or tool when communicating with a customer.
- Select a plugin: You have to select a plugin from the drop-down list of plugins.
4. Condition Matching
It is a logic-based decision card in your chatbot flow.
-
You can add a condition through + Add Rule.
-
You can edit the title of the rule according to your needs. By default, the title of the rule is Rule 1.
-
Rules: You can add rules based on three parameters:

1. Customer Fields: The data that comes from the system’s customer fields.
2. Custom Variable: Variables that are created manually.
3. Widget Channel: The platform where the conversation is initiated.
- If you have selected the Rule as Customer Fields.

- You have to select the Customer Field from the drop-down. Listed below are the fields:
- Company Name - Full Name - Email - Contact Group (If you select this customer field, you must select a contact group from the drop-down).

- Select the conditions based on the rule. Listed below are the conditions that can be used for rules:
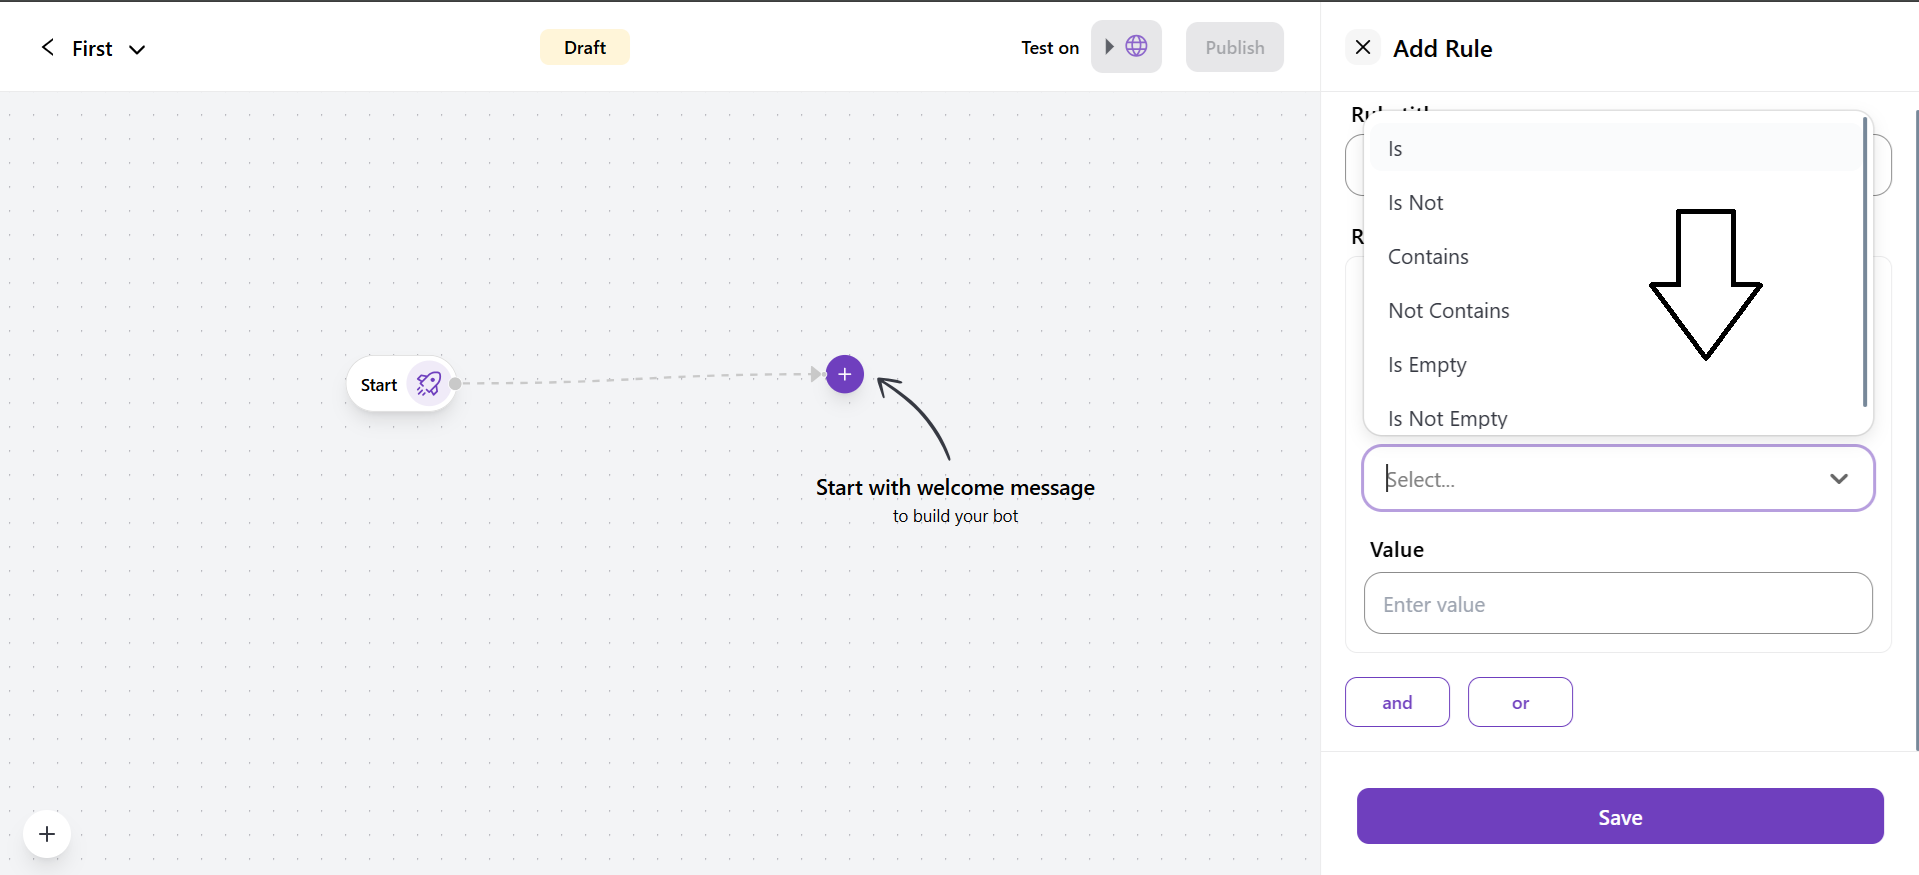
- Is: It is used to check that the value of the field exactly matches the given input.
- Is Not: It ensures that the value of the field does not match the given input.
- Contains: It is used to check whether the field contains the specific input given.
- Not Contains: It ensures that the field does not include the specific input given.
- Is Empty: It identifies when the field is empty by the customer.
- Is Not Empty: It identifies that the field is not empty and contains a value or input.
-
If you have selected the rule as a Custom variable.
-
You have to select the Customer Field from the drop-down. Listed below are the fields:
- Last visitor response
- FileUpload.url (This will only show in case you have added a bot context field.)
- Select the conditions based on the rule. Listed below are the conditions that can be used for rules:
- Is: It is used to check that the value of the field exactly matches the given input.
- Is Not: It ensures that the value of the field does not match the given input.
- Contains: It is used to check whether the field contains the specific input given.
- Not Contains: It ensures that the field does not include the specific input given.
- Is Empty: It identifies when the field is empty by the customer.
- Is Not Empty: It identifies that the field is not empty and contains a value or input.
- If you have selected the rule as a Widget channel.

- Select the conditions based on the rule. Listed below are the conditions that can be used for rules:
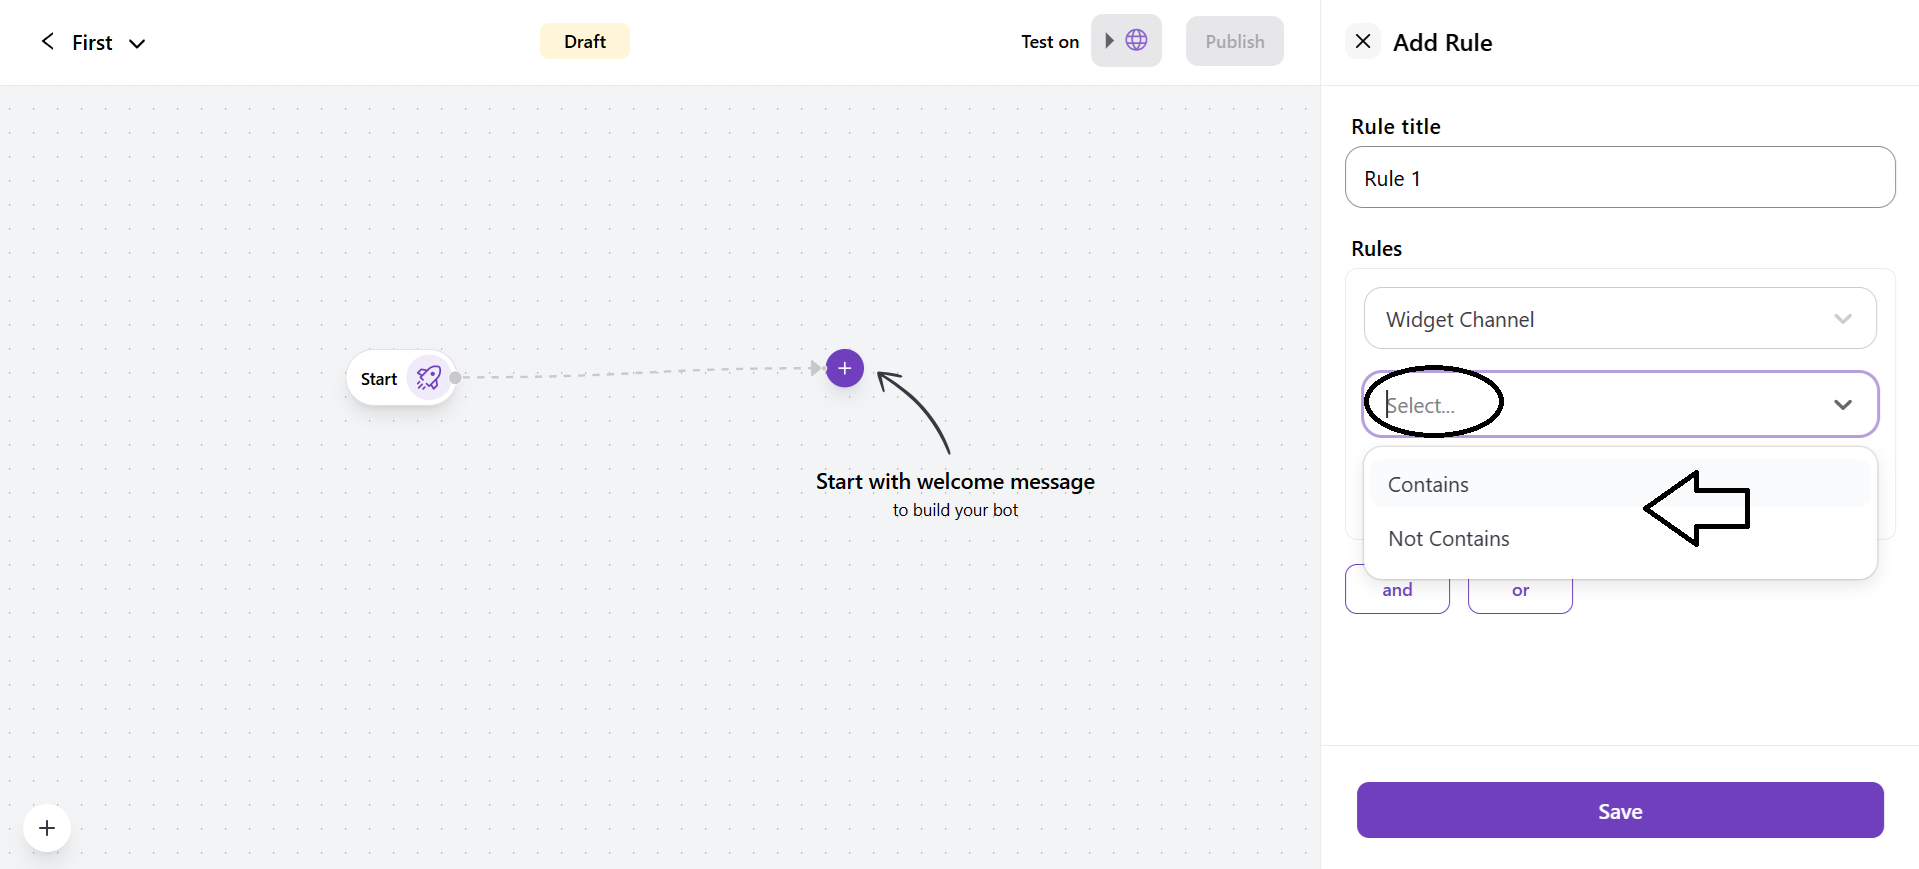
- Contains - Not Conations
- Select the value of the conditions. Listed below are the values:
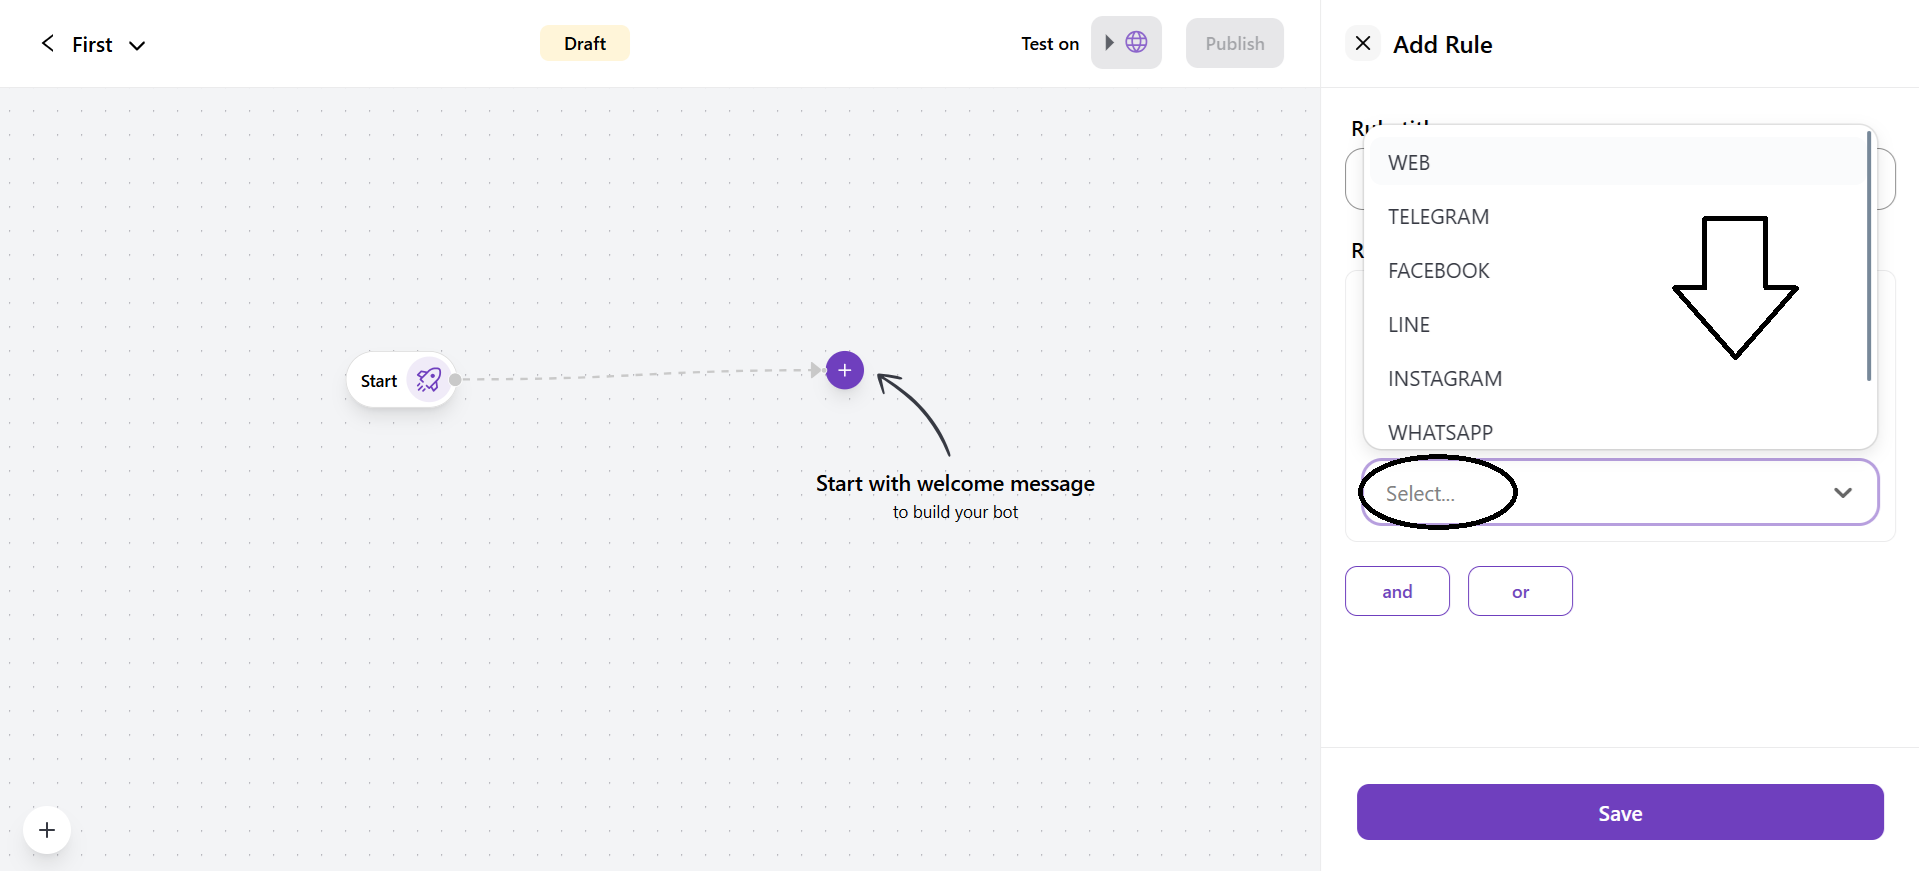
- Web - Telegram - Facebook - LINE - Instagram - Whatsapp - Mobile
- You can add AND and OR conditions inside a parameter.
AND: It ensures all the specified conditions need to be true for the rule to be triggered.
OR: It functions when one of the given conditions is true. You can use AND and OR in a single rule.
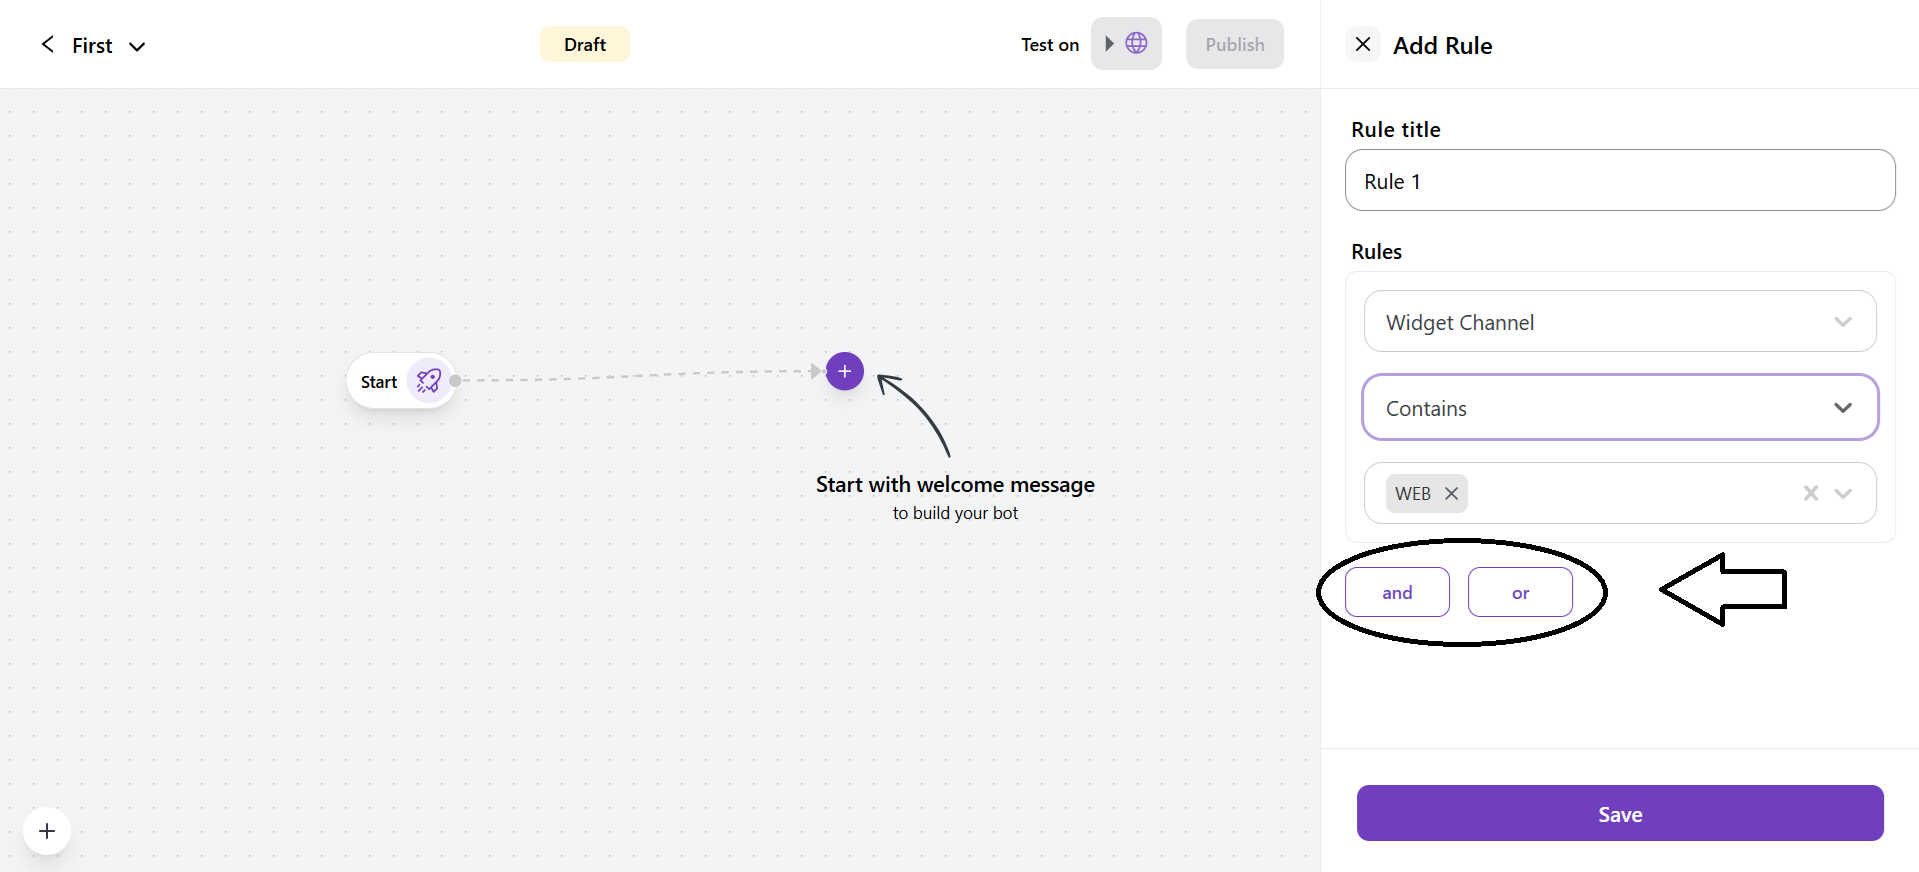
- In case of multiple rules by default, only the AND condition works.
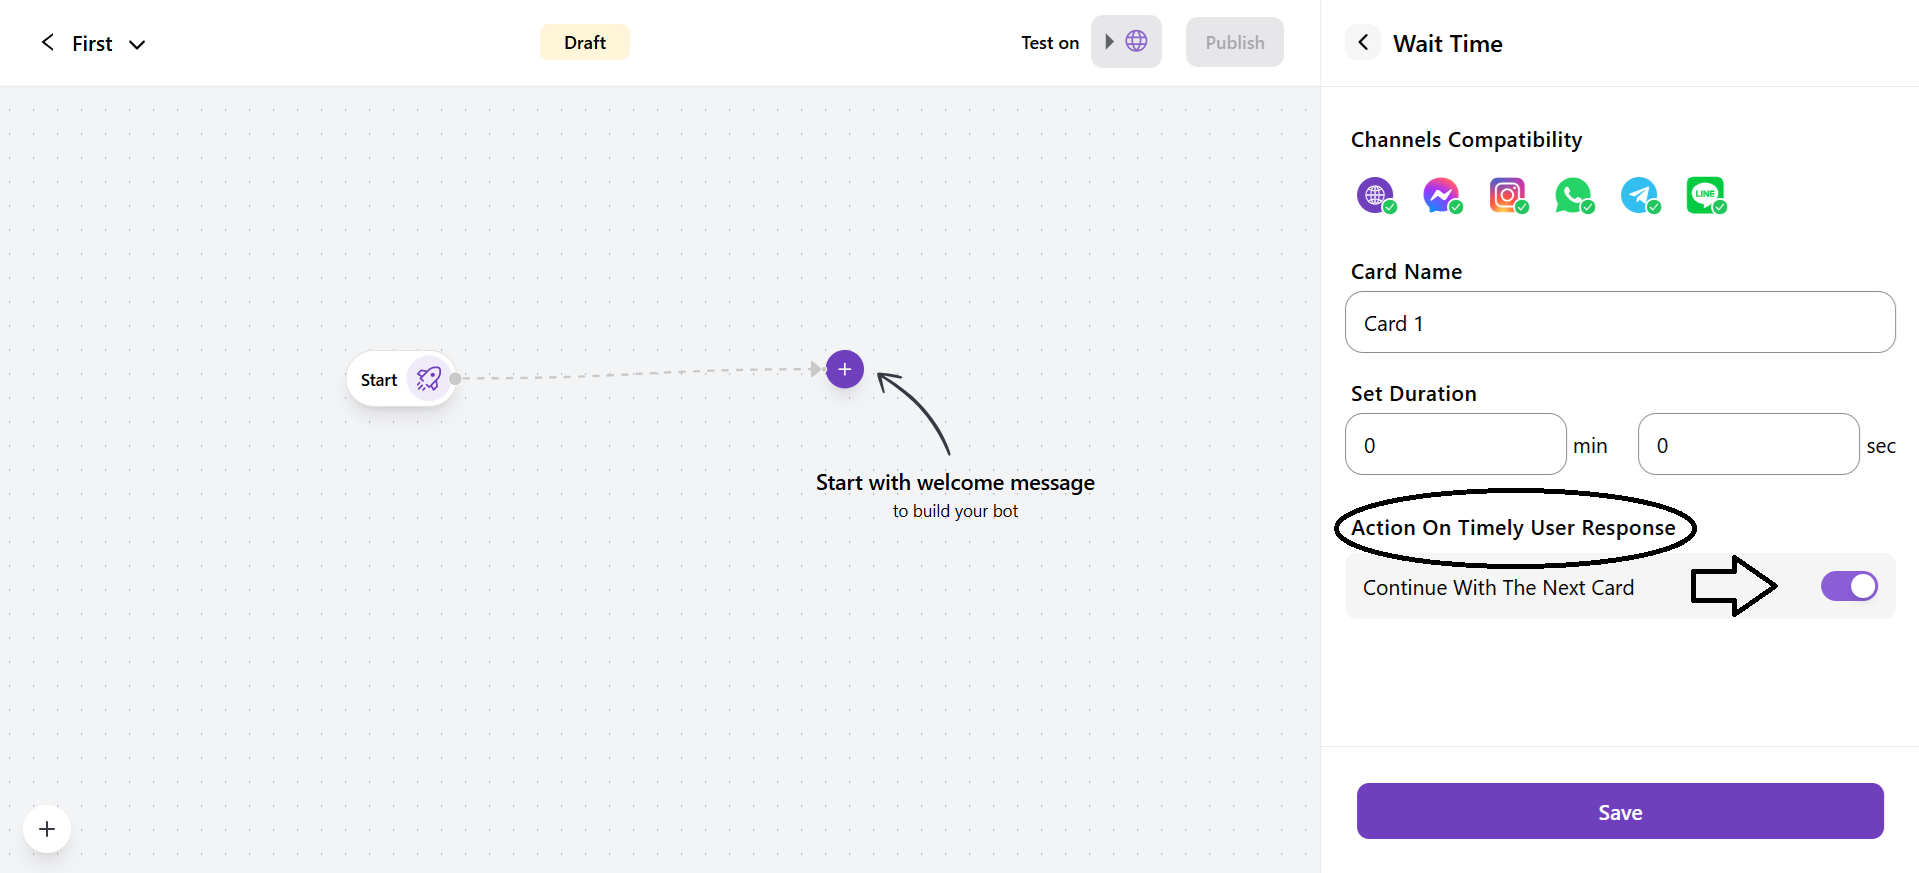
5. Wait time
It allows you to add a time duration to pause the chatbot’s conversation for a specific duration before it continues to send the next message.
- Set Duration
In this field, you can define how long the bot should wait before moving forward in the conversation. You can set the delay time in minutes or seconds.
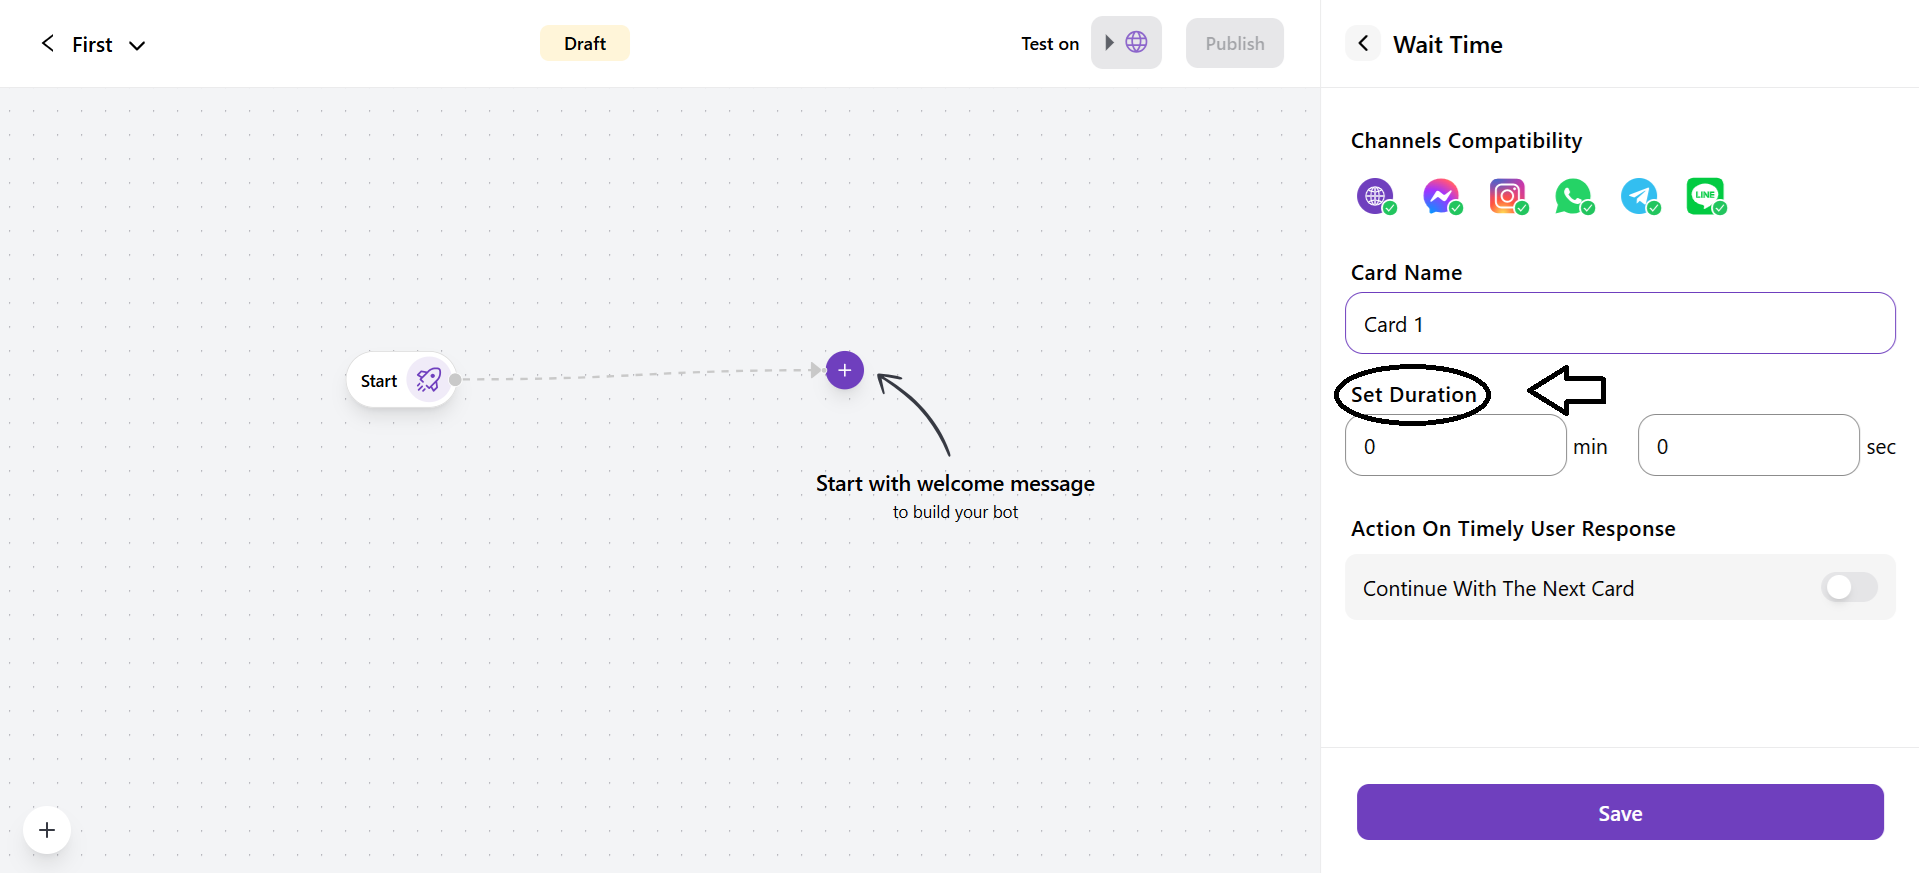
- Action on Timely User Response
-
Continue with the next card: You can toggle these settings to enable or disable the control of what will happen if the customer responds before the time ends.
-
If enabled, the chatbot will always wait for the full duration before continuing the conversation.
-
If disabled, the chatbot will immediately move to the next card once the customer responds without waiting for the timer to finish.
6. Ticket
It allows the creation ticket automatically when a user submits a query through the bot.
- Ticket Title: Enter the title of the ticket.

- Description Origin: You have to select the source from where the ticket will be raised.

- You have two options:
1. Choose the latest visitor response
2. Ask for visitor response
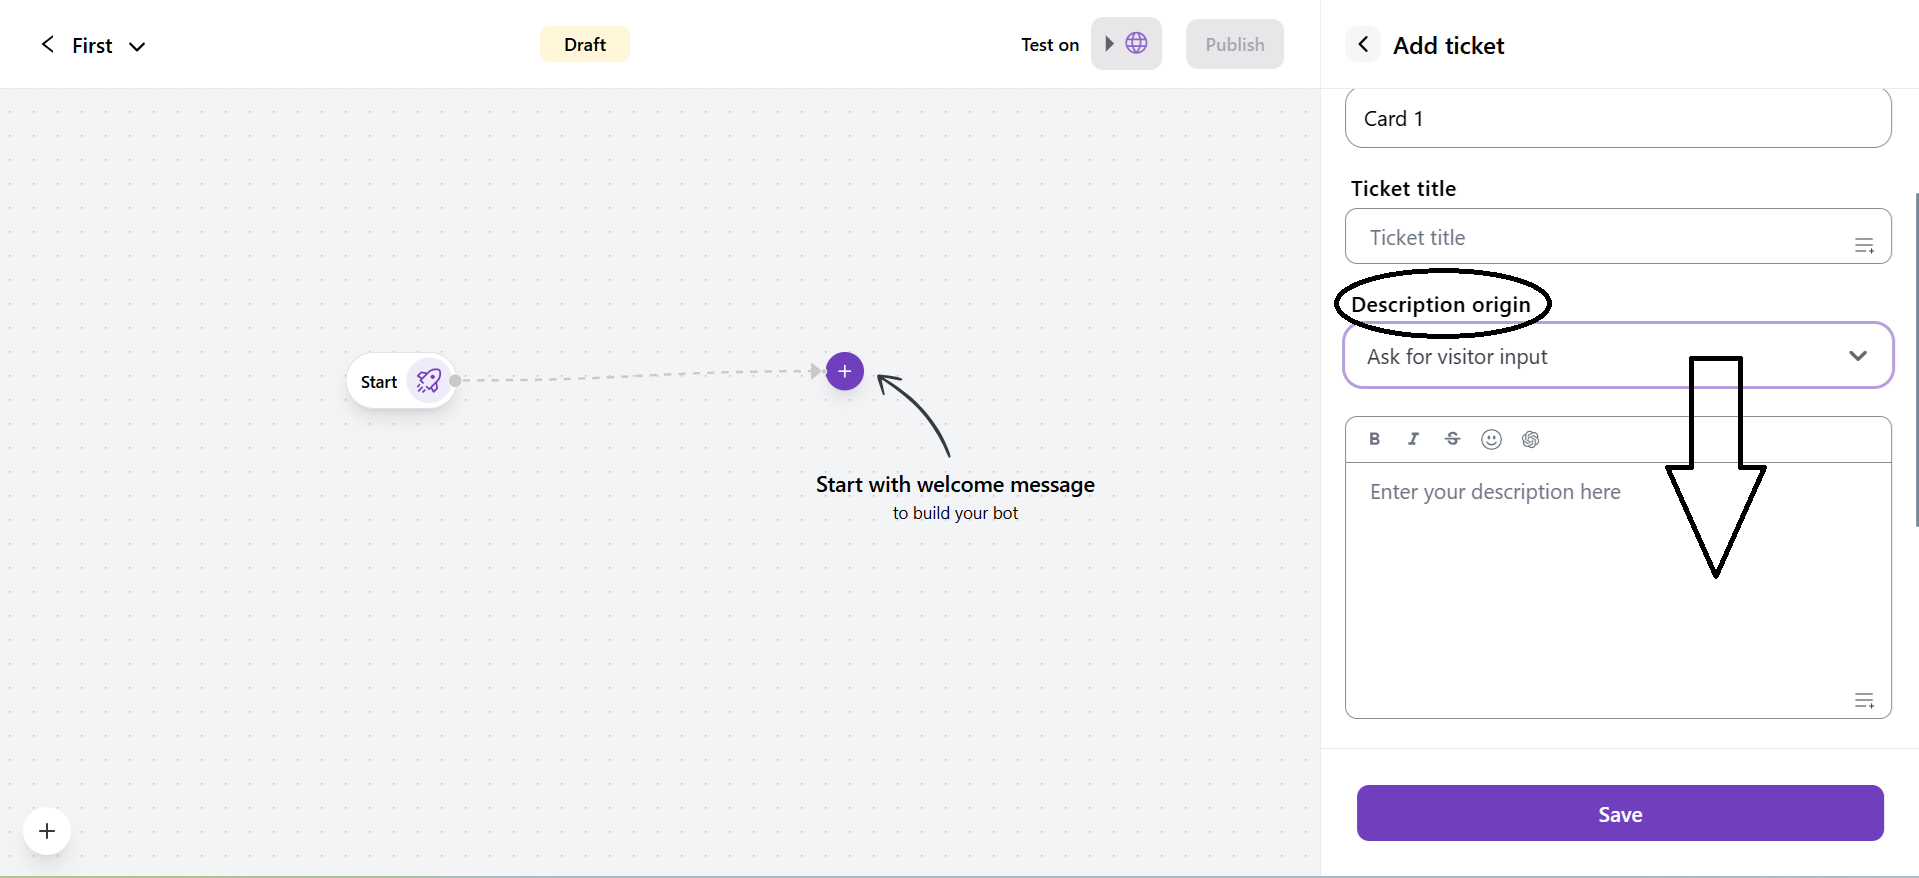
If you select this option, you have to enter text to ask the customer any query.
- Assign ticket to
You have to select to whom the ticket will be assigned.
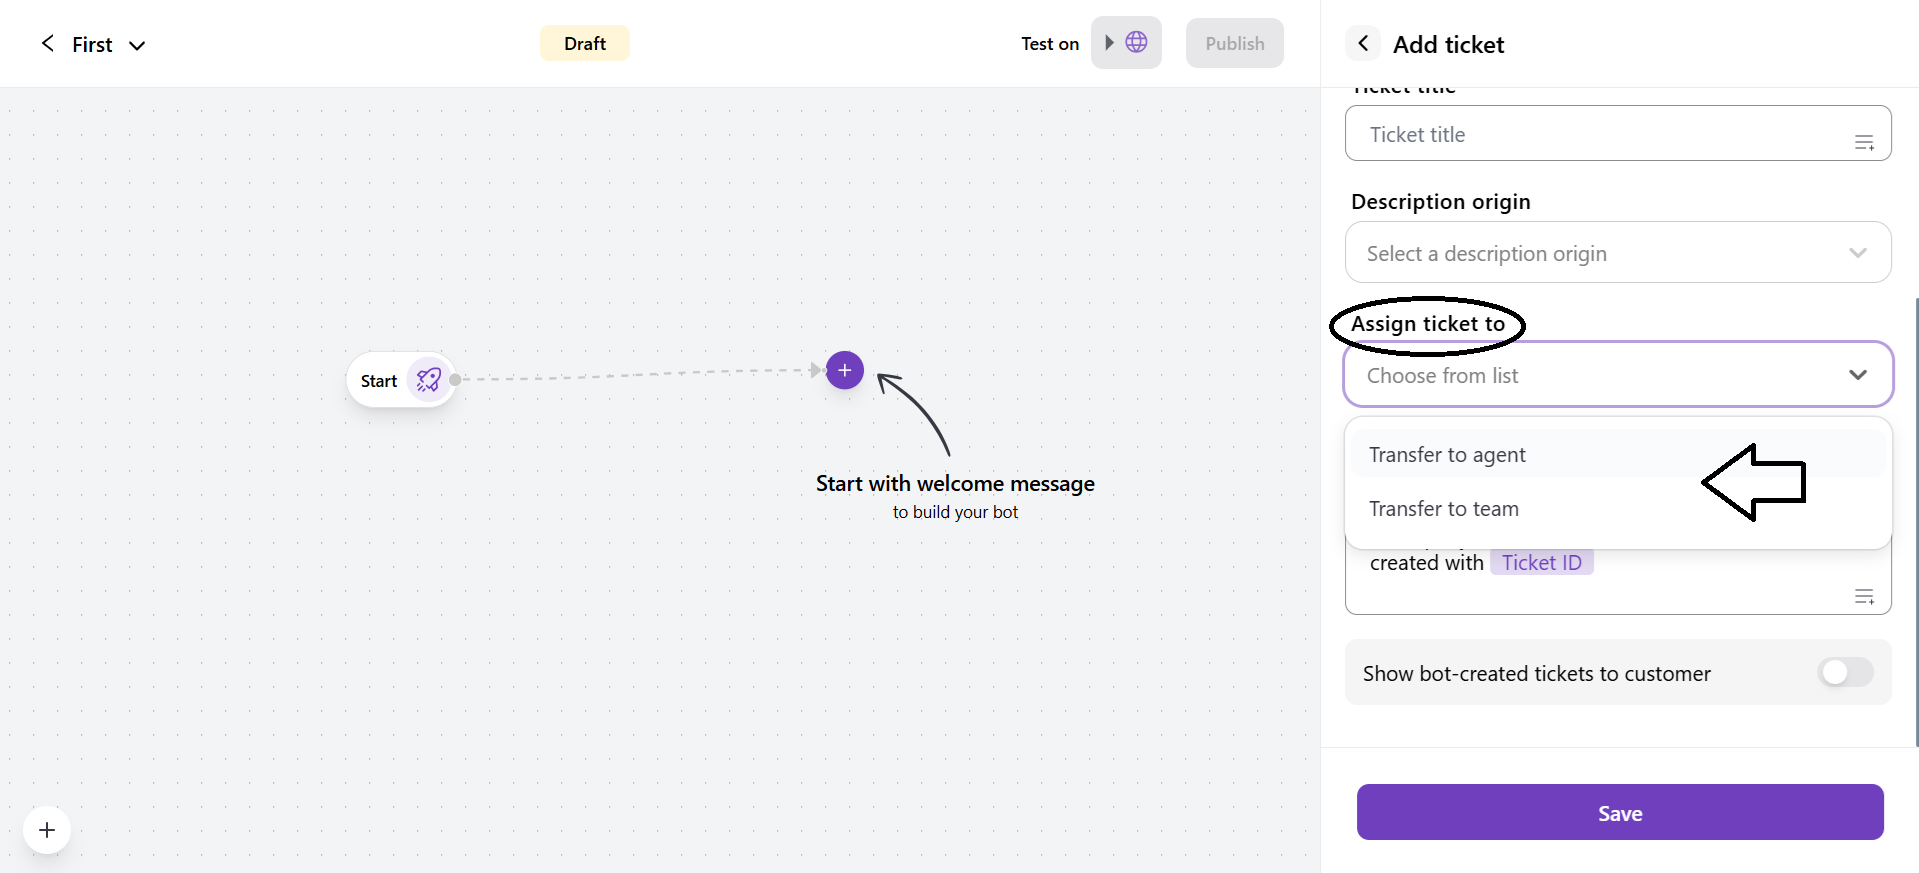
- You have two options to assign tickets:
1. Transfer to agent
If you select this option, a drop-down of users will be opened to assign the ticket to the agent.

2. Transfer to team
If you select this option, a drop-down of the teams will be opened to assign the ticket to the agent.

- Auto-reply
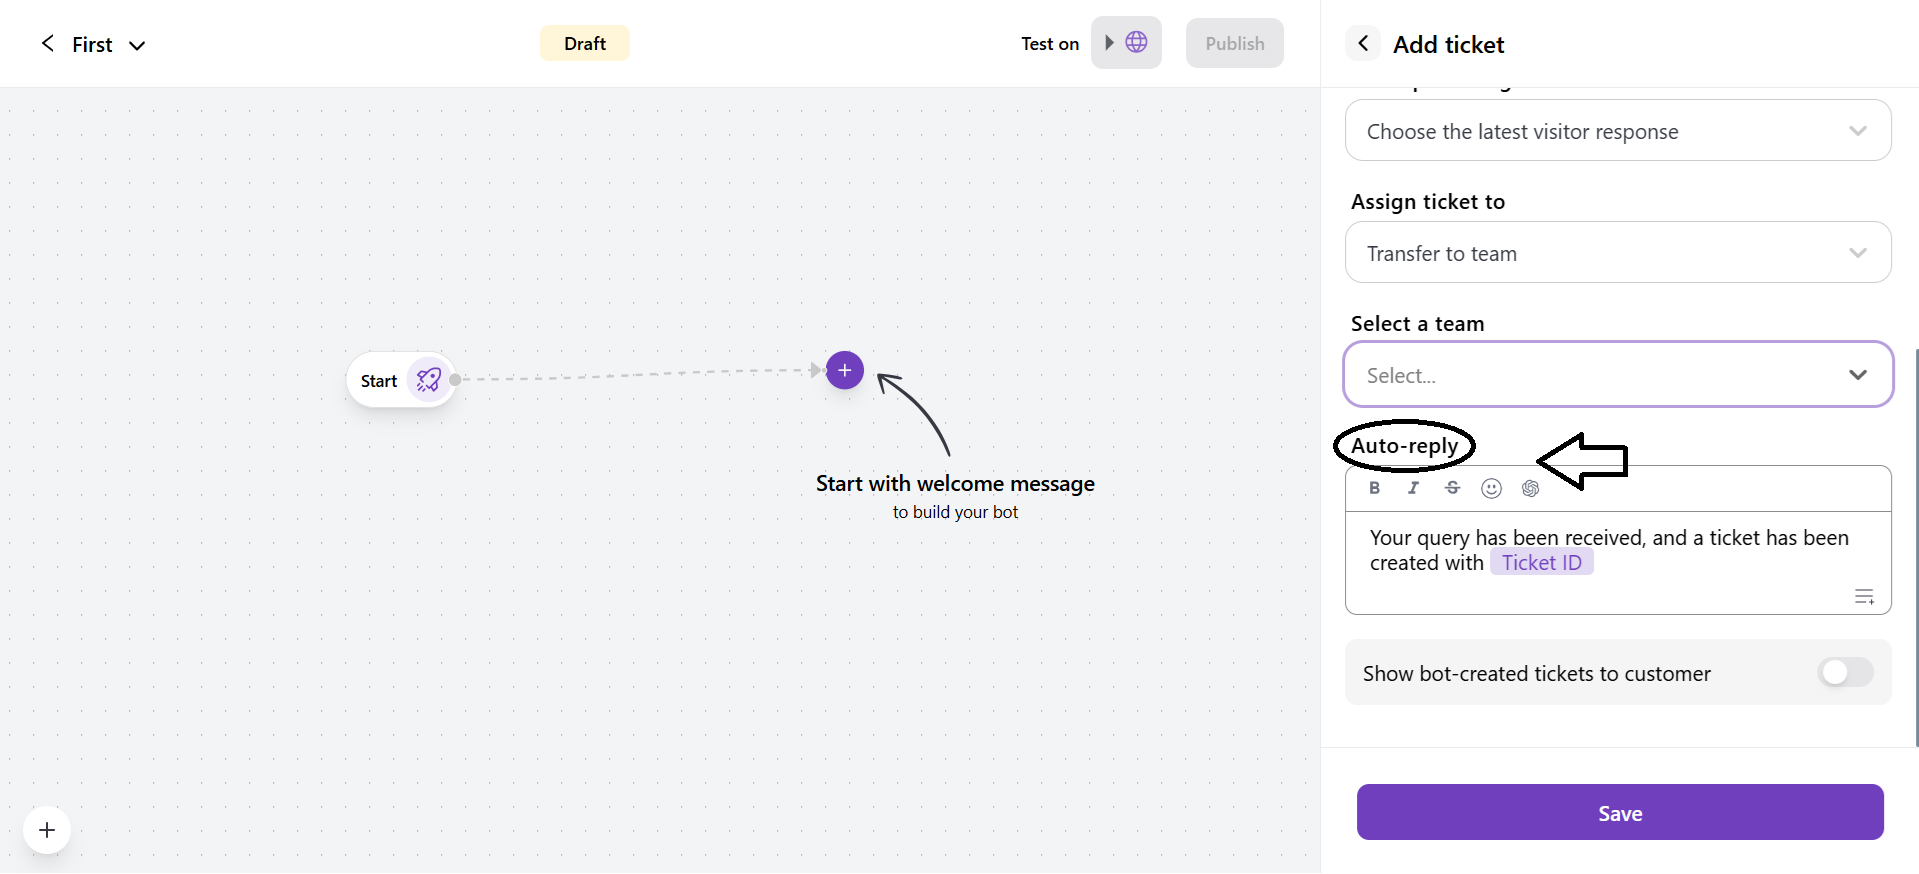
This the the automated message that the chatbot sends immediately to the customer as the ticket is created. You can edit the auto-reply message.
-
Show-bot created tickets to customer

- If enabled, the customer can view the ticket created.
- If disabled, the customer cannot view the ticket as the ticket is logged internally.
7. Go to Card
It allows you to connect from one card to another within the bot flow.
-
Select connection type
-
You have two options to select which card to connect with which card.
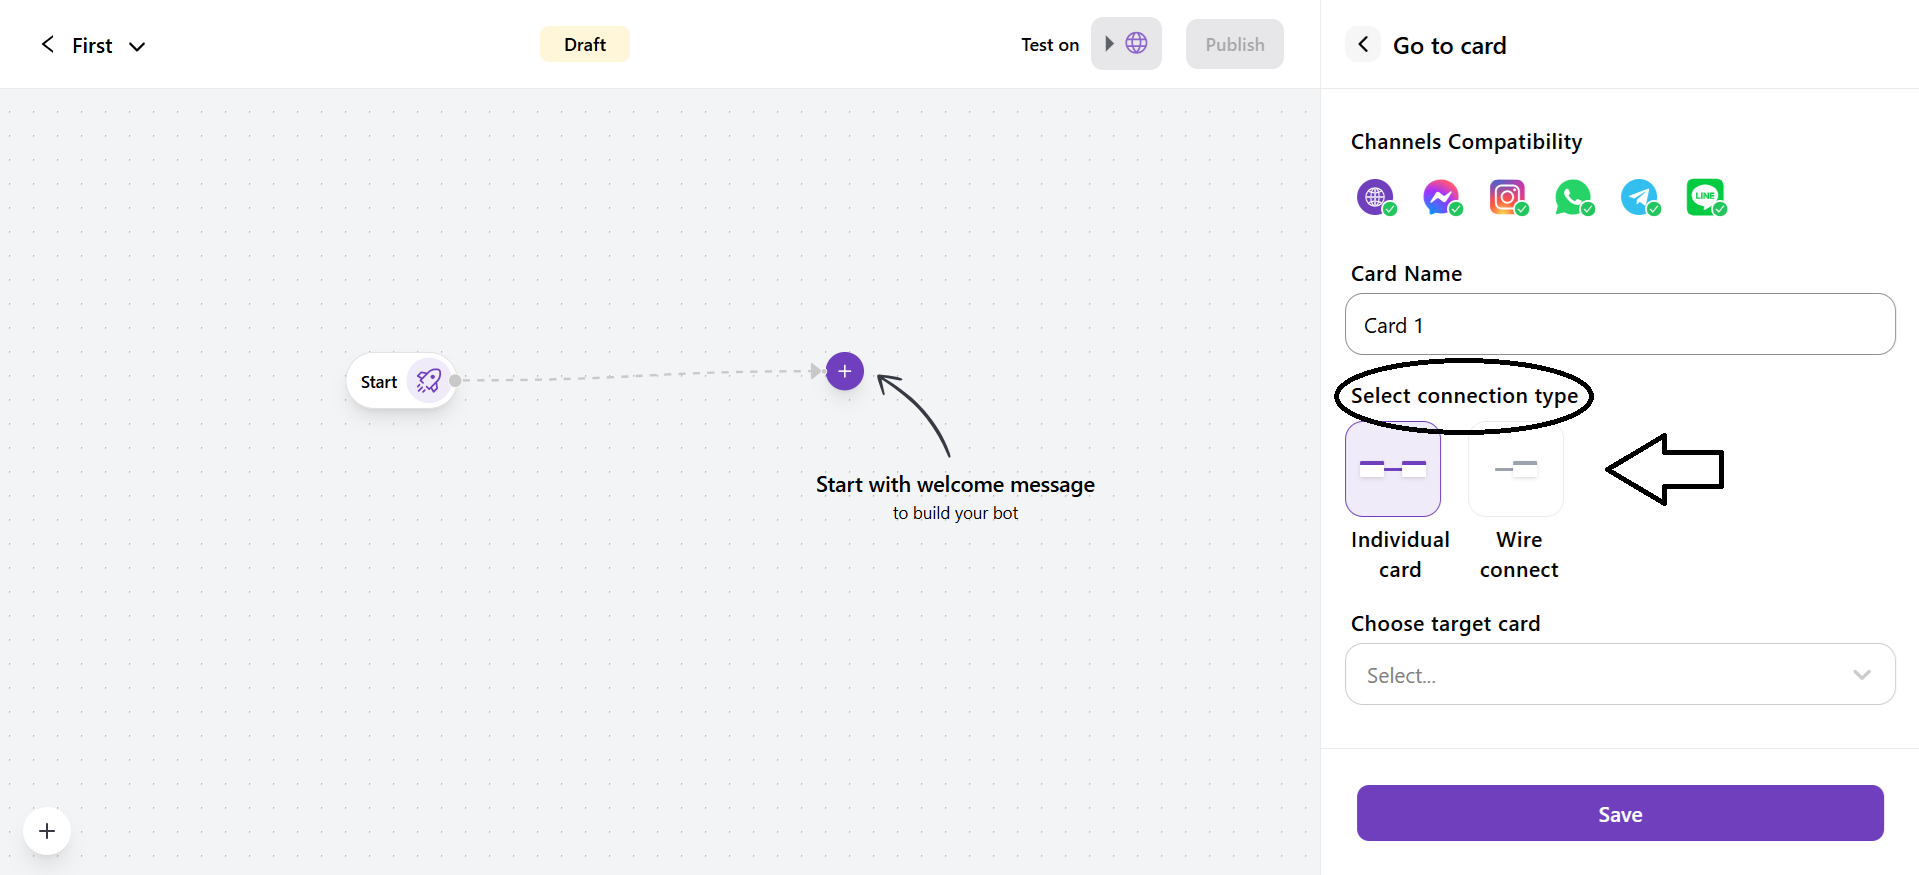
1. Individual Card This lets you connect a specific card to another card directly.
2. Wire connect This connects the current card to another card of your chatbot flow.
- Choose Target Card.
This drop-down allows you to select which card the bot should go to after the current card.

8. Transfer to bot
It allows your current bot to transfer the conversion to another bot.
- Choose another bot.
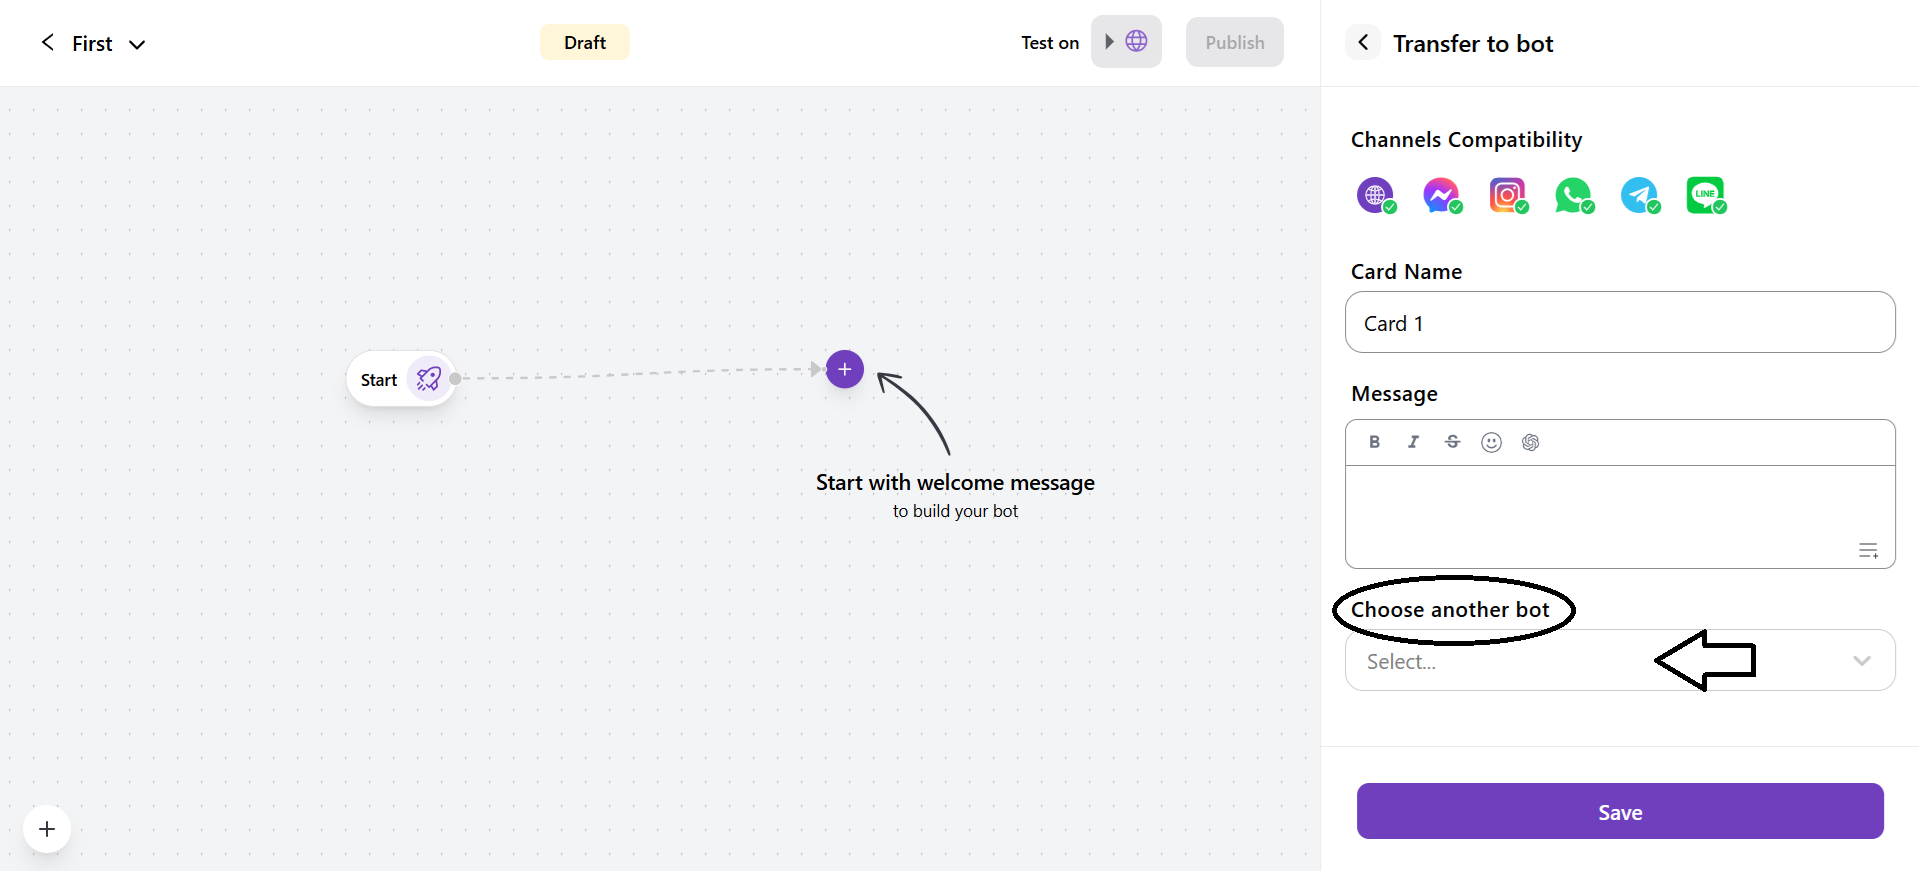
- You have to select another bot to whom the conversation will be transferred.

