Home
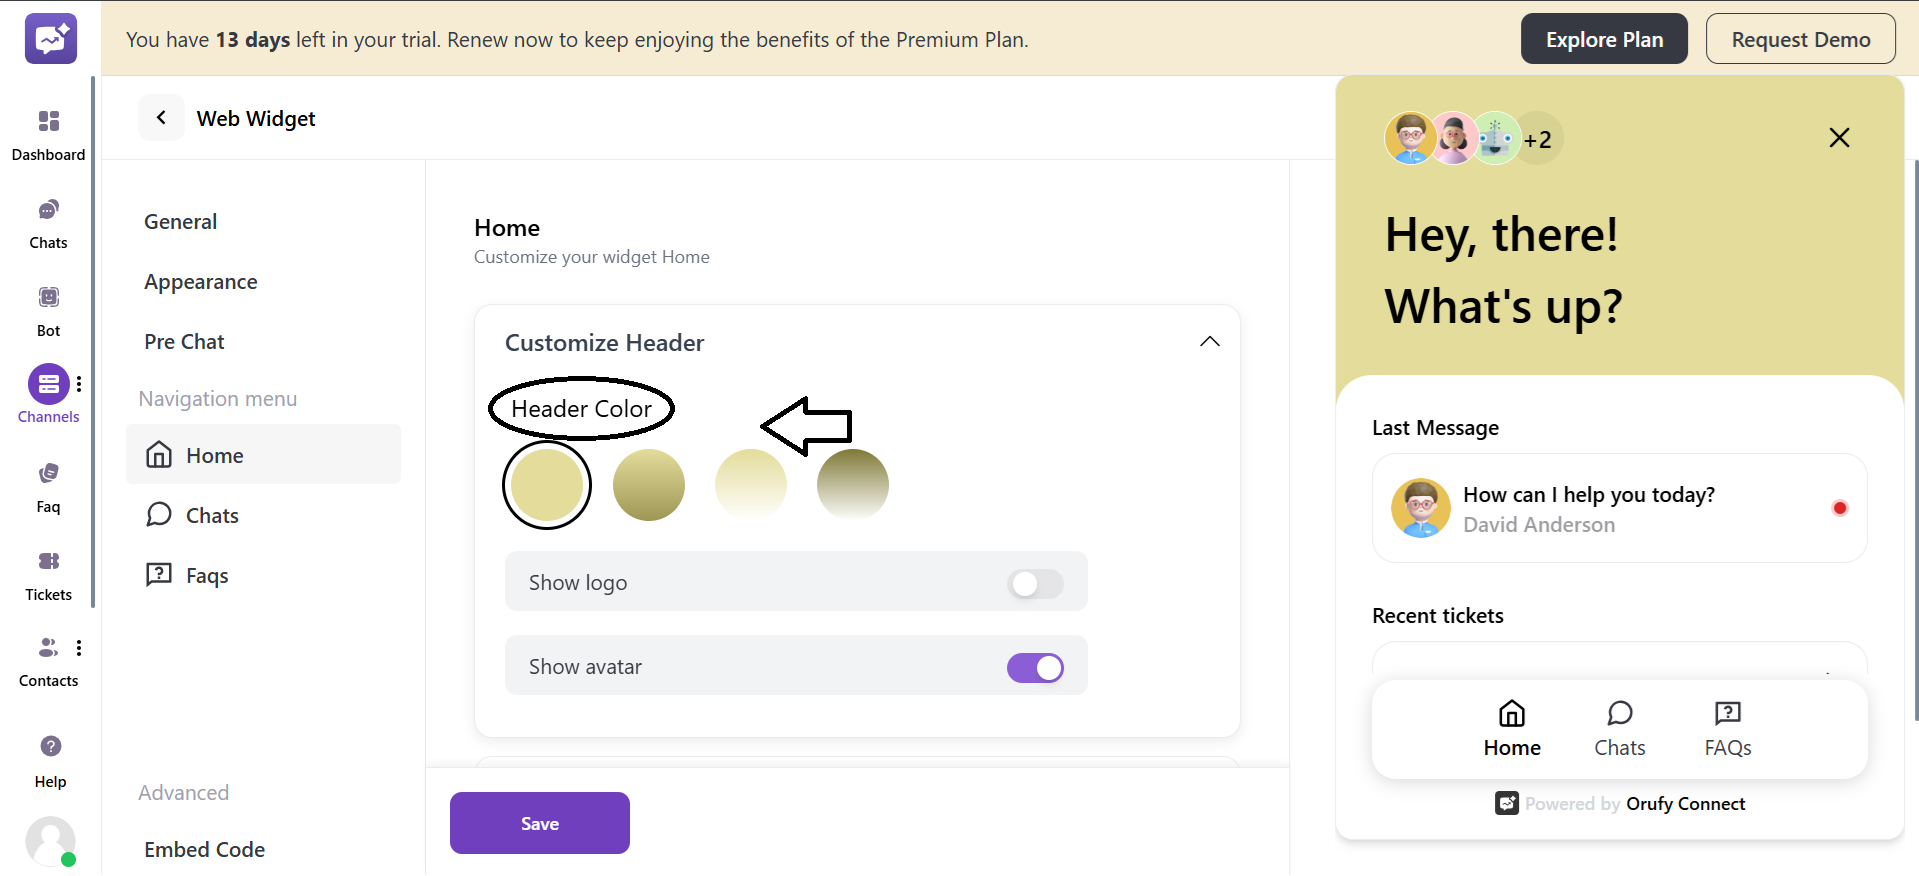
1. Customise header
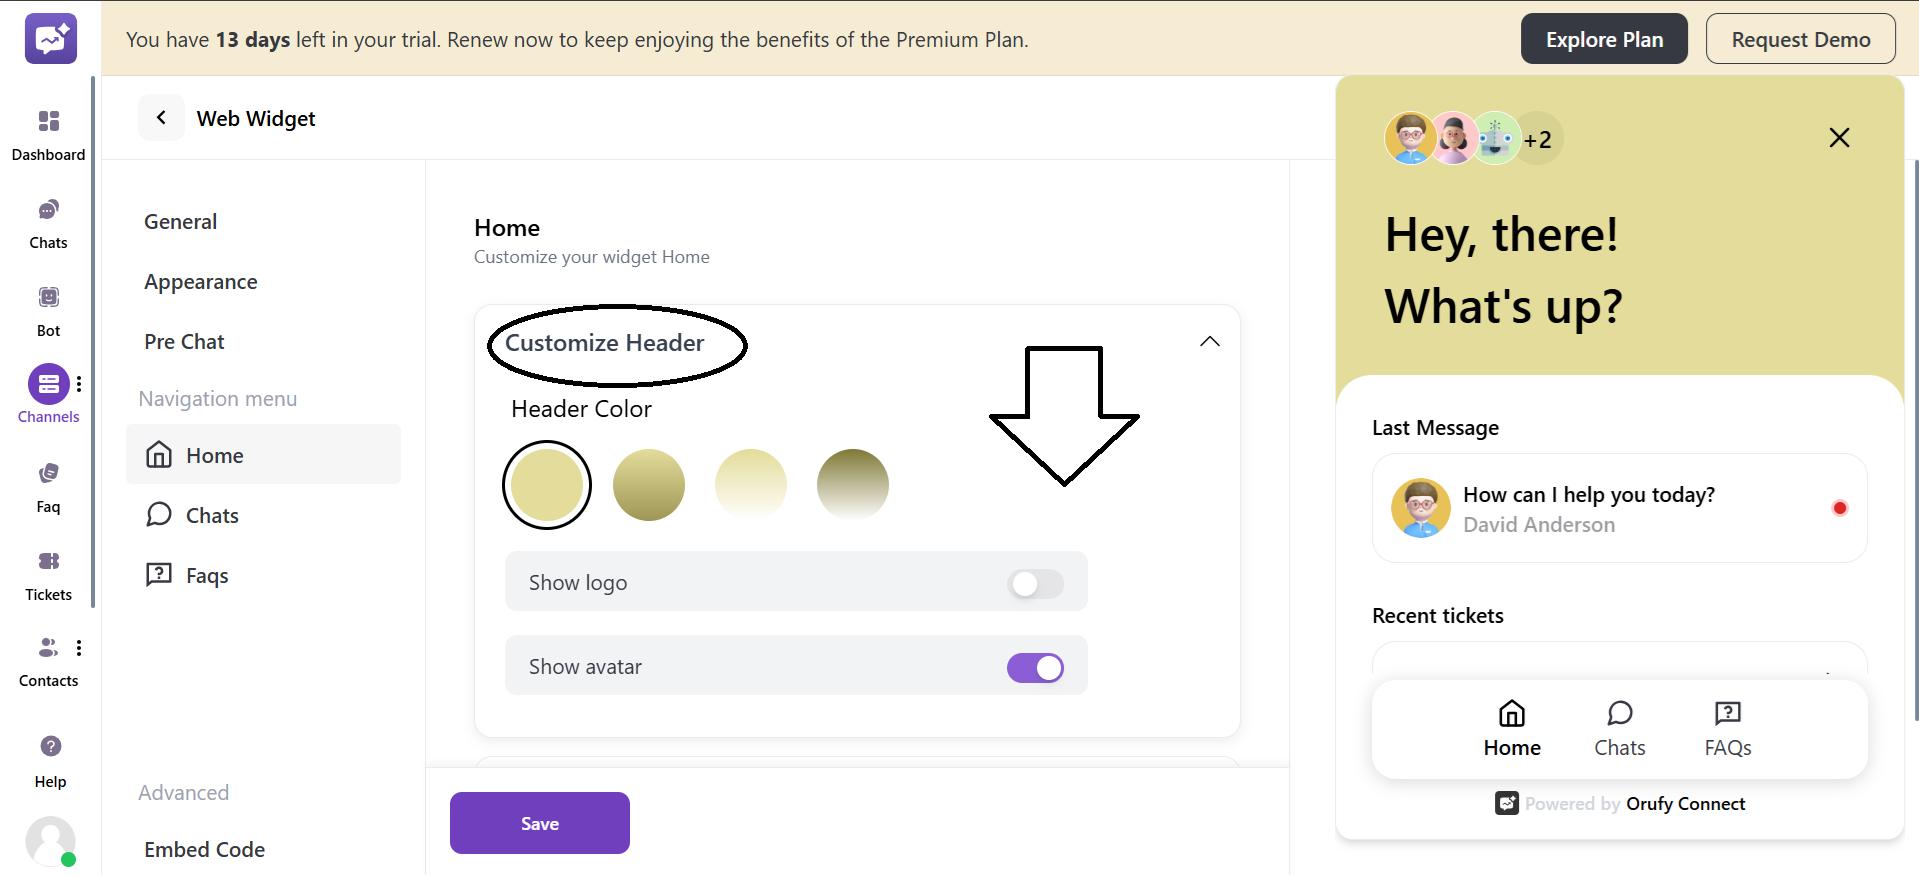
- Header Color
You can select the color of the header for the web widget.
- Show logo
You can toggle this setting to enable or disable. If you enable it, you can upload the logo to appear in the web widget.
![]()
The logo should be in JPEG, PNG, or GIF format, with a maximum size of 5 MB.
- Show avatar
If you enable this setting, it will display the profile picture of the member agents or bots included in the web widget.
![]()
2. Welcome Message
- Greeting: You can enter the greeting for the conversation. For example, Hello, Hey there, and more.
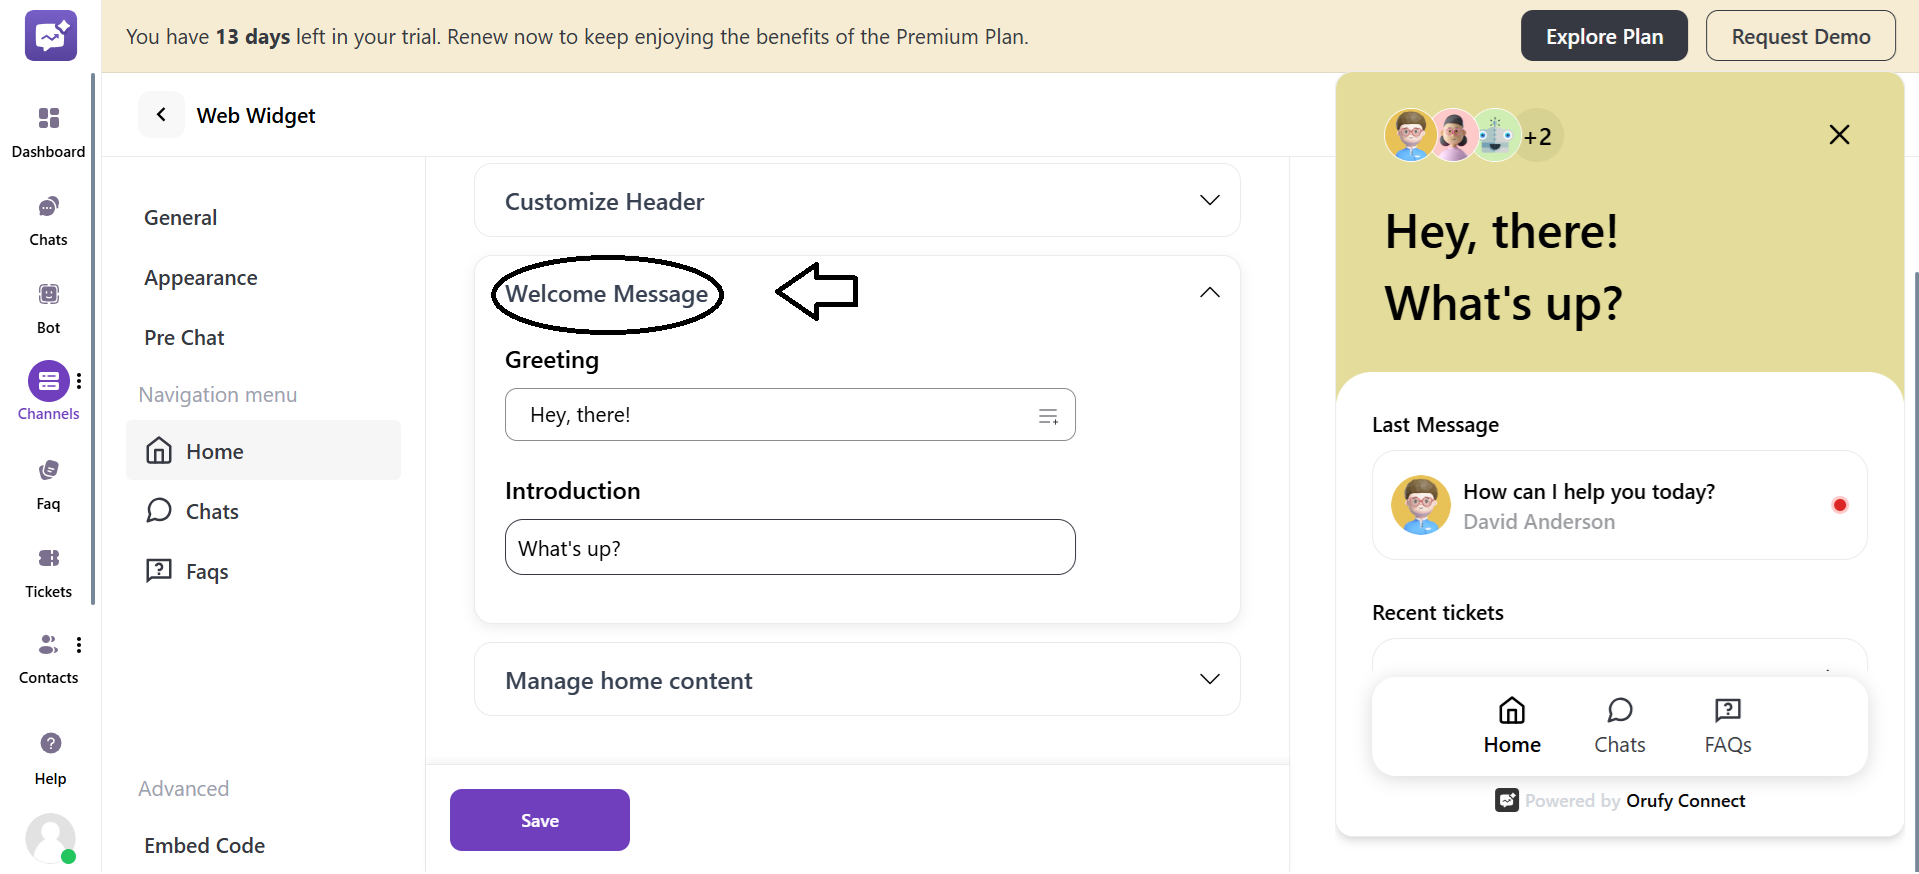
- Introduction: You can enter the introduction on the basis of what you want to ask the customer.
3. Manage Home Content
You can drag and drop the fields listed in the Manage Home Content.
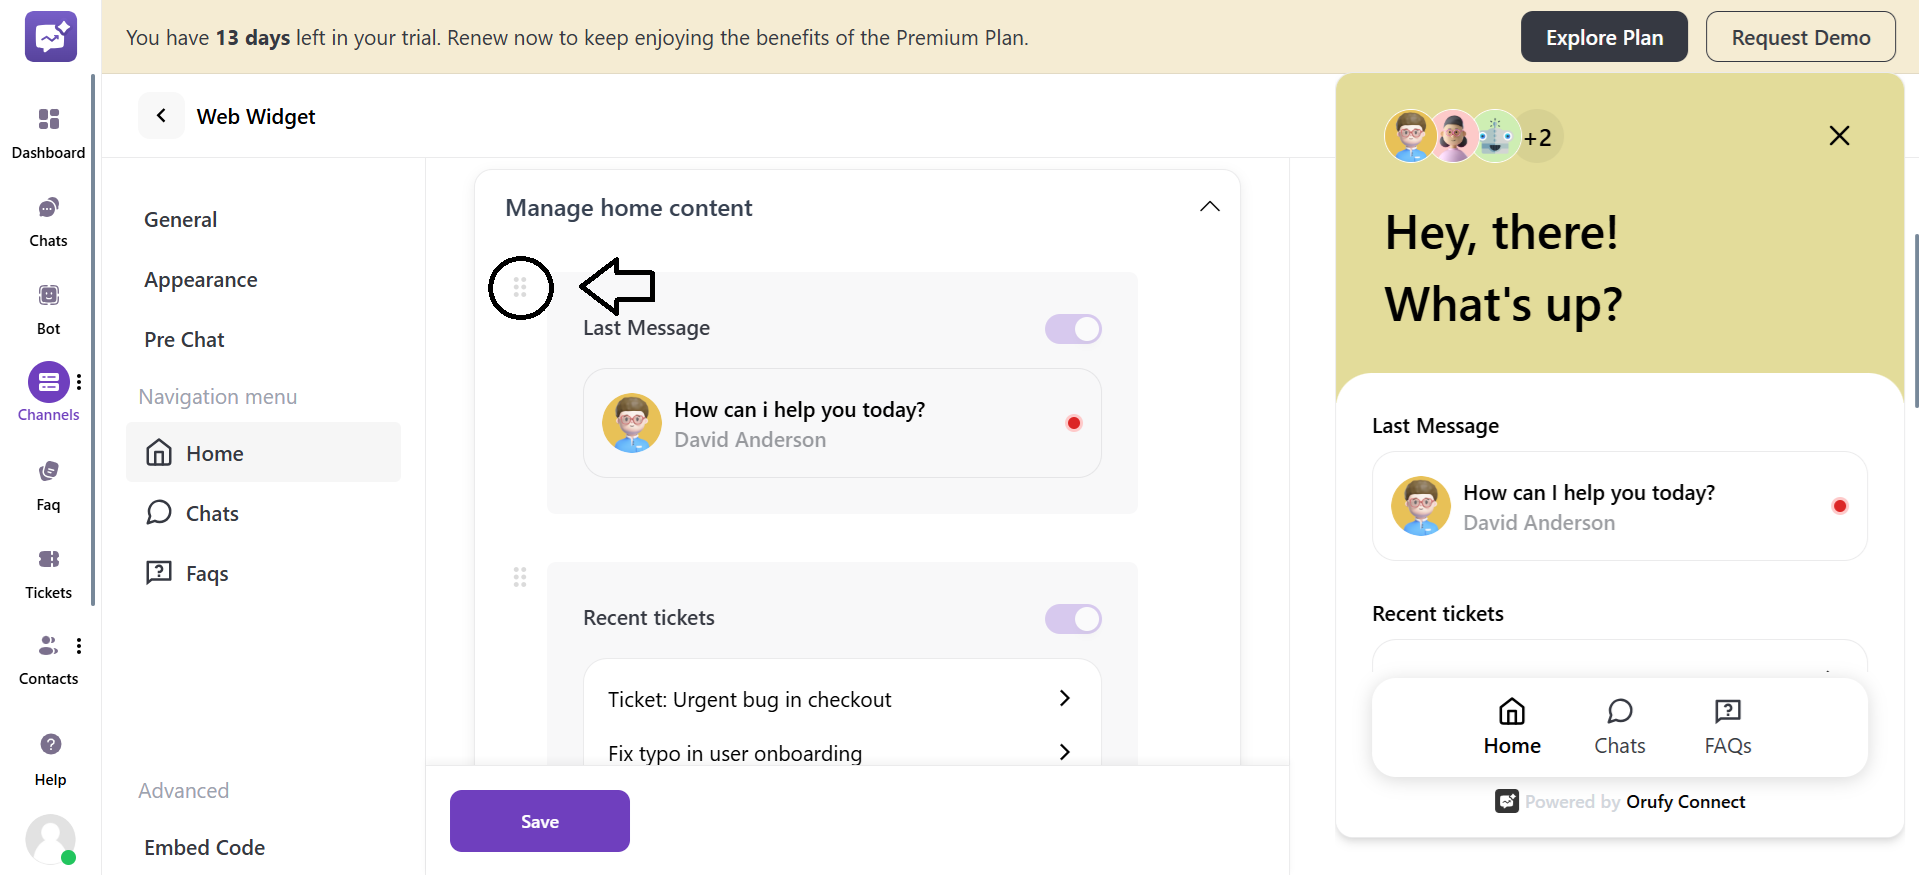
- Last Message
It displays the most recent automated message. This is typically used to greet the visitor. It helps create a conversational feel before the customer interacts.
- Recent Tickets
It shows the visitor’s recent support tickets within the widget. Allows customers to track their ongoing issues without needing to contact support again. It reduces repeated customer queries.
- Send Message
It is a quick option to start a new chat with the support team. It is often estimated with a response time. It improves customer interaction by resolving queries faster. You can edit the response time from the Reply expectation section.
- Show FAQs
It displays a list of frequently asked questions. This section can be toggled on or off depending on your support assistance.
- It enables customers to find answers to their queries on their own. You can select the category of the FAQs to be displayed.

- If this setting is enabled, by default, one FAQ category will be selected. You can select the category of the FAQs to be displayed.
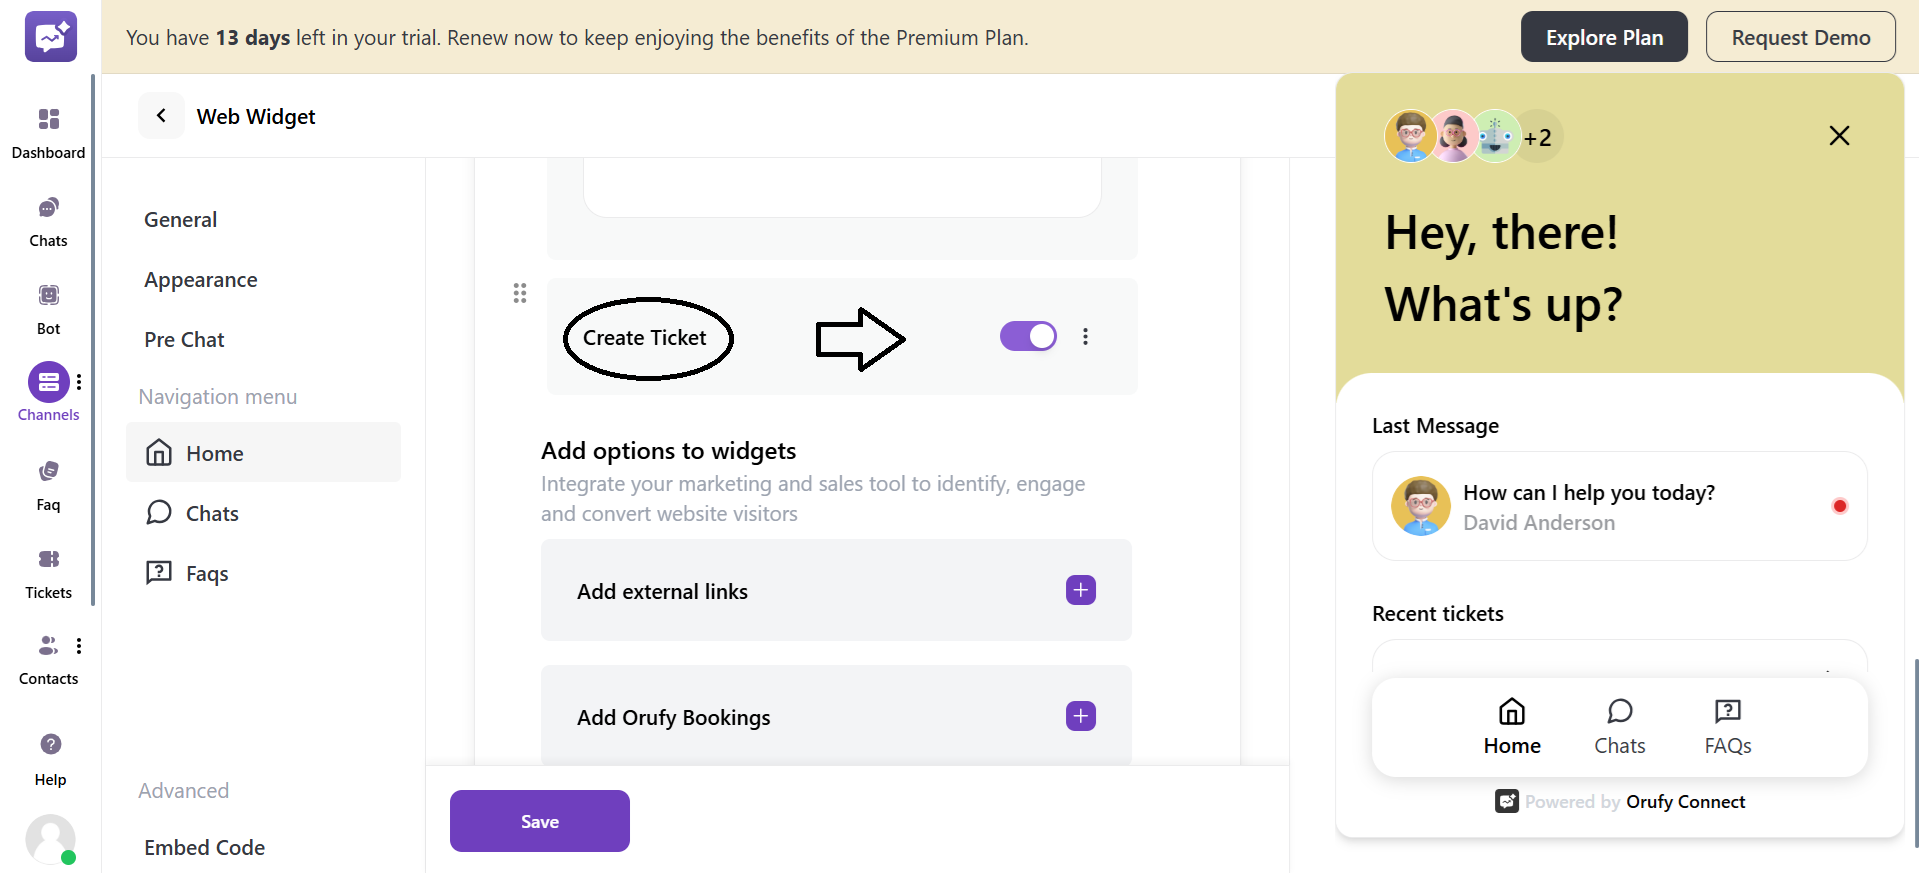
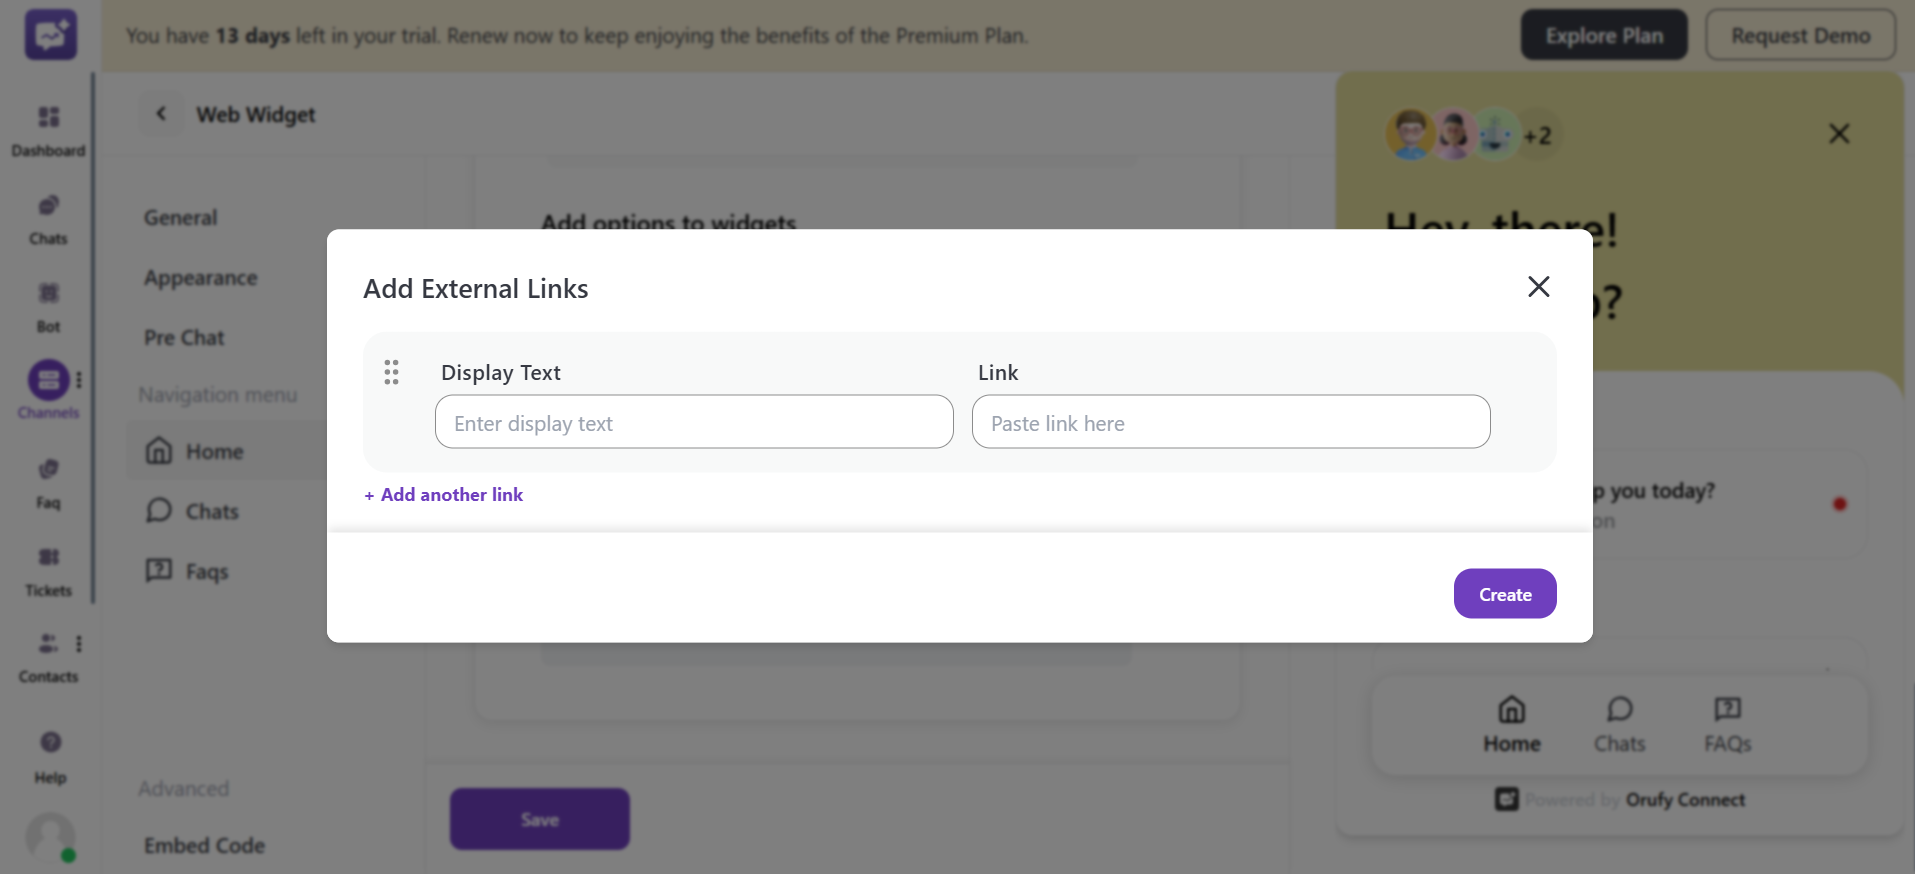
4. Add Options to Widgets
- External Links
You have to click on + icon to add an external link. You add custom links for examples, Help Centre, support document, etc. You can enter the label in the Display text field for the customers. Paste the link that will open as the customer clicks on the label.
- Orufy Bookings
Allows customers to schedule calls or appointments directly from the chat widget.

-
You have to enter the orufy Bookings Link to make it accessible to the customers.
-
Enter the label text, basically the title shown above the booking button.
-
Enter the text to be displayed inside the booking button.
-
Create Ticket
It provides users with an option to submit a new support ticket directly. Useful when the user doesn’t want a live chat but wants to log an issue.